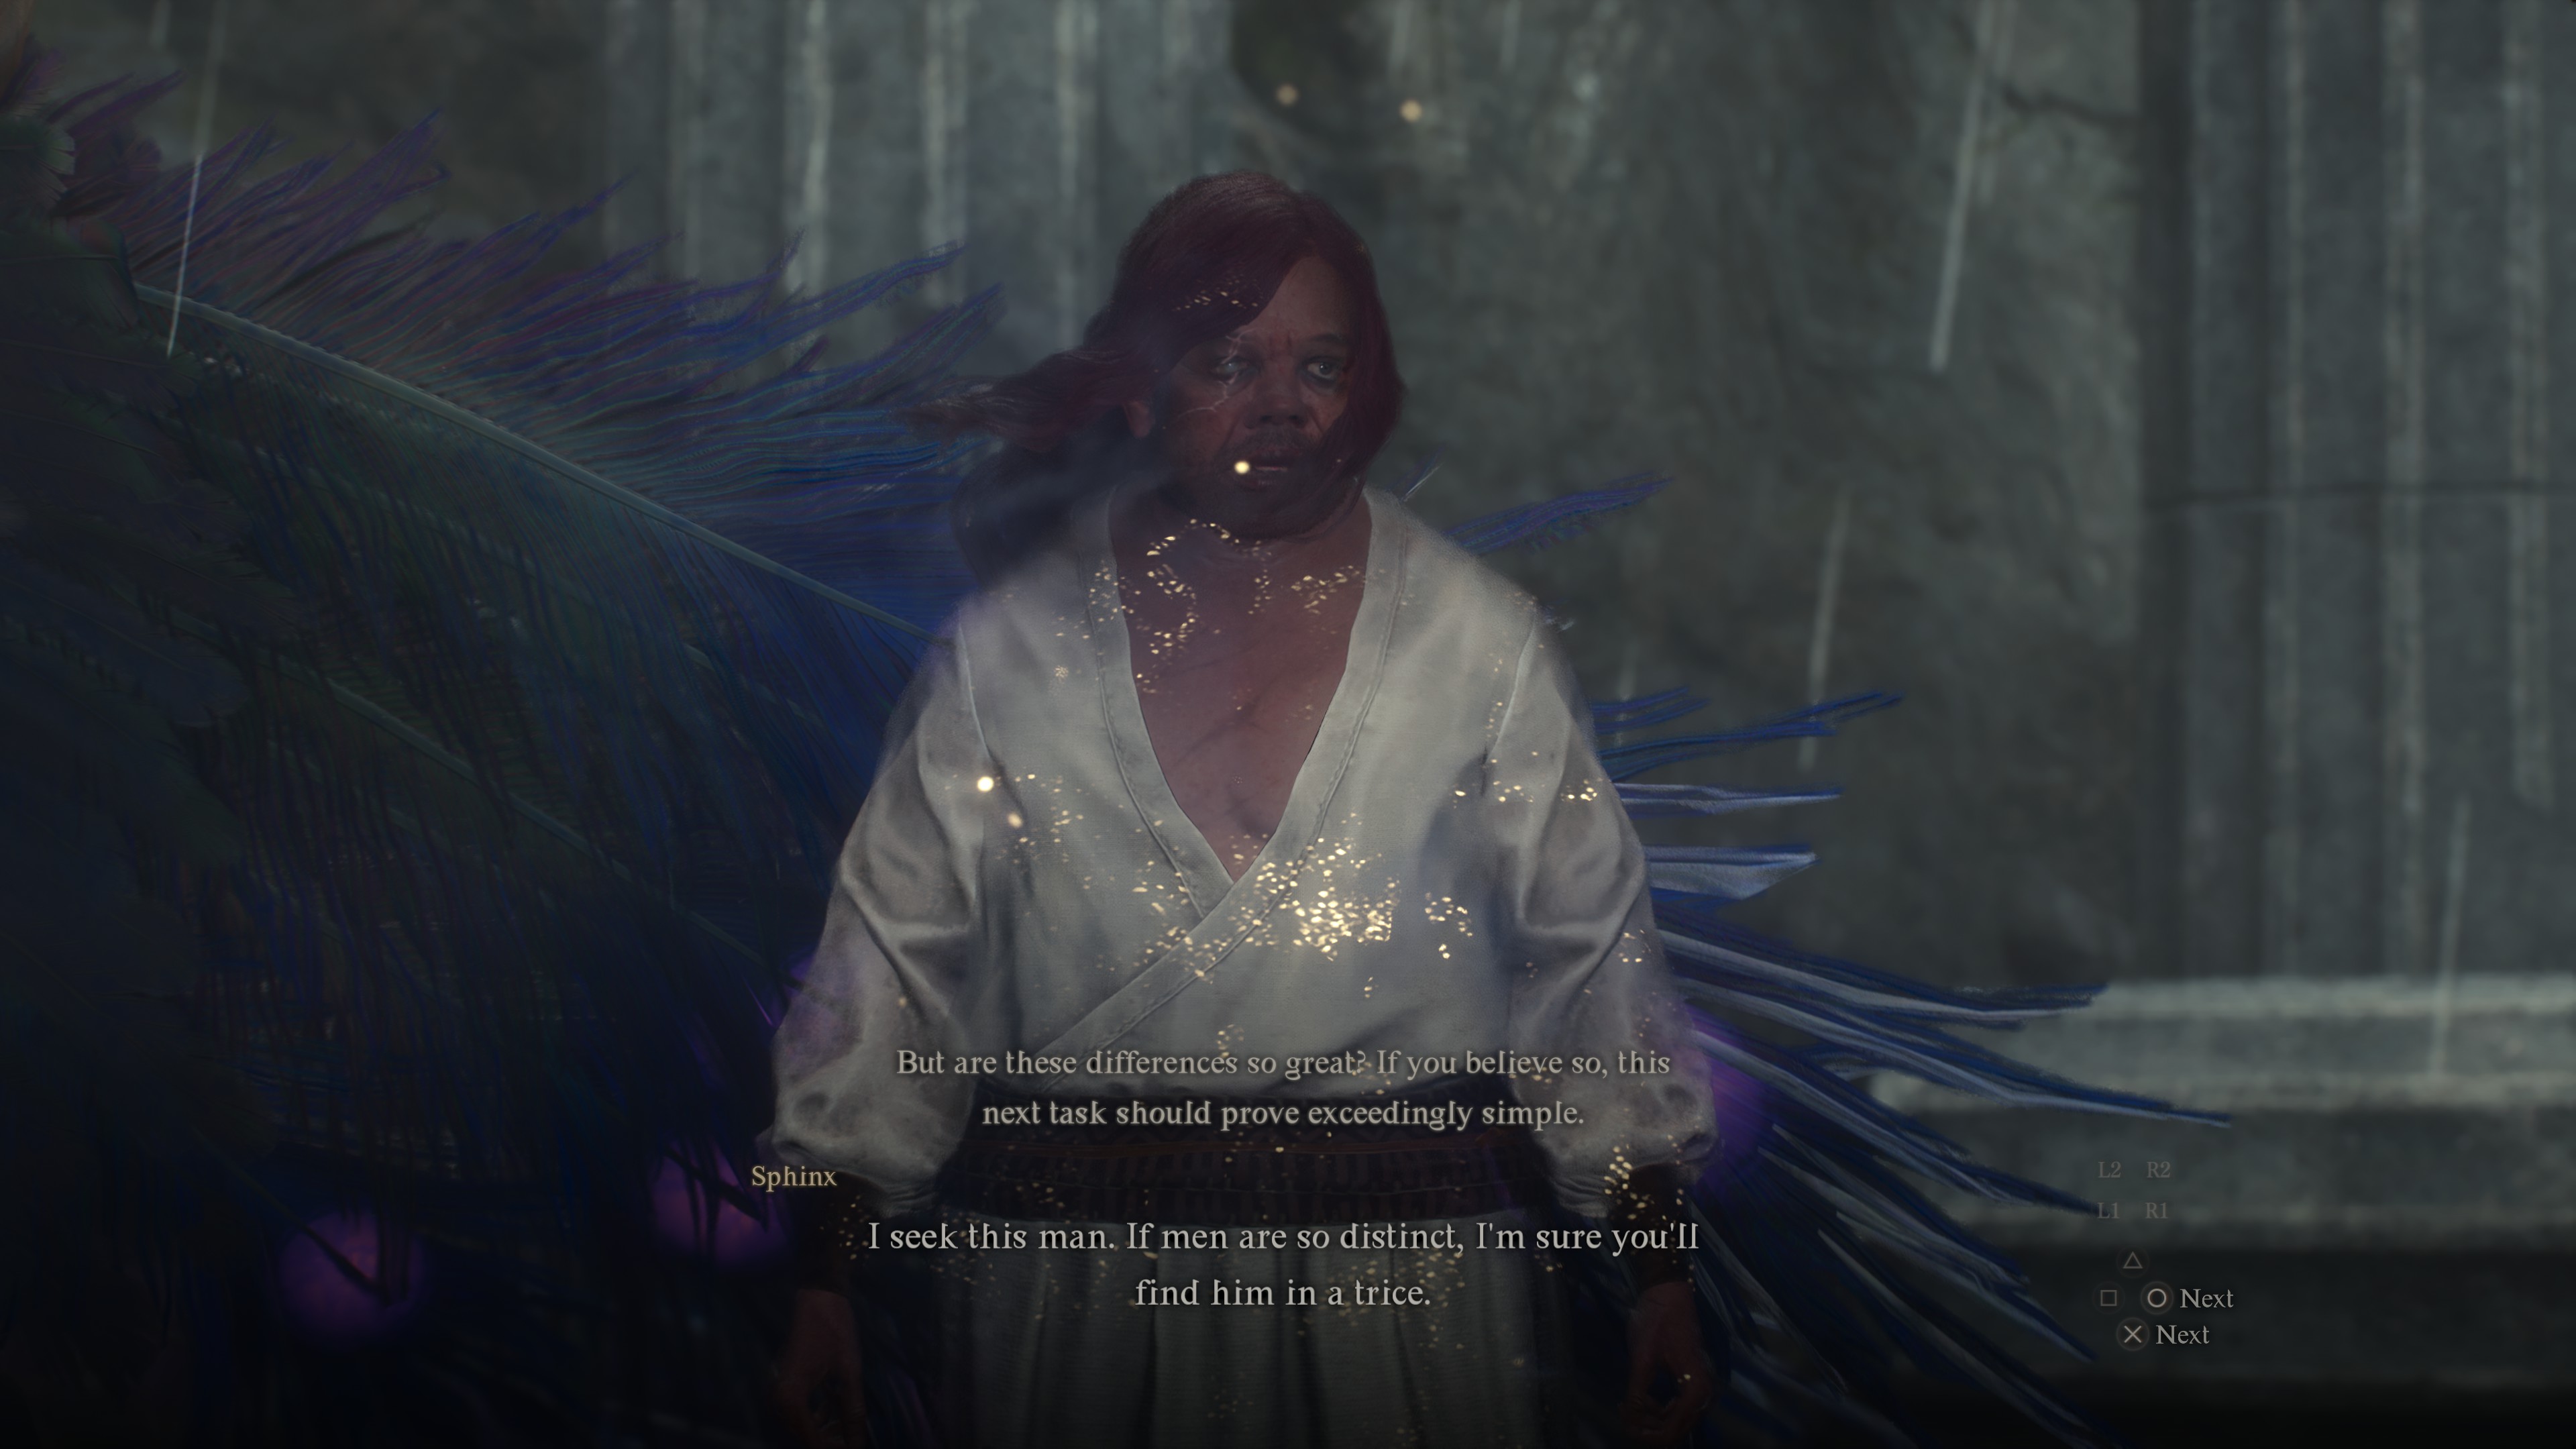
Dragon's Dogma 2 A Game of Wits: Where to find and how to solve all of the Sphinx's Riddles
By far one of the most hyped sidequest chains of Dragon's Dogma 2 in the lead-up to launch, the enigmatic Sphinx and her riddles are one of the most substantial side activities in Dragon's Dogma 2; and might very well end up taking the majority of your playtime to tackle every challenge that the Sphinx has to throw at you. But where do you find her, and what challenges can you expect to face? Thankfully, we've gone through the trouble to fully best the Sphinx, and here's everything you'll need to know.
Where to find the Sphinx
Your first hint of where to look for the Sphinx will likely come from Albert, the Beggar's, stories in the Vernworth city square; idle around long enough to hear his tales, and you might learn that the Sphinx is purported to be in the North of Vermund, next to a haunted cenotaph; which isn't much to go on, at least on its own. Thankfully, if you speak with NPCs at the Checkpoint Rest Town, you'll get a clue that the cenotaph might be nearby. So, where do you need to head to reach the Sphinx?
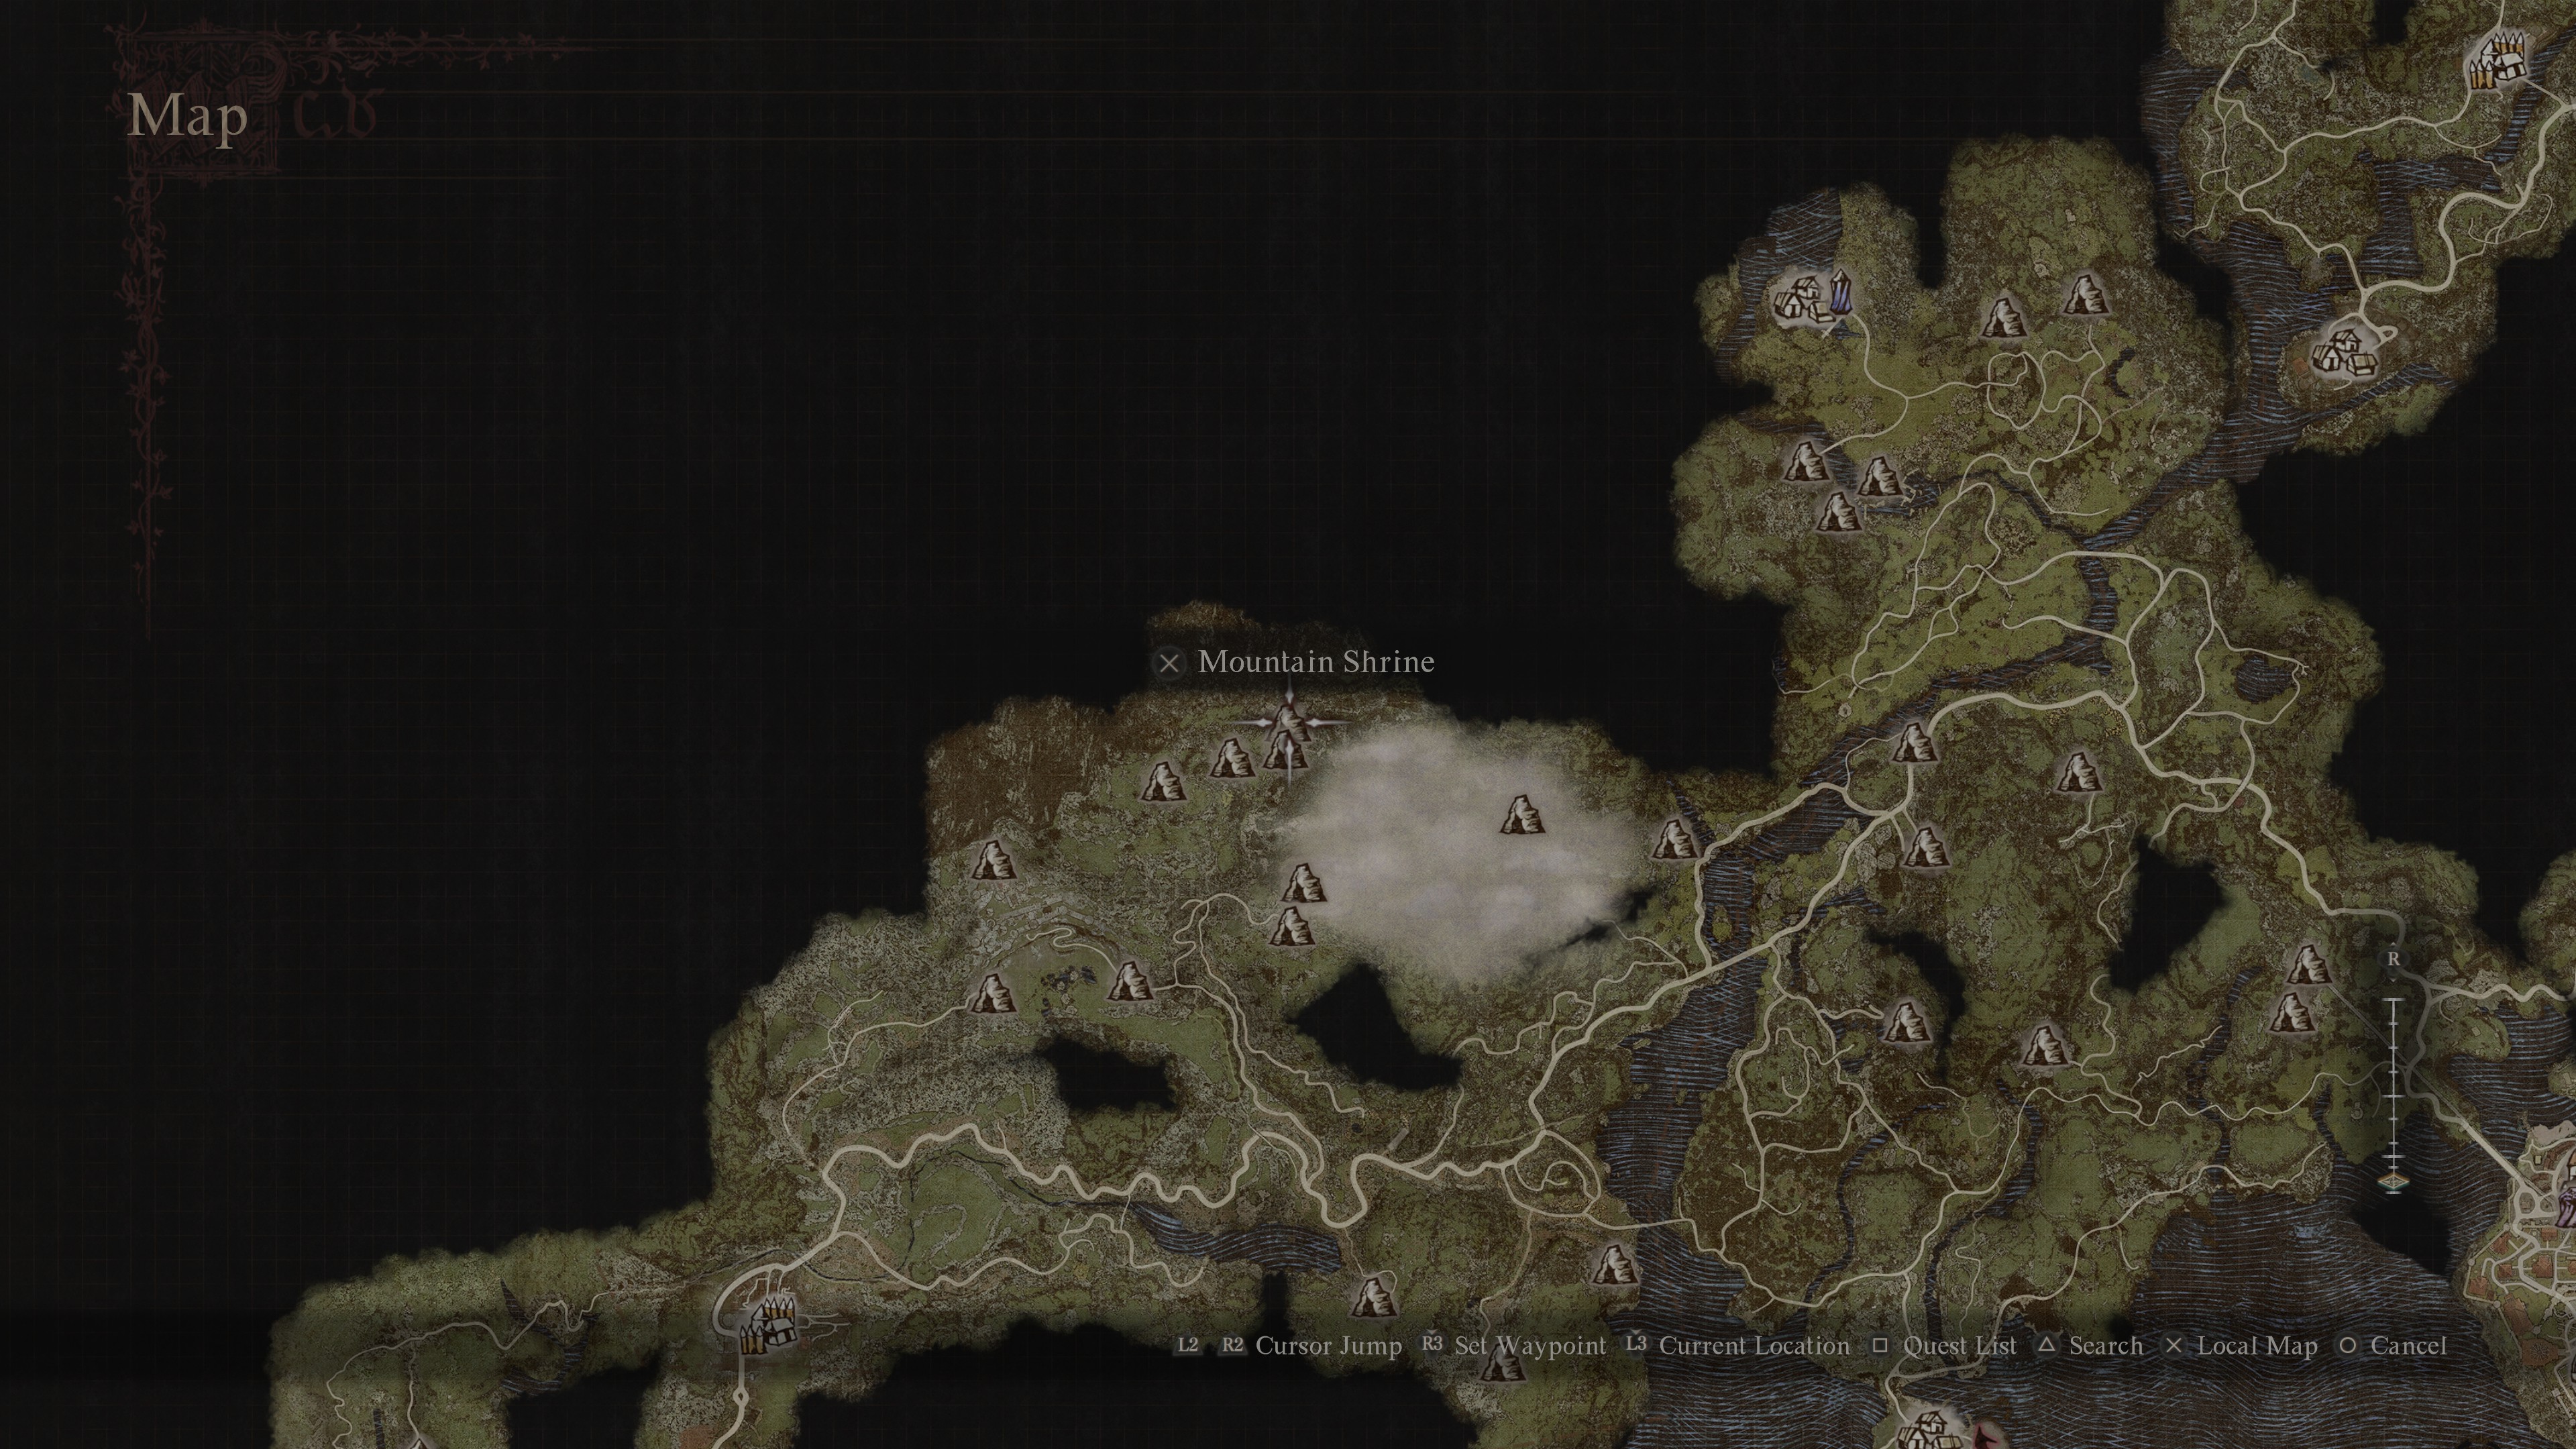
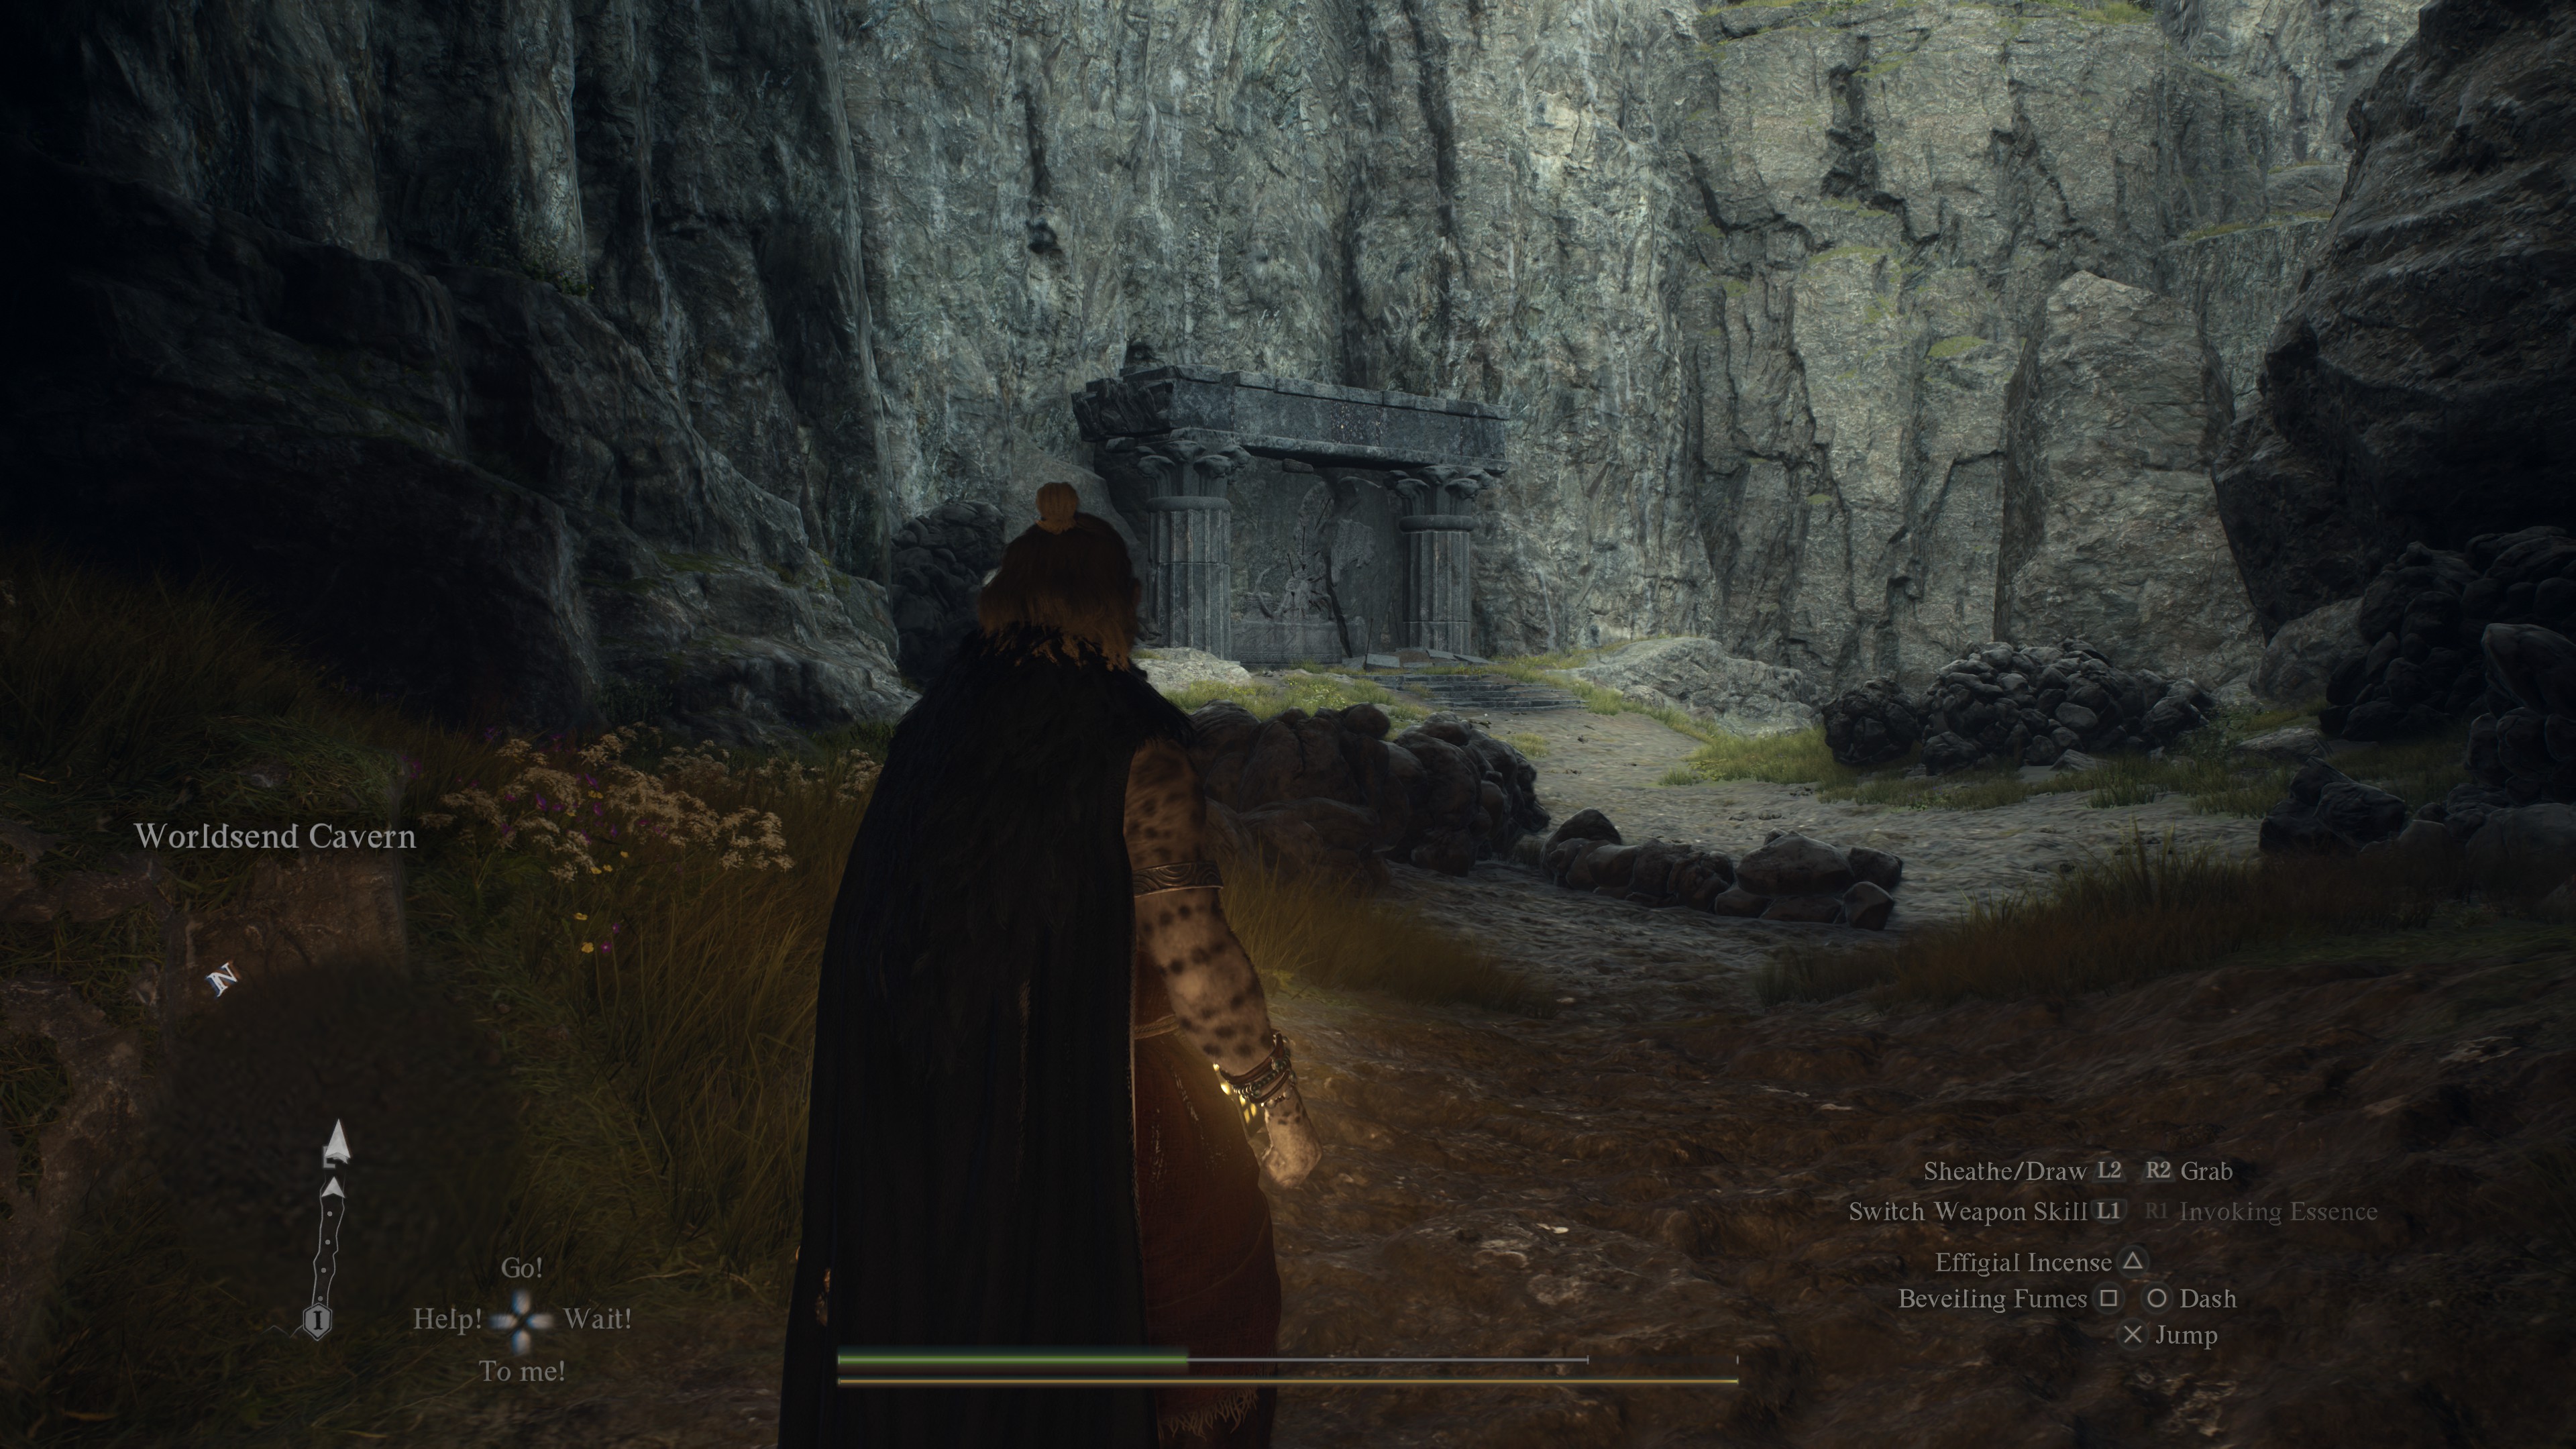
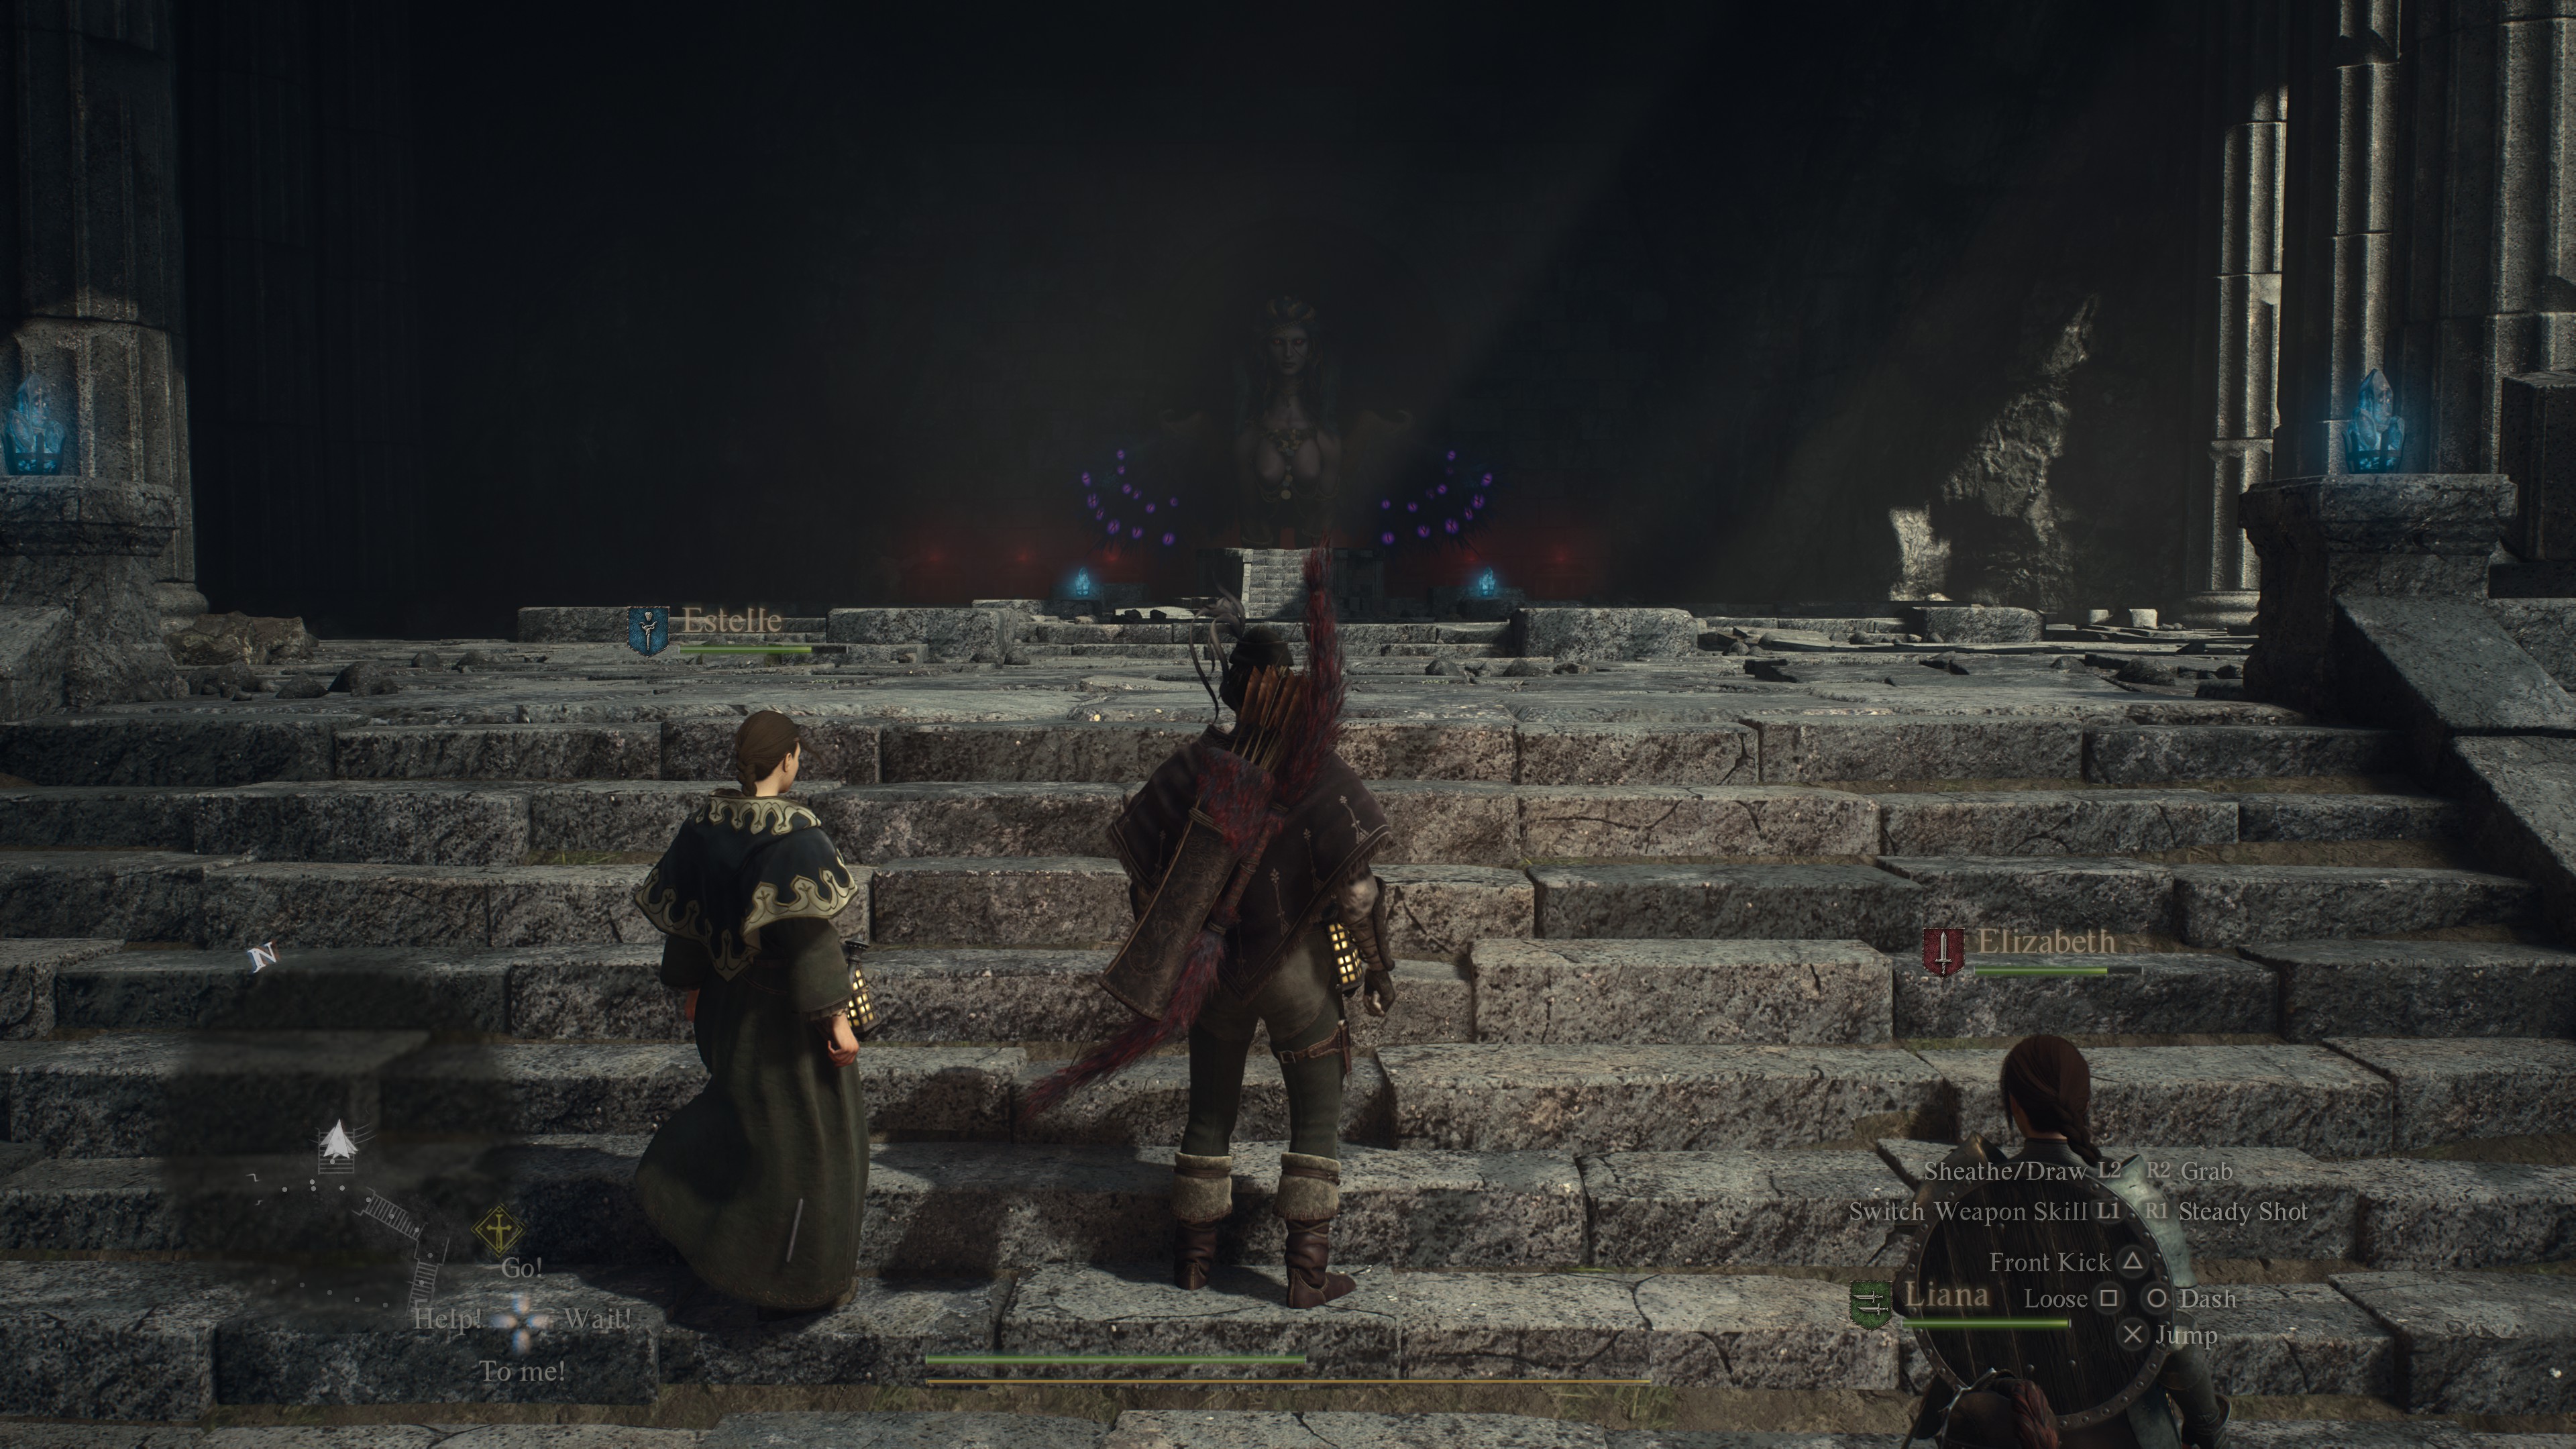
Northeast of the Border Rest Checkpoint, splintered off the main road to the North is the Ancient Battleground. If you approach it from the branch from the main road closer to the capital, you'll run into the NPC Oskar, who'll task you with the sidequest Tolled to Rest; where he'll help you explore the Ancient Battleground with his magic. Afterwards, on top of the Ancient Battleground you'll find a ladder - in our case, originally guarded by an armored Cyclops - which leads to the Worldsend Cavern. Out the other side you'll see the "cenotaph" you seek; a mural depicting the Sphinx. There's a Golem in that clearing that you'll have to either defeat or run past, and the path to the Sphinx and her Mountain Shrine is more or less a straight shot from here.
The Sphinx's First Five Riddles
While this might be a slight spoiler; the riddles that the Sphinx challenges you with at the Mountain Shrine are but half of what she'll task you with. We highly recommend setting a Portcrystal down here, so you can easily return with a Ferrystone when needed. They are as follows:
Riddle of Wisdom
The Sphinx will task you with finding and returning with its "Parent". This is probably the trickiest of the bunch; if you have already been to Harve Village, you may have already run into the solution. The Riftstone of Fellowship at Harve Village will spawn pawns with the names SphinxMother or SphinxFather. The hint is through the Riftstone's description - it holds pawns with a unique moniker. Simply bring a pawn with either name before the Sphinx, and she'll congratulate you and unlock a chest behind her housing 1200 Rift Crystals.
Riddle of Eyes

The Sphinx will unlock a door to a dungeon next to the Mountain Shrine. She tasks you with finding the "item of greatest value" held within - but you don't actually have to venture that far inside. The whole riddle is a trick; an ornate chest at the end of the dungeon holds a rotten fruit, meanwhile if you stop and look back at the doorway you entered from, you'll notice a chest hidden, nestled above. This holds the true answer you seek; a potion. Present this to the Sphinx to unlock another chest, this time housing a Wakestone.
Riddle of Rumination
We can't help you with this specific riddle, as it will be unique to each savefile. The Sphinx will ask if you remember where you discovered your first Seeker's Token, and then challenge you to return to that location and find whatever it is that the Sphinx has left there. You have a week in-game to complete this challenge before it is failed. If you can discover the "Finder's Token" that the Sphinx has left at the location of your first Seeker's Token pickup, you can return to her triumphant.
Riddle of Conviction
This is yet another trick Riddle; the Sphinx will challenge you to hand over to her what you would consider your most prized possession, with the warning that it might not be returned. This is a lie, as she'll accept anything - and the chest that she unlocks will simply contain whatever item you handed over.
Riddle of Madness
The Sphinx will entrust you with bringing your most beloved NPC before her; simply deduce who that might be, based off your interactions and sidequests you've completed with them, and pick them up. If you set a Portcrystal at the Mountain Shrine, much like we suggested, you can simply use a Ferrystone to transport both of you directly to the Mountain Shrine. In the chest she unlocks, you'll receive another Portcrystal.
The Sphinx's Last Five Riddles
After you've completed the last of the riddles at the Mountain Shrine, the Sphinx will announce her intention to move elsewhere - and that your first new challenge will be to find her. At this point, there is no need to keep a Portcrystal at the Mountain Shrine, so pick it up to use elsewhere.
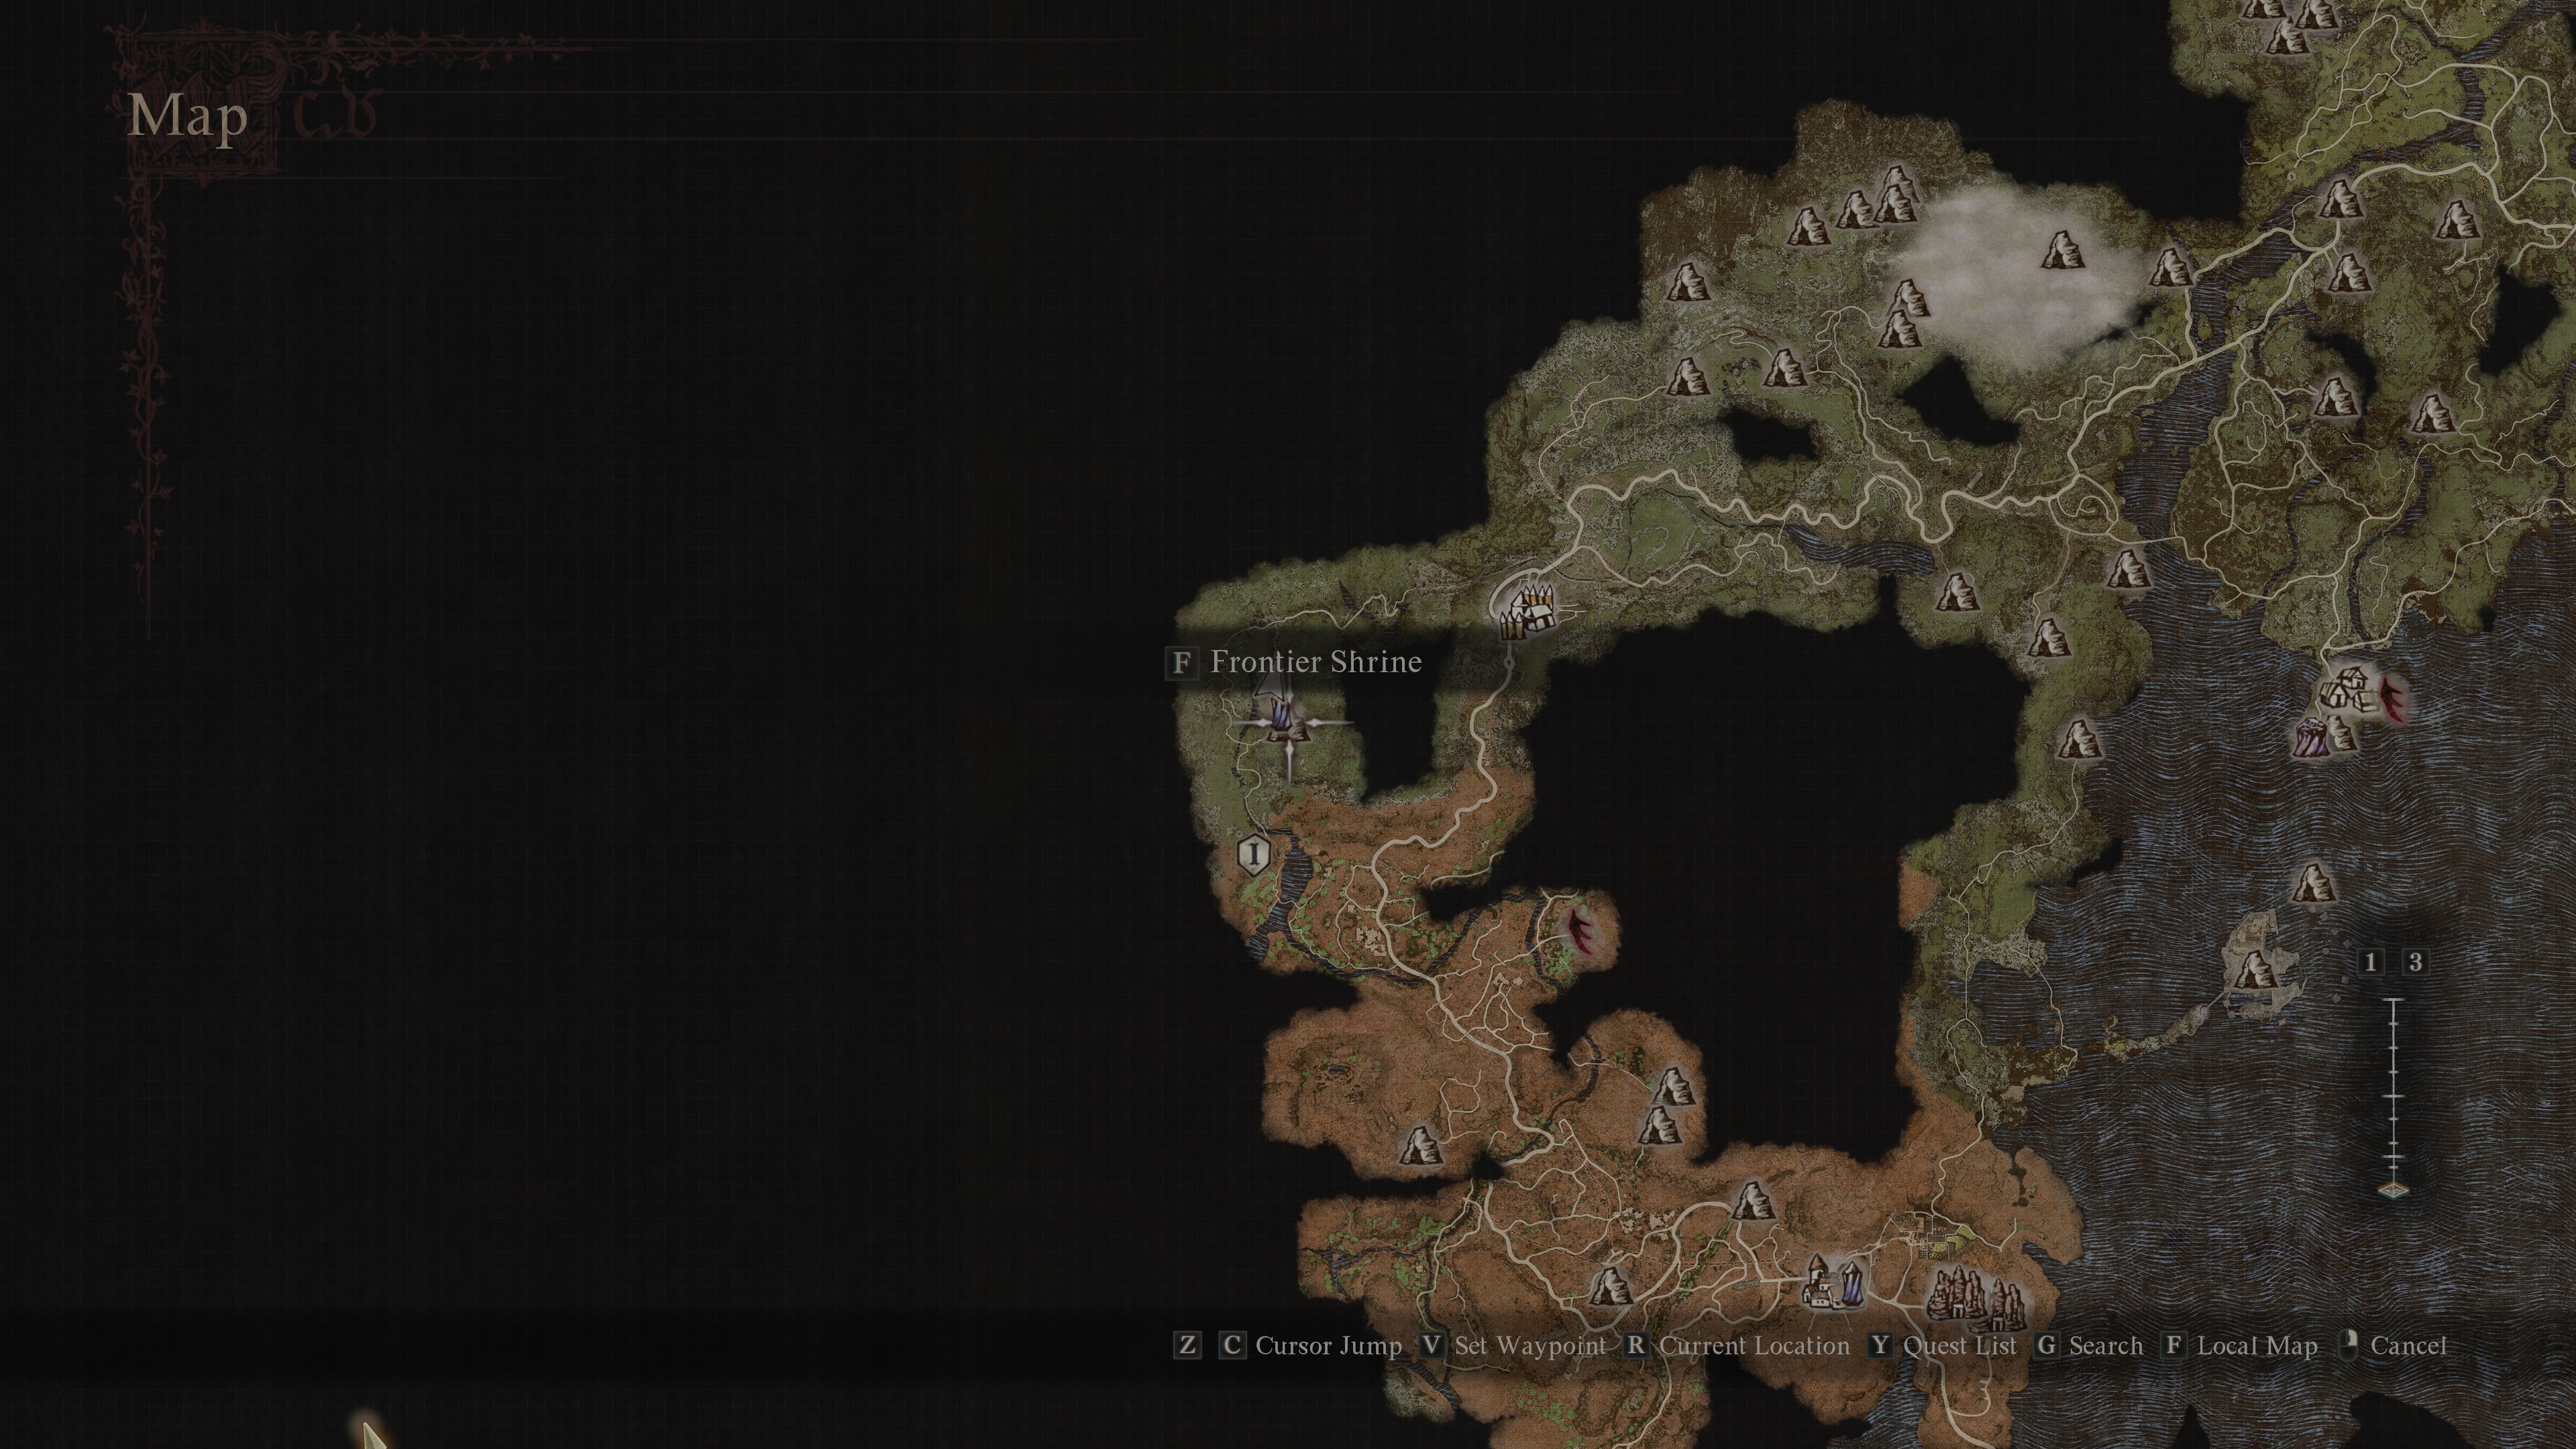
The Sphinx's second location is far easier to find than the first. You can pretty easily spot the location from the main road to Bakbattahl from the Checkpoint Rest Town; but the far easier method to reach it is to follow the river North of the Checkpoint Rest Town into the mountains; this is the quickest path to the Frontier Shrine. The Sphinx awaits you here, and immediately as a congratulations, she'll unlock the first chest. The game doesn't make this as clear as the chests that have unlocked in the past, so remember that if you've found her at the Mountain Shrine, you have "answered" at least 6 Riddles.
The rest of the riddles are as follows. Be very careful here, as there's a real chance that if you fail one that the Sphinx will leave your game forever. Unlike the first set of Riddles, the Sphinx will task you with these one at a time in a random order:
Riddle of Reunion
This is the riddle that you answered by finding her again. We're once again listing it here to stress that finding her does count as a riddle in her eyes; the first chest that has unlocked will have 100,000 Gold. Once again, we highly recommend placing a Portcrystal here for convenience.
Riddle of Contest
The Sphinx will challenge you to defeat a random solider while equipped with a ring that makes your attacks deal essentially no damage. While you can't deal any damage, gravity still can. The trick is to pick the soldier up, and fling him off the edge of the cliff. The Sphinx will unlock a chest containing a Ring of Ambition.
Riddle of Differentiation
The Sphinx will show you an NPC and ask you to find them for her - the trick is that the NPC is one of two twins; either Dante or Vergil. If you rest until morning at Vernworth and immediately take an oxcart to the Checkpoint Rest Town, the two NPCs will be on opposite sides of the border. Pay very close attention to which of the two that the Sphinx wants you to find, as they look remarkably similar. Much like with the Riddle of Madness, pick up the NPC in question and use a Ferrystone to take both of you to the Shrine. Your reward from the chest this time is the Whimsical Daydream; a Trickster weapon that grants gold with every strike to an enemy.
Riddle of Recollection
The Sphinx will ask you how many riddles you have answered for it. The Quest Log will be inaccessible during this riddle, so you can't just look it up and cheat. Assuming you completed all 5 of the Sphinx's original riddles, simply check how many treasure chests you've unlocked at the Frontier Shrine, and add 5. Then take that number of statues and place them roughly in front of the Sphinx. As a reward, in the next chest you'll find an Unmaking Arrow - an arrow that, when fired, will save your game and instantly kill whatever it touches. Remember this for later.
Riddle of Futility
The Sphinx will task you with helping an NPC - Ser Maurits - gaze his eyes upon a fragile vase that she's procured. What she doesn't say, is that you're not actually expected to take the vase to him; instead, find him in Bakbattahl and per usual, bring him back to the Sphinx - and the vase. When you first find him, make note of the mural he overlooks - and the emphasis on the warrior attacking the Sphinx with a very prominent key necklace. As a reward, the chest will contain an Eternal Bond Ring.
The Final Riddle
At this point, the Sphinx will congratulate you on your completion of its riddles, and you'll indeed unlock the Trophy or Achievement for answering all of its riddles. However, as it starts flying off, start attacking it - you'll likely have realized that a large, gold chest remains locked - and the Sphinx herself is wearing the key as a necklace. Keep attacking her until she starts to fight back. From here on out, the battle is a bit tricky.
Fight her normally, but make note of her comments that she can't simply be killed like any normal foe. This isn't just a bluff, but the truth. The secret to killing her is to shoot her with the Unmaking Arrow that you received, which is why we warned you to complete her final riddle as an Archer.
Partway through the fight, the key on her neck will start to glow purple; this is the signal to equip the Unmaking Arrow. Simply fire it at the key, and she'll die instantly. Firing the Unmaking Arrow otherwise will not kill her, and she will simply run away - leaving you with nothing.
If done successfully, the Sphinx will congratulate you with solving her final, hidden riddle. Gather the key and use it to unlock the Gold Chest that she left behind, which houses the game's Eternal Wakestone. Congratulations on besting the Sphinx at her game, and good luck with the rest of your adventure!