
Mass Effect: Signal Tracking quest walkthrough
One of the things that makes the Citadel in Mass Effect a good hub world is that returning to it regularly results in a stream of new side quests and storylines for your Shepard to get involved in. One of those activities is the Citadel: Signal Tracking quest, which sees Shepard tracking a mysterious signal that leads to a rogue artificial intelligence.
This quest can sometimes be a little obtuse, as it sends you on a hunt right across the Citadel’s many different zones. Later objectives are actually clearly marked on the map, but the earlier ones are left for you to discover on your own - which can be a pain.
On this page, we detail the Signal Tracking locations so you can quickly track down the signal and complete the quest, plus explain the decisions, options, and puzzle solutions at the end of the quest.
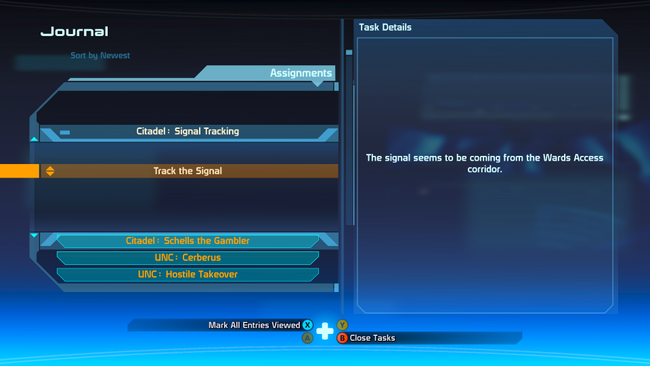
Mass Effect: Signal Tracking quest walkthrough
First of all, if you’re just looking to get your hands on this quest in the first place, we’d better quickly explain how to obtain it. The Signal Tracking quest is available any time after you first get access to the Citadel Wards, but it also doesn’t disappear - so you can save picking it up for later on, a subsequent Citadel visit, or whenever is convenient.
From the Lower Wards area of the Citadel, follow the signs to Flux - a nightclub and casino which features dance floors and gambling machines that feature ‘Quasar’, an original game designed for the Mass Effect universe. You can play Quasar to earn money, and it actually makes a return much later on in Mass Effect 3.
At the back of the upstairs area of Flux where there’s Quasar Machines, there’s a single Quasar machine that’ll have a different interaction prompt to the rest. Whereas the other machines prompt you to play low or high stakes Quasar games, this one is instead marked as a “Suspicious Gambling Machine”.
Interact with it and a member of Shepard’s squad will comment that the machine has been rigged, but that you can track the signal to find out who’s responsible. This adds the Citadel: Signal Tracking quest to your journal.
From here, your job is simple - to track the signal across the Citadel to its source. You’ll have to interact at three specific prompts in different areas to progress the quest - and those are the Signal Tracking locations we list below.
Signal Tracking Locations List
You have to track three signals in a specific order so that you can catch the culprit behind the rigged gambling machine. Here’s the three, in the order that you’ll need to track them down. Here's where to find them, both described and in screenshot form:
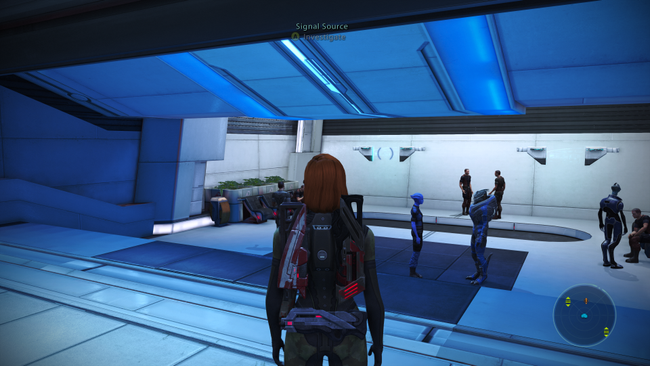
Signal 1: The first signal is found in the large corridor area that makes up the Wards Access. There’s a bunch of C-Sec people here, but this is not part of the C-Sec area. Access it from the Wards elevator nearest the Citadel Tower if coming from the Presidium, or from the hallway right next to the stairway to Flux from the Lower Wards. It’s hiding off at the back of one of the side rooms just off this hallway.
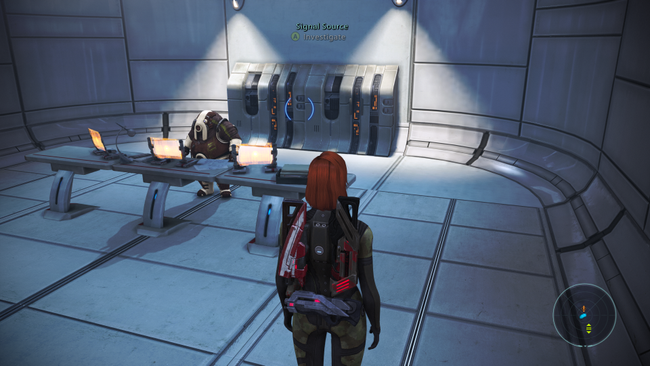
Signal 2: For the second Signal, go to Barla Von’s office on the Presidium - it’s a private room just next door to the Emporium where a Hanar shopkeeper sells stuff. It’s behind Barla Von on the back wall. Chances are, you visited Von earlier in the game while searching for Fist as part of the main quest.
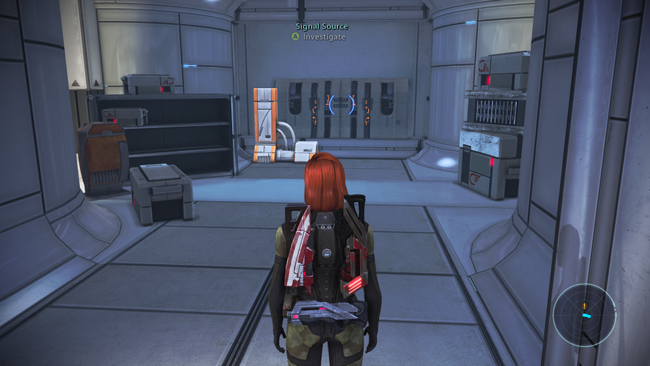
Signal 3: The third and final Signal is found just a few seconds away from the previous one. Go to the Citadel Emporium next to Barla Von’s office, where the Hanar shopkeeper is. Head to the back of this area to a back room. This is actually the location of one of the targets in the Citadel: Scan the Keepers quest. At the back end of this room is the final Signal. We recommend you save before interacting with it…
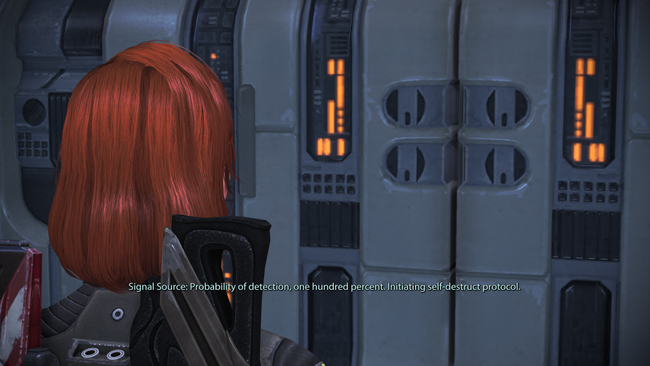
When you discover the AI, it will talk to you and arm its self destruct mechanism, which threatens to blow up a large portion of the Citadel Presidium - which of course isn’t ideal. You can keep it in a conversation loop, but as soon as you tell it that you’re done talking, or threaten it, it’ll arm the self-destruct mechanism. This is unavoidable.
Once the self destruct is activated, you’ll be on a timer. Shepard has 2 options. First, you can blow the power junction to hell with your weapons. Even if you don't have the correct class training or specialization for Shotguns, here is an ideal place to deploy one - but be careful, as the explosion might injure you too and could even kill you if somehow you have low health.
Second, you can disarm the self destruct. You have to do this through a hacking mini-game, which varies depending on the version.
- In the original 360 & PS3 release, enter the following code: Y, X, Y, A, X, A, A (or △, ◻, △, X, ◻, X, X).
- In the original PC release, the code is randomly generated. You’ll have to guess. This, and if you run out of time, is why we suggest you save.
- In the new Legendary Edition Remaster, enter the same code as the original 360/PS3 release - though you won’t have to enter it in its entirety, as the puzzle has been simplified.
With the bomb defused and the mystery solved, the quest is over! You’ll get credits and XP for your trouble. This quest is a rare one that offers no consequences or call-backs in Mass Effect 2 or 3 - it's entirely stand-alone.