
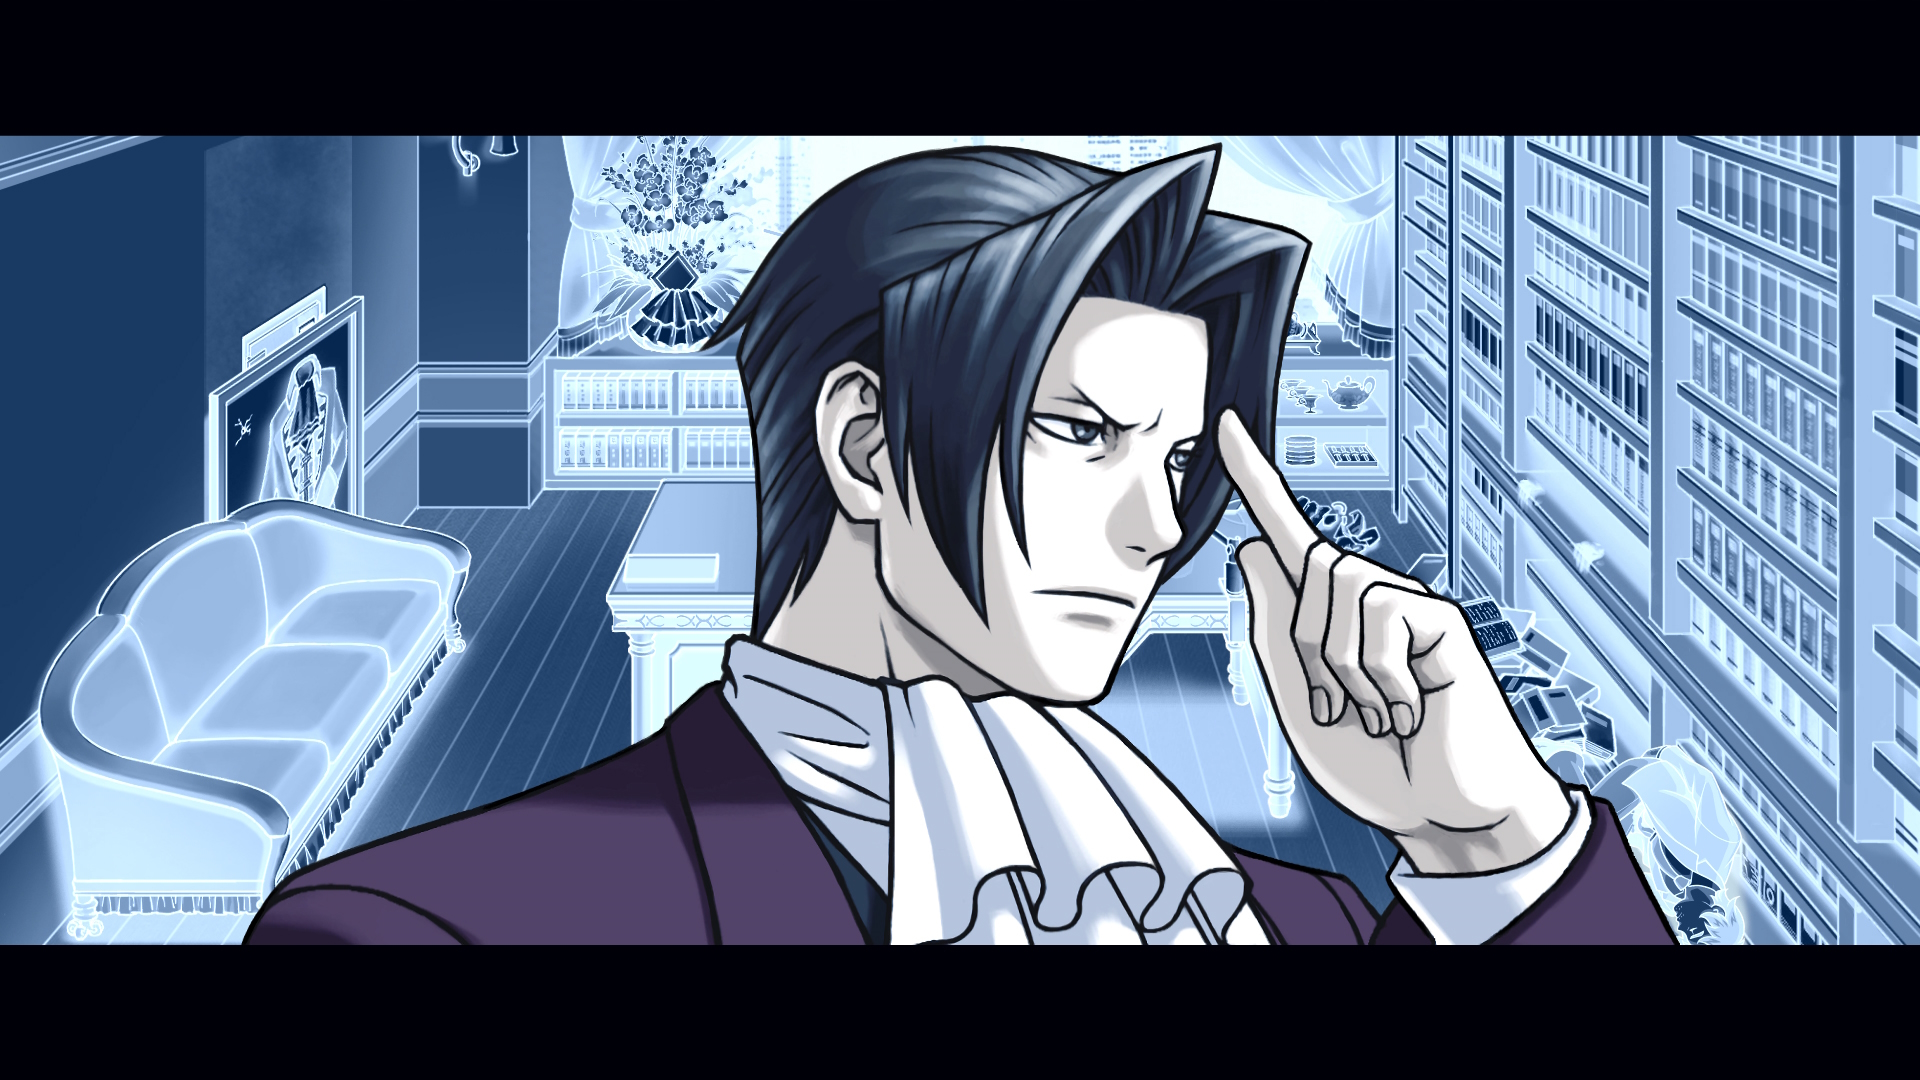
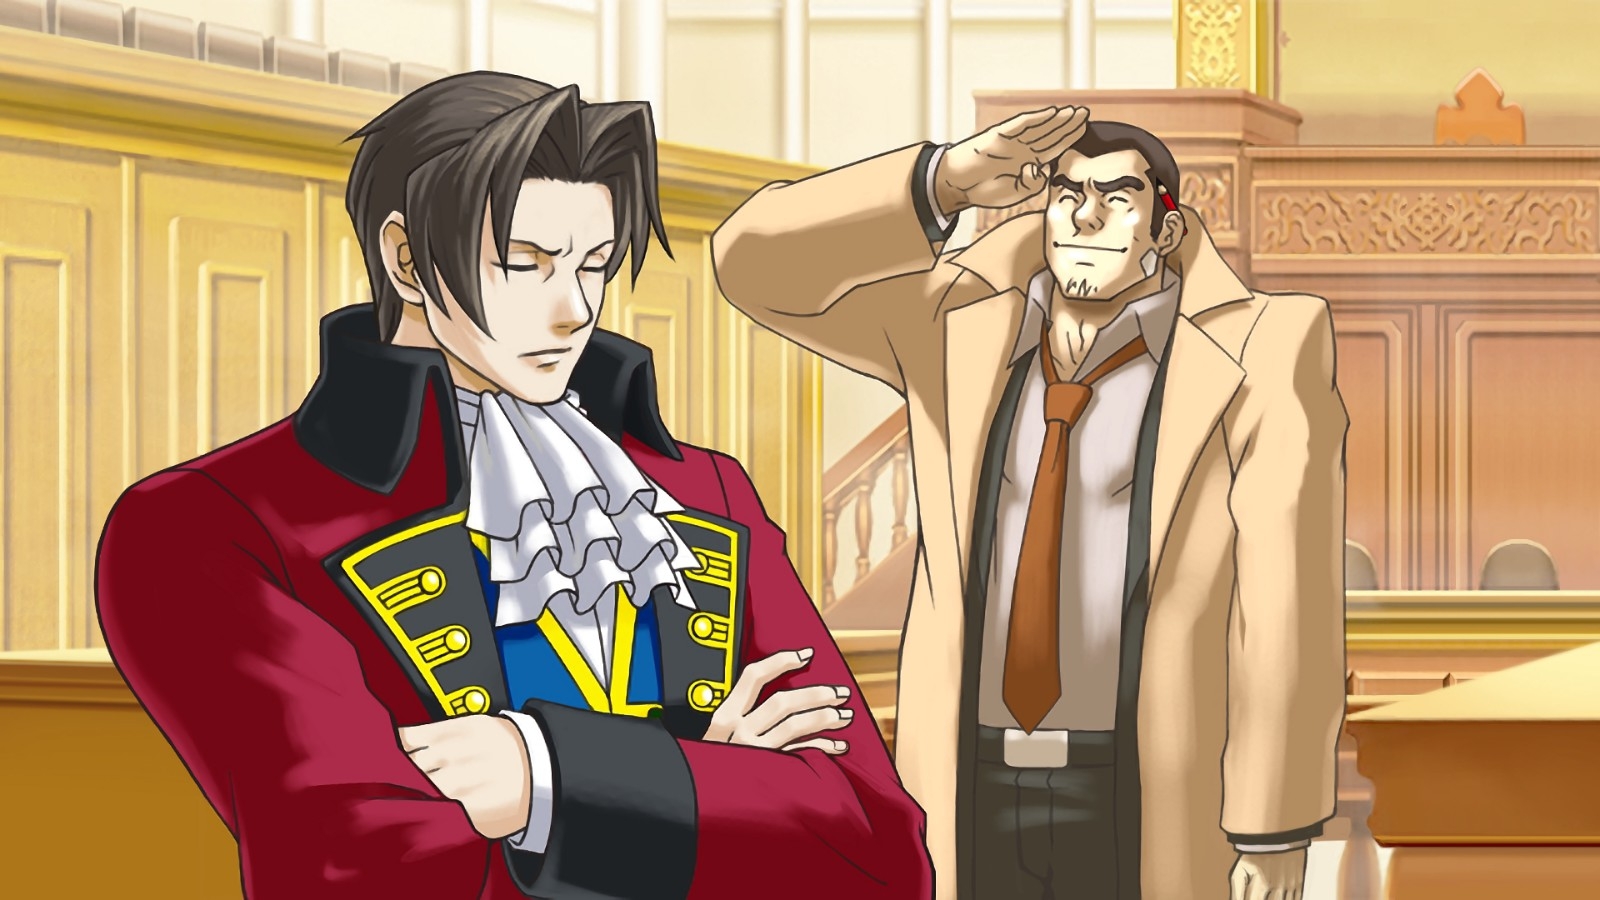
Ace Attorney Investigations: Miles Edgeworth - Spoiler-Free Walkthrough
Last seen on the Nintendo DS and through a no-frills mobile port, Ace Attorney Investigations: Miles Edgeworth is now available on Switch and PC through the Ace Attorney Investigations Collection, which brings Miles Edgeworth and its never-before-localized-officially sequel, Ace Attorney Investigations 2: Prosecutor’s Gambit, together in a single bundle.
As with our previous walkthroughs for the Phoenix Wright: Ace Attorney Trilogy and Apollo Justice: Ace Attorney Trilogy collections, you can check out this spoiler-free walkthrough to help you beat every case and nail every choices.
Note: While we consider the walkthrough to be spoiler-free, making the guide comprehensible means that we did need to get specific when necessary.
You can use the links below to jump directly to a specific section of each episode.
- Episode 1: Turnabout Visitor
- Episode 2: Turnabout Airlines
- Episode 3: Kidnapped Turnabout
- Episode 4: Turnabout Reminiscence
- Episode 5: Turnabout Ablaze
Episode 1: Turnabout Visitor walkthrough
It’s time to see what life is like for lawyers on the other side of the courtroom! Unlike typical Ace Attorney games where players play on defense in the courtroom on trial day, Ace Attorney Investigations stars the prosecution, and is focused on investigations and Confrontations, as Miles and crew comb scenes for clues as to what happened. You’ll also question witnesses and suspects, using logic and deduction to trip up their testimonies and make that guilty verdict stick.
Also unlike the mainline Ace Attorney games, Investigations is a little more fluidly structured, without a formal division between investigation and Confrontation.
To make this walkthrough a little easier to organize, I’ve opted to divide each episode into “phases.” During investigation phases, you’ll mostly be gathering clues and examining evidence. During Confrontation phases, you’ll argue points and find logical flaws in a conversation partner’s assertions, presenting evidence and making choices much like a main-game Cross-Examination.
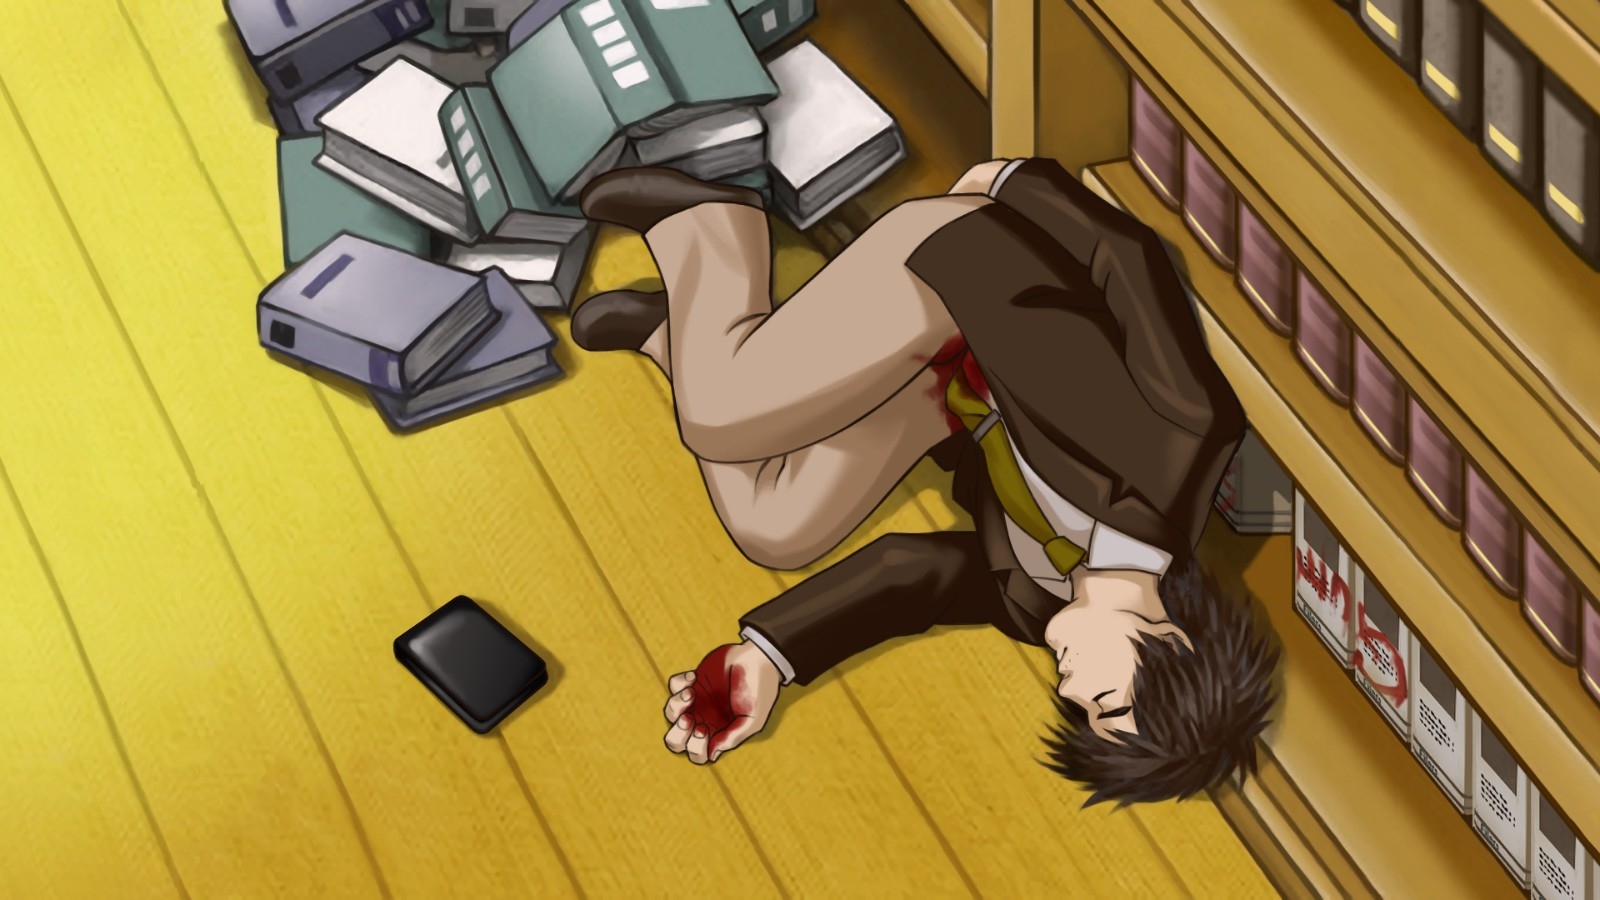
Your first case is one where the gunshot is coming from inside the office. More specifically, inside Miles’ office!
Episode 1: Investigation Phase 1
Here are all the actions you’ll need to take to clear the investigation phase.
- You’ll first go through the introductory cutscenes and dialog.
- Miles will start to ease you into the investigation mechanics, earning you the Crime scene: My office and The office key clues (which I’ll call Facts from here on).
- These two clues serve as your introduction to Logic.
- The Logic system involves recalling Facts by entering Edgeworth’s head, and hitting a button to connect two related Facts to each other.
- You may notice a “health bar” in the upper-left corner. This is where the Logic system resembles a regular Ace Attorney game’s Cross-Examination: Attempting to brute-force a connection risks lowering your health and failing the investigation.
- You’ll also be penalized for presenting bad evidence during Confrontation, but more on that later.
- After your first Logic sequence, you’ll gain The killer’s goal Fact and proceed with the Investigation in earnest.
- You’ll gain full control of Edgeworth in the High Prosecutor’s Office - Room 1202.
- Unlike mainline Ace Attorney games, you’ll be hoofing it around each location as you investigate.
- Make sure to stop by any interactable object and NPC to obtain information about it and add Facts to your pool of leads. Relevant Evidence will also be added to your Organizer, as well.
- Clues and NPCs you’ve already interacted with will be marked with a convenient checkmark, saving you some confusion.
- You can also hit a button to consult with your companion - in this case, Gumshoe - and get a hint on how to proceed.
- Examine the pistol on the floor near the bottom center of the screen to get the Revolver Fact.
- Examine the crime scene: The body and the pile of debris on the right side of the room. You’ll zoom in and will need to examine different parts of the scene with your cursor. When a clue can be interacted with, your cursor will turn gold.
- Examine the black, wallet-like object near the victim’s hand to gain the Victim was a detective Fact.
- You’ll be prompted to try using Logic to connect Victim was a detective and Revolver. The Revolver Fact will change into Victim’s Revolver.
- You’ll be prompted to examine the Revolver thoroughly, and will be able to rotate the object in 3D, looking for clues.
- Examine the Revolver’s cylinder and trigger. You won’t get any new facts, though.
- Return to the body and examine it for the Crime Scene Notes Fact.
- You can also examine the pile of books on the floor for Signs of a Struggle.
- The examination will be interrupted by a brief scene introducing Jacques Portsman, fellow prosecutor.
- When you regain control, examine the framed red jacket on the upper-left side of the screen.
- It’s time to use the power of Deduction! You’ll want to point out a contradictory element of the screen. Select the bullet hole above the jacket’s right shoulder and hit the Deduce button to highlight it.
- Similar to a Cross-Examination, you’ll be prompted to Present some evidence that proves the contradictory nature of what you just pointed to.
- Present the Victim’s Revolver. You’ll gain Another handgun as a Fact, and the subsequent scene will add Secret Safe to your Organizer as evidence.
- Examine the safe’s keypad for the Wiped fingerprints Fact.
- You’ll get a hint that you should use Logic to come up with some new clues. Do so.
- Link up The killer’s goal and Wiped fingerprints to get Motive: Theft (?).
- Link Motive: Theft (?) with Signs of a struggle.
- The resulting scene will give you a new perspective to examine for contradictions.
- Remember, you can examine the scene using the interact button for more information.
- Select the bullet hole on the bottom shelf, lodged in book 0D and Deduce that it holds a contradiction.
- When prompted, Present the Crime Scene Notes.
- Choose “The order of the files.” During the subsequent explanation, you’ll gain Files in disarray.
- Examine the changed crime scene.
- Select the missing book on the lower-right shelf, beside volume 0G, to gain the Stolen File evidence. You’ll complete the investigation phase for this scene and kick off an Confrontation with Portsman.
Episode 1: Confrontation Phase 1
It’s time to poke some holes in Portsman’s logic and save a bumbling suspect!
For convenience, I’ll borrow the Cross-Examination template from our Ace Attorney walkthroughs to help organize topics.
- This is your first Confrontation, a process that Edgeworth explicitly likens to courtroom Cross-Examination. You’ll get a chance to have Edgeworth explain that whole process in detail, if you need it.
- In summary, when you find a flaw in your opponent’s testimony, open up your Organizer and pick a piece of contradictory evidence. You can also Press the character for more detail or to trip them up.
- First, read through Portsman’s statements.
- Then you’ll enter the Rebuttal phase, giving you a chance to Press and Present your way to success.
Rebuttal: Portsman’s Logic
- Press any statement you like for more flavor.
- Present the Stolen File on the fourth statement.
- This will set off a new round of scenes and another round of testimony.
Rebuttal: Reasons for Suspicion
- During the opening argument, you’ll receive the Master Key evidence.
- As hinted by Edgeworth, you’ll want to Press Portsman for more info to open up an opportunity to Present evidence.
- Press on the first statement.
- When prompted, choose “Ask for more details.”
- This adds a new second statement.
- On this new statement, Present the Secret Safe evidence.
- This will end the Confrontation, and transfer you to a new location for some follow-up Investigation.
Episode 1: Investigation Phase 2
- You’ll regain control in the Prosecutor’s Building, 12th Floor Hallway.
- It’s time to get some new info by taking the investigation into the hall.
- Speak to Maggey and explore each topic.
- Present Maggey with the Master Key evidence to earn a new Fact: Master key was stolen. This will unlock a new conversation topic.
- Select the new conversation topic, which will then unlock another topic, which in turn earns you the Used the master key Fact.
- This point is a good reminder that you can dip into Edgeworth’s Logic pile anytime to try connecting Facts together, and that the Facts themselves can contain contradictions or raise new questions.
- In this case, note that the timeline between the Master key was stolen and Used the master key Facts seems off, somehow.
- Connect the two Facts to create Mr. Portsman’s Office, a piece of evidence for your Organizer.
- Walk to the right side of the screen and examine the door near the basketball hoop.
- When zoomed in, highlight the door’s keyhole, and hit the Deduce button, then Present Mr. Portsman’s Office.
- When prompted, choose “Prints on the doorknob.”
- Present Maggey Byrde’s profile to update the Mr. Portsman’s Office evidence.
- Your view will shift to the bottom of the door.
- Examine the base of the basketball hoop to receive the Basketball Hoop evidence.
- Examine the small white shape sticking out from under the door to obtain the Note Left By Victim evidence.
- Examine the bench on the left side of the screen to zoom in.
- Examine the small book peeking out from under the right side of the bench to obtain the Stolen 0-Series File evidence.
- Collecting all of the clues in the hall will end the Investigation.
Episode 1: Confrontation Phase 2
- Clearing the Investigation in the hallway will automatically move you back into the High Prosecutor’s Office - Room 1202.
- It’s time to get some answers from Portsman in a new round of Confrontation.
Rebuttal: Portsman’s Rebuttal
- Present the Master Key evidence on the third statement.
- When prompted, Present Maggey Byrde’s profile.
- When prompted, Present the Basketball Hoop.
Rebuttal: Conjecture’s Rebuttal
- Present Mr. Portsman’s Office on the second statement.
- When prompted, present the Note Left By Victim.
Rebuttal: Portsman’s Alibi
- Press on every statement.
- After the scenes, you’ll receive the Mr. Portsman’s Alibi Fact.
- Jump into Edgeworth’s Logic screen to assemble some new info to work with.
- Combine Mr. Portsman’s Alibi with Another handgun to receive Another visitor.
- Take your new Fact, Another visitor, and connect it with Files in disarray.
- Things will take a turn, and you’ll have another chance at Rebuttal.
Rebuttal: Portsman’s Alibi, Pt. 2
- Press on the fourth statement to add some more detail.
- Present the Note Left By Victim on the revised fourth statement to close the Confrontation.
- Focus on the tape’s title, and the bloodstain on the bottom of the cassette.
- When prompted, Present the Stolen 0-Series File to close the episode.
Episode 2: Turnabout Airlines walkthrough
- Part 1 - Confrontation Phase 1
- Part 1 - Investigation Phase 1
- Part 1 - Confrontation Phase 2
- Part 1 - Investigation Phase 2
- Part 2 - Confrontation
- Part 3 - Investigation Phase 1
- Part 3 - Confrontation Phase 1
- Part 3 - Investigation Phase 2
- Part 3 - Confrontation Phase 2
It may just be the second episode of the game, but it’s time to flash back to two days prior, deep into Edgeworth’s business trip.
This episode sees the persistent prosecutor persecuted once again, pointed at as a perpetrator most foul, and pressed into parlaying his perspicacity in service of parrying pernicious proclamations.
Episode 2: Part 1 Confrontation Phase 1
- The introductory scenes will open aboard Flight G-390, First Floor - Lounge, but will quickly transition to Second Floor - First Class for an opening Confrontation.
- You’ll start with the Travel Wallet, Crime Scene Notes, and Sky Magazine clues, as well as profiles for ??? and Rhoda Teneiro in your Organizer.
- The scene launches immediately into Cross-Examination.
Rebuttal: What Ms. Teneiro Saw
- Present the Travel Wallet on the fourth statement.
- You’ll be given a chance to examine the Travel Wallet in detail.
- Examine the wallet’s clasp, and the Travel Wallet will turn into Mr. Hicks’ Wallet.
- This will launch you into a new line of Rebuttal.
Rebuttal: Ms. Teneiro’s Logic
- Present the Crime Scene Notes on the fourth statement.
- When Prompted, examine the money on the floor of the elevator in the photo.
- The subsequent scenes will push Edgeworth into Investigation mode.
Episode 2: Part 1 Investigation Phase 1
- You’ll regain control on Flight G-390, Second Floor - First Class, and need to head to First Floor - Lounge to begin your investigation.
- As you lay things out to start, you’ll receive the Where was the killer? Fact.
- Move over to the red puddle at the base of the statue to the right of the elevator door and examine it to zoom in.
- Examine the footprint-like tracks to receive the Spilled grape juice Fact.
- Zoom back out and examine the elevator to receive the Elevator Fact.
- When the scene zooms in on the body, examine the whole crime scene.
- Examine the small gold statue on the floor to receive the Murder weapon: Capt. Ugo Fact.
- Examine the body to receive the Blunt force trauma and Broken glasses Facts.
- Examine the small piece of paper sticking from the jacket pocket to receive the Photo of Mr. Hicks Evidence.
- Examine the lanyard around the body’s neck. Edgeworth will signal that something’s “missing.” Hit the Deduce button on the lanyard.
- Present the Photo of Mr. Hicks to receive the Missing Cell Phone Evidence.
- Time to work on the Facts with Logic!
- Connect Murder weapon: Capt. Ugo and Blunt force trauma to receive the Captain Ugo Piggy Bank Evidence.
- Connect Where was the killer? to Elevator to create the In the elevator with Hicks? Fact.
- Connect In the elevator with Hicks? to Spilled grape juice to receive the Grape Juice Footprints Evidence.
- This completes the investigation in the Lounge, with the following scene launching you straight into a second Confrontation.
Episode 2: Part 1 Confrontation Phase 2
- The scene launches immediately into Cross-Examination.
Rebuttal: What I Saw
- Press on the first statement to get it revised.
- Present the Grape Juice Footprints on the revised first statement to proceed to the next topic.
Rebuttal: What I Saw, Pt. 2
- You can press on every statement for flavor, but you’ll want to Press on the second statement to move forward.
- The second statement will be revised, but you’ll need to Press it again to get a new third statement added to the testimony.
- Present the Sky Magazine Evidence on the new third statement.
- The subsequent scene will add the Refueling in Zheng Fa and Ms. Meele’s Testimony Evidence to your Organizer.
- When prompted, Present the Grape Juice Footprints.
- When prompted, Present the Captain Ugo Piggy Bank to close the Confrontation.
Episode 2: Part 1 Investigation Phase 2
- Time to move to the right, entering Flight G-390, First Floor - In-Flight Shop to begin your next investigation.
- You can actually re-examine the clues in the Lounge, but doing so adds nothing but flavor text.
- As you begin you’ll receive the Murder weapon: Capt Ugo Fact again.
- Examining the suitcases up against the wall will earn you the Suitcase Fact.
- Examining the broken glass case will add the Tiny Captain’s Hat Fact.
- Use Logic to combine the Murder weapon: Capt. Ugo and Tiny Captain’s Hat Facts to obtain an update to the Captain Ugo Piggy Bank evidence.
- After obtaining the update, you’ll be able to examine the broken glass case in more detail.
- Examine the different hotspots to obtain some flavor text, but you’ll want to hit Deduce on the broken glass panel and Present the updated Captain Ugo Piggy Bank.
- You’ll also obtain the Turbulence Fact, and an update to Captain Ugo Piggy Bank.
- Use Logic to connect Turbulence with the Suitcase Fact.
- When prompted, Examine the wheels of the left-side suitcase.
- Examine the handle of the suitcase to open it.
- You’ll receive the GoYou Suitcase and Bloody Cloth Evidence pieces.
- When prompted, Present the Crime Scene Notes to end the Investigation and bring you to a save checkpoint.
Episode 2: Part 2 Confrontation
- A brief transition chapter will begin at Hope Springs Airport.
- You’ll be able to talk to Gumshoe and Franziska and enjoy some of the cameos from other Ace Attorney games in the waiting lobby, but leave to the left when you’re done.
- You’ll enter Flight G-390, Second Floor - First Class, then transition automatically to the First Floor - Lounge for a spot of conversation.
- Speak to Lablanc and choose “Lablanc’s Cargo” as a conversation topic.
- Present Lablanc with the Bloody Cloth evidence, which will update the clue to Borginian Cloth.
- Select “Rhoda Teneiro” as a topic.
- You’ll automatically be kicked into a Confrontation after the scene.
Rebuttal: Franziska’s Logic
- Present the Suitcase on the second statement.
- When prompted, Present the Grape Juice Footprints.
- Point to and Present the track-like marks on the floor.
Rebuttal: Franziska’s Logic, Pt. 2
- Present the Captain Ugo Piggy Bank on the first statement to close the Confrontation.
- After you regain control, enter the blue door to your left.
Episode 2: Part 3 Investigation Phase 1
- You’ll enter Flight G-390, First Floor - Flight Attendant’s Room to begin a new round of Investigation.
- Feel free to poke around the room and talk to the others, then speak to Rhoda to begin an interrogation.
- Ask about the “Captain’s Permission” and “In-flight Shop” topics as they come up.
- Present the GoYou Suitcase to Rhoda to unlock “The last suitcase” as a conversation topic.
- When prompted, point to the price tag on the suitcase’s handle and Present it.
- When prompted, choose “the in-flight shop.”
- Present Rhoda Teneiro’s profile.
- You’ll receive the Suitcase Receipt Evidence.
- Following the subsequent scenes, you’ll be moved to Flight G-390, Lower Deck - Cargo Hold to continue investigating.
- Speak to Franziska and explore her single available topic to receive the Interpol Fact.
- Examine the black, open suitcase at the bottom center of the screen to receive the Profile on Franziska Fact.
- Connect Interpol with Profile on Franziska to unlock a new topic, “Truth behind Hicks” in Franziska’s conversation options.
- Speak to Franziska and select the new topic to receive the Smuggling Fact.
- Examine the row of yellow suitcases near the staircase to receive the Glass shards Fact.
- Hop into Logic and connect Glass shards with Broken glasses to trigger a set of scenes and complete the investigation.
Episode 2: Part 3 Confrontation Phase 1
- Completing the investigation launches you straight into a new Confrontation.
Rebuttal: Definitive Evidence
- Press on the second statement to add a new third statement to the testimony.
- Press on the new third statement.
- Choose “The Body.”
- You’ll eventually receive the Autopsy Report evidence.
- In a rapid-fire sequence, you’ll receive the Capt. Ugo piggy bank, Weapon couldn’t be found, and Cause of death Facts.
- You’ll automatically enter Logic mode. Connect Cause of death with Capt. Ugo piggy bank to combine them into the A sizable weapon fact.
- Connect Weapon couldn’t be found with A sizable weapon.
- Choose “Don’t have evidence to show.”
- Choose “Free fall.”
- When prompted, Present Refueling in Zheng Fa. It will be updated into Cargo from Zheng Fa.
- You’ll end this short Confrontation with a new round of investigating in the cargo bay.
Episode 2: Part 3 Investigation Phase 2
- You’ll regain control in the Flight G-390, Lower Deck - Cargo Hold and continue examining the area.
- Attempt to examine the large cargo on the left side of the screen to trigger a scene.
- Speak to Lablanc and select “Lablanc’s cargo” to receive the Valuable piece of art Fact.
- Back out of the conversation, then use Logic and connect Valuable piece of art with Smuggling.
- Speak with Lablanc again and select “Fake statue” to receive the Alif Red Certificate and the Alif Red Statue Evidence.
- You’ll be able to examine the unveiled statue.
- Select the statue’s eye and hit Deduce, then Present the Photo of Mr. Hicks.
- You’ll need to keep investigating the statue.
- Scroll down to the statue’s foot and hit Deduce on the brown cloth under the statue’s base, and then Present Cargo from Zheng Fa.
- You’ll receive an update to the Alif Red Certificate.
- Present the Borginian Cloth when prompted.
- Choose “Ms. Meele's Testimony” to close this Investigation Phase.
Episode 2: Part 3 Confrontation Phase 2
- Completing the investigation launches you straight into a new Confrontation.
Rebuttal: Ms. Meele's Alibi
- Press on the fourth statement.
- Choose “Raise an objection.”
- Present the Suitcase Receipt.
Rebuttal: Reason for Suspicion
- Press on the third statement to add a new fifth statement to the testimony.
- Present the Alif Red Certificate on the new fifth statement.
- Present the GoYou Suitcase.
- Choose “Where the murder took place.”
- Present the Missing Cellphone Evidence to close the Rebuttal.
- When you regain control, run upstairs to the Flight Attendants’ Room and examine the closed locker on the right side of the screen.
- You’ll be returned to the cargo hold to continue the Confrontation.
- Examine the cell phone, focusing on the screen, the switch on the right side of the housing, the keyboard, and the camera on the back.
- Examine the photo, highlighting the boxes in the lower right.
- Present the Borginian Cloth.
- Point to the box in the upper left that says “Bedsheets” and Present it to end the case.
Episode 3: Kidnapped Turnabout walkthrough
- Part 1 - Investigation Phase 1
- Part 1 - Investigation Phase 2
- Part 1 - Confrontation
- Part 2 - Confrontation
- Part 2 - Re-creation
- Part 3 - Investigation
- Part 3 - Confrontation
- Part 3 - Re-creation
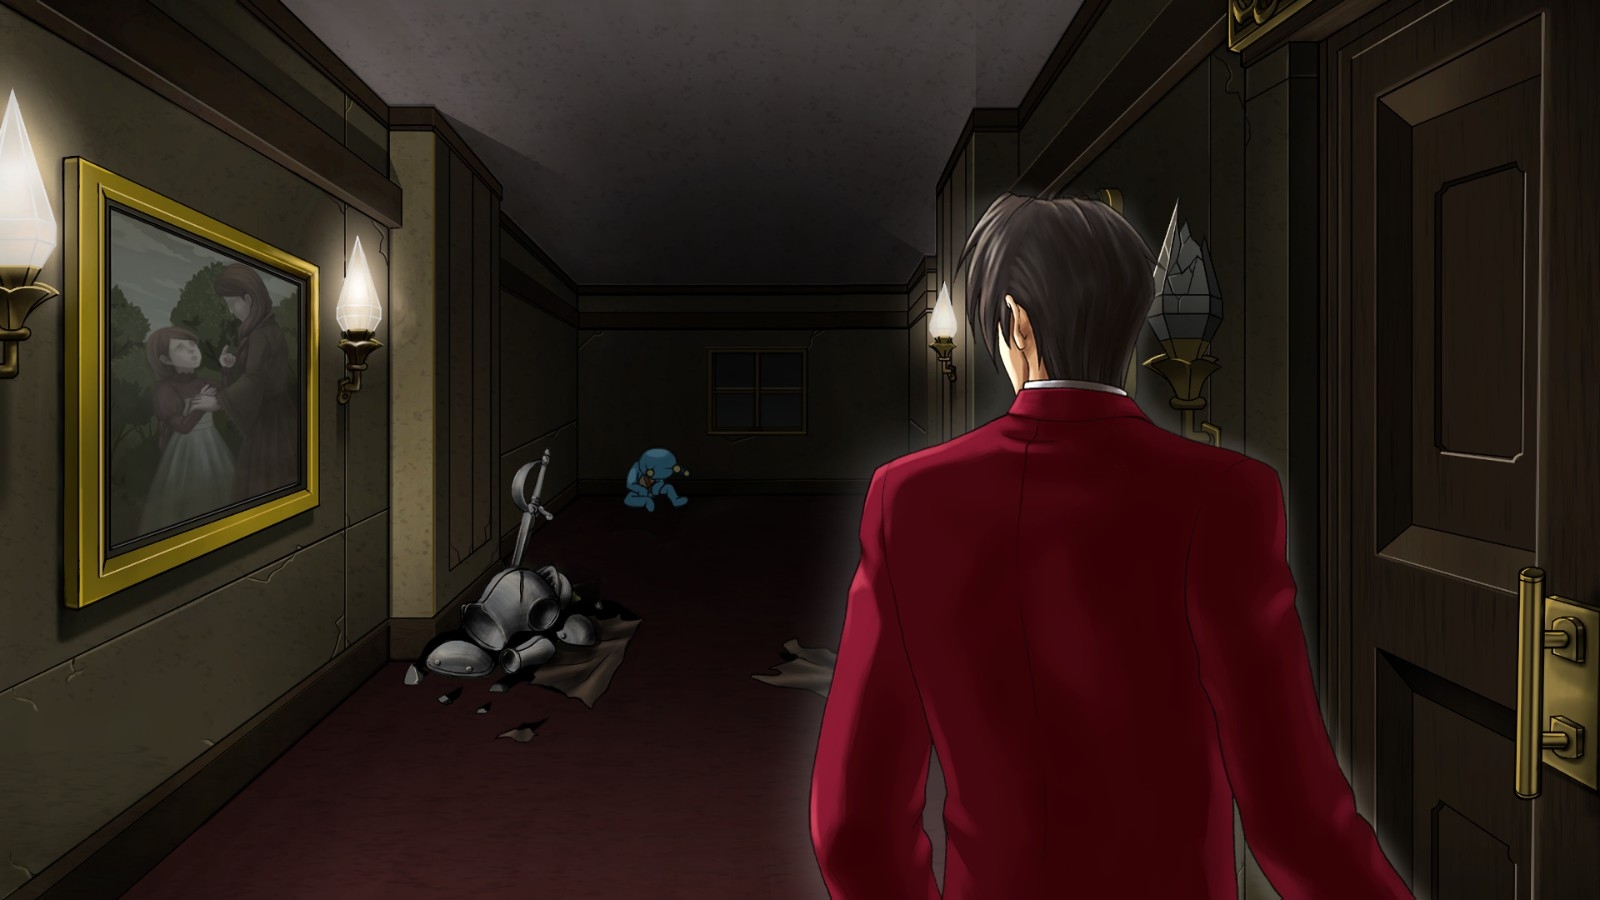
There’s no rest for the righteous, as Edgeworth is thrust into a kidnapping case almost as soon as he’s left the airport.
Episode 3: Part 1 Investigation Phase 1
- You’ll begin the episode in an unknown location, shepherding an ugly suitcase down the path. Subsequent cutscenes bring you elsewhere and put you in conversation with your new companion, Kay Faraday.
- Choose “Great Thief” and “Yatagarasu” from her topics to get the ball rolling.
- You’ll also begin your investigation by seeking a way to leave the Isolation Room.
- You’ll also have the Gatewater Land Pamphlet Evidence in your Organizer.
- Begin by examining items around the room, starting with the cellphone on the floor, which will trigger a brief call.
- Begin investigating items around the room, including the blue mascot head on the right side of the room, the pink mascot head in a box, the sign on the floor, the small key on the left side of the shelf, the lockers under the window, and the metal pillar Edgeworth was leaning against at the start of the scene.
- For your trouble, you’ll receive the Blue Badger’s Head, Blue Badger Bible. Badger Photo Rally Evidence, and several Facts: Costumes, Tiny Key, Lockers, and The Beam I was tied to.
- Once you’ve gathered everything up, speak to Kay about “The kidnapping.”
- The conversation will move her away from the door, allowing you to interact with it and see the room on the other side.
- Examine the hole in the floor to receive the Open floor panel Fact.
- Time to use Logic to brainstorm a way out. Connect Open floor panel with Beam I was tied to to change the scene.
- Examine the closed panel on the floor to receive the Underground entrance Fact.
- Connect Underground entrance to Tiny key.
- Following the scene, you’ll receive the Underground ladder Fact.
- Connect Underground ladder with Lockers to complete the investigation and move onto the next phase.
Episode 3: Part 1 Investigation Phase 2
- A scene in the Wild, Wild West Area will set the stage for your next investigation and introduce you to Interpol agent Shi-Long Lang.
- After the cutscenes, speak to Kay and Gumshoe and exhaust their available topics, then exhaust Amano’s topics when he shows up, as well.
- You’ll be turned loose to do some more investigating.
- Check out the sandy footprints on the left side of the screen to receive the What kind of shoes? Fact.
- Speak to the Blue Badger mascot on the right side and exhaust his available topics.
- When prompted, present the Badger Photo Rally, and you’ll receive the A 2nd Blue Badger Fact.
- Dip into Logic and connect Costumes with A 2nd Blue Badger to receive the Costumed Escape Fact and Stolen Costumes Evidence.
- While in Logic, connect What kind of shoes? With Costumed escape.
- Return to the footprints by the left side of the screen and reexamine them.
- Examine the garage door. The subsequent scene will give you the Victim was a kidnapper? Fact and Preliminary Findings Evidence.
- Examine the gunshot wound which will update Preliminary Findings.
- Examine the horse-shaped pendant. Hit Deduce on it and Present the Preliminary Findings to add Mr. Deacon’s Pendant to your Organizer and close the investigation.
- You’ll then enter a brief Confrontation sequence.
Episode 3: Part 1 Confrontation
Rebuttal: Shi-Long Lang’s Logic
- Press on the fourth statement to gain a new fifth statement.
- Present the Preliminary Findings on the new fifth statement.
Rebuttal: Meekins’ Testimony
- You’ll gain the Blue Badgermobile evidence as you begin your rebuttal.
- Present the Blue Badgermobile on the third statement.
- As the rebuttal closes, Preliminary Findings will be updated to Mr. Deacon’s Murder Notes.
Episode 3: Part 2 Confrontation Phase 1
- You’ll be ejected from the park and placed at the Gatewater Land Main Gate, but quickly transfer to the Stadium to speak with a familiar-looking witness.
- Before your Confrontation, you’ll be allowed to examine the area, though there won’t be much to look at besides the pink vehicle.
- Speak to Ema and exhaust her available topics.
- The Pink Badger will arrive. Speak to the Badger, and go through her topics, as well.
- You’ll be kicked into Cross-Examination right after.
Rebuttal: What Oldbag Witnessed
- Press on every statement to trigger a scene that introduces you to a new mechanic: Re-creation.
- Re-creation is a form of crime scene reenactment that projects a scene onto the environment based on data inputted, as a way of checking for problems in your assumptions and with witness testimony.
- In gameplay terms, it’s a twist on the standard Investigation mechanic that surfaces new Facts and Evidence to use in Confrontations.
Episode 3: Part 2 Re-creation
- The Re-creation will be projected onto the Stadium scene, giving you more to examine.
- Examine the stage on the left side of the screen to receive the Stage was packed up Fact.
- Examine the killer (the red silhouette) and the victim (the blue silhouette).
- When prompted, Present Mr. Deacon’s Murder Notes to receive the Why is there no blood? Fact.
- Armed with new Facts, open up Logic and connect Victim was kidnapper? with Why is there no blood?
- To proceed, you’ll need to drum up some new Evidence to ponder.
- Speak with Ema and choose “Footprint analysis.”
- You’ll receive the Victim’s Costume Evidence.
- Now armed with more info, you can re-confront the witness.
Rebuttal: What Oldbag Witnessed
- Present the Victim’s Costume on the second statement to receive the In the shadow of the stage Fact.
- Pop into Logic and connect In the shadow of the stage and Stage was packed up.
- After the subsequent scene, you’ll be thrown into another Confrontation with Lang.
Rebuttal: Agent Lang’s Logic
- Present Mr. Deacon’s Murder Notes on the third statement.
- Choose “The killer and victim’s locations.”
Rebuttal: Another Bit of Proof
- Present the Blue Badgermobile on the second statement.
- Point to and present the vehicle’s front wheel to end the Confrontation.
Episode 3: Part 3 Investigation
- You’ll be kicked out of the crime scene and returned to the Wild, Wild West Area for a spot of Investigation.
- Speak to Mr. Amano and exhaust his available topics to receive the Love Letter Evidence.
- When prompted, choose “The Kidnapper’s Hideout.”
- Speak to the cop in blue to receive the Colin Devorae Dossier.
- You’ll transfer to the Kidnapper’s Hideout.
- Examine an object just beside the door to the right to receive the Broken prop sword Fact.
- Examine the door itself to zoom in. Examine the door’s handle for The door leading outside Fact.
- Combine the Broken prop sword and The door leading outside to receive the Broken Prop Sword Evidence.
- Examine the blue bin at the bottom of the screen to receive the Costume pieces Fact.
- Examine the table in the upper left to zoom in. Examine the chairs and cups of coffee for the Folding chairs and 3 cups Facts.
- Combine Folding chairs and 3 cups in Logic to set off a scene.
- Speak to the Proto Badger.
- When prompted, point to the boxed Pink Badger costume in the lower right and Present it to receive the Unaccounted for Bad Badger Fact.
- Combine Costume pieces with Unaccounted for Bad Badger in Logic.
- You’ll zoom in on the costume. Examine the costume itself, and the tear on its hand. Hit Deduce on the tear and Present the Blue Badger Bible.
- You’ll receive the Missing Model Gun Evidence and close the Investigation phase.
Episode 3: Part 3 Confrontation
- You’ll rush out to the Gatewater Land Main Gate for a bit of clue-hunting ahead of the main confrontation.
- Examine the costume and the unusual pendant inside the neck hole. It will be revealed as Ms. Paups’ Pendant.
- You’ll then swing into a long chain of Confrontations.
Rebuttal: Ms. Paups’ Confession
- Press on the fifth statement.
- Choose “raise an objection.”
- When prompted, Present Mr. Deacon’s Pendant.
- Present Ms. Paups’ Pendant.
- Present the Colin Devorae Dossier.
- Point to and Present the word “daughter.”
Rebuttal: Another Possibility
- Present the Stolen Costumes on the fourth statement.
- Present Lance Amano’s Profile.
Rebuttal: Lance’s Testimony
- Press on all the statements.
- A new sixth statement will be added.
- Present the Broken Prop Sword on the new sixth statement.
- When prompted, Present the Love Letter.
- The Stolen Costumes Evidence will be updated.
Rebuttal: Chain of Events
- Press on the third statement to have it revised.
- Present the Colin Devorae Dossier on the third statement.
- Choose “Both are correct.”
- Present the Bad Badger’s Head.
- Point to and Present the Proto Badger.
- Present the Missing Model Gun.
Rebuttal: What Ms. Paups Saw
- Press on the third statement to have it revised.
- Present the Bad Badger’s Head on the revised third statement.
- Choose “Miles Edgeworth.”
- You’ll be prompted to inspect some new evidence.
- Examine the gun, the strange fragment of glass inside the costume’s head, and the dark hole in the waistband of the costume pants.
- You’ll receive the Revolver, Mirror Fragments, and Victim’s Costume Evidence pieces.
Rebuttal: Decisive Evidence
- Press on the first statement.
- Choose “Raise an objection.”
- Present the Victim’s Costume.
- Present the Victim’s Costume a second time.
- Point to the bullet hole in the costume’s waistband and Present it.
- Point to the words “Haunted House” and Present them.
- Present the Mirror Fragments.
Episode 3: Part 3 Re-creation
- After a big twist, you’ll be left relying on the Little Thief to Re-create the Haunted House crime scene and do some much-needed Investigating.
- When prompted, point to the green “B” marker and Present it.
- Inspect the mirror to the left of the door to receive the Mirror shards Fact and an update to the Mirror Fragments Evidence.
- Inspect the Bad Badger holding a weapon.
- Present the Broken Prop Sword.
- Choose “Test with Luminol,” and the Broken Prop Sword will be updated.
- Point at the sword in the attacker’s hand, and hit the Deduce button.
- Present the Colin Devorae Dossier.
- Present the Broken Prop Sword.
- You’ll trigger a scene and receive an update to the Gatewater Land Pamphlet.
- Examine the updated Badger doll at the far left side of the screen.
- Hit Deduce on the Badger’s belt and Present the Blue Badger Bible to receive the Blue Badger in reverse Fact.
- Activate Logic and Connect Blue badger in reverse to Mirror shards.
- Present the Gatewater Land Pamphlet.
- Choose “Move the mirror-wall.”
- Point to the shadowed area on the map and Present it.
- Point to and Present the far left end of the hallway.
- Present the Victim’s Costume to close the case.
Episode 4: Turnabout Reminiscence walkthrough
- Part 1 - Investigation
- Part 1 - Confrontation
- Part 2 - Investigation
- Part 2 - Confrontation
- Part 3 - Investigation Phase 1
- Part 3 - Confrontation Phase 1
- Part 3 - Investigation Phase 2
- Part 3 - Confrontation Phase 2
It’s time for a trip down memory lane as Edgeworth recalls a case from seven years ago, involving a few familiar faces and the origin story of a beautiful friendship!
Episode 4: Part 1 Investigation
- You’ll begin the episode as a young Miles Edgeworth, fancy coat and all, standing in the District Court - 3rd Floor Lobby.
- Speak to von Karma and exhaust his available topics to get some background on the case at hand.
- You’ll receive the KG-8 Incident Overview Evidence.
- Over the next run of scenes, you’ll move into Courtroom No. 3, then regain control in the Hallway to begin investigating the latest twist in the case.
- Speak to Gumshoe and the two new characters: Tyrell Badd and Calisto Yew, and exhaust their topics. You’ll receive Det. Gumshoe’s Testimony as Evidence.
- After the cutscenes, you’ll move to Defendant Lobby No. 2 to begin gathering clues and facts.
- Examine the table at the bottom of the screen for the Neat and tidy table Fact.
- Examine the open window in the upper right of the screen for the Lobby No. 2 window Fact.
- Examine the plastic bags on the floor near the bodies for the Plastic bags strewn about Fact.
- Examine the bodies to zoom in. Pinpoint the knife for the Knife Evidence, the gun for the Handgun Evidence, and the black stain on Faraday’s left hand for the Ink stain Fact.
- After gathering the above pieces, the bodies will be repositioned for more examination.
- Examine the pen in Faraday’s jacket pocket for the Fountain pen in pocket Fact, the stab wound on his chest for the Crime Scene Notes Evidence, and the bullet wound on Rell’s chest to update the Handgun Evidence.
- Open up the Logic menu and connect Ink stain with Fountain pen in pocket to receive the Mr. Faraday’s Fountain Pen Evidence.
- Connect Neat and tidy table with Plastic bags strewn about to receive the Plastic Bag Evidence.
- When prompted, point to Faraday’s right hand and hit Deduce on it, then Present Mr. Faraday’s Fountain Pen to close the Investigation for now.
Episode 4: Part 1 Confrontation
- You’ll receive updates to the Crime Scene Notes Evidence before being thrown into a Confrontation about your contest with Franziska.
Rebuttal: What Happened
- Press on the third statement to have it revised.
- Present Det. Gumshoe’s Testimony on the revised third statement.
- Choose “Yes, something is off.”
- Present the Crime Scene Notes.
- Choose “The order the bodies fell.”
Rebuttal: What Happened, Part 2
- Press on the third statement, which will trigger a revision.
- Present the Handgun on the revised third statement.
- Choose “Neither man.”
- Present the Plastic Bag.
- Choose “Motive for the murders.”
Rebuttal: Gumshoe’s Motive
- Press on the fifth statement.
- Choose “Raise an objection.”
- Choose “Motive for killing Mr. Rell.”
Rebuttal: Motive to Kill the Men
- Present the KG-8 Incident Overview on the first statement.
- You’ll leave the Confrontation after the scenes.
- Speak to Yew and exhaust her available topics.
- Present the KG-8 Incident Overview to Yew.
- Choose “Through the victim.”
- You’ll unlock new topics with Yew. Speak of them with her to move on to the next round of investigation.
Episode 4: Part 2 Investigation
- You’ll return to consult with your mentor in the District Court - 3rd Floor Lobby and be turned loose to continue the investigation.
- Examine the area for some flavor, and then speak to Yew again, exhausting all her available topics.
- Speak to Gumshoe and exhaust his topics as well.
- You’ll receive the Annual Bonus Envelope evidence.
- Present Det. Gumshoe’s Testimony to Gumshoe.
- You’ll receive the Swiss Roll evidence.
- Head through the door to the left to enter the Hallway.
- Speak to the Judge and explore his topics.
- Examine the vending machine to receive the Vending machine fact.
- Examine the couch at the left end of the hall to zoom in.
- Examine the cactus to receive the Windowsill cactus fact and the small pink item to receive the Pink piece of trash fact.
- Scroll down and examine the small brown object on the floor surrounded by ants to receive the Swiss roll crumbs fact.
- Examine the hand-shaped smudge on the right side of the couch to receive Det. Gumshoe’s Fingerprints into evidence.
- Speak to Badd, exploring his topics.
- When prompted, choose “Time he heard the gunshot.”
- You’ll receive the Det. Badd’s Testimony evidence.
- Enter Logic mode and connect Windowsill cactus to Pink piece of trash to receive the Balloon Piece evidence.
- Connect Swiss roll crumbs to Vending machine to update Det. Gumshoe’s Fingerprints.
- You’ll be prompted to reexamine the vending machine.
- While zoomed in, point to the Swiss Rolls entry, hit Deduce, and Present the Annual Bonus Envelope to update the Swiss Roll evidence and complete the Investigation.
Episode 4: Part 2 Confrontation
- You’ll immediately confront the Judge for some cross-examination.
Rebuttal: What I Saw at Recess
- Present Det. Gumshoe’s Fingerprints on the fourth statement.
Rebuttal: What I Saw, Pt. 2
- Press on the second statement to add a new third statement.
- Present Det. Badd’s Testimony on the new third statement.
- Present the Balloon Piece when prompted.
Rebuttal: While I was on Duty
- Press on the third statement to get it revised.
- Present Det. Gumshoe’s Fingerprints on the revised third statement.
- When prompted, present the Swiss Roll.
- When you regain control, speak to young Kay.
- Present the Swiss Roll.
- Go through Kay’s topics. You’ll receive the Promise Notebook evidence.
- When prompted, present the Promise Notebook to close the Confrontation.
Episode 4: Part 3 Investigation Phase 1
- Immediately following the confrontation, you’ll enter Defendant Lobby No. 1 to continue very short investigation.
- Speak to Badd. The initial exchange will give you Ms. Yew’s Perfume.
- Run through Badd’s topics.
- After the conversation, you’ll be transferred to Courtroom No. 3 to claim some new evidence.
- After the conversation, walk up to the prosecutor’s bench on the left side of the screen and examine the objects there to zoom in.
- Examine each object in turn, starting with the organizer (the small black book) to receive Mr. Faaraday’s Organizer and Yatagarasu’s Key.
- Examine the bloody knife. When prompted, Present Yatagarasu’s Key.
- You’ll be prompted to examine the knife’s 3D model. Examine the blood on the blade, then the small gold bit protruding from the bottom of the handle to update the descriptions of both Yatagarasu’s Key and Knife.
- You’ll be transported to Defendant Lobby No. 2 to find a key piece of evidence.
- Speak to Badd and go through his topics.
- Present Yatagarasu’s Key to Badd, then go through his topics again to be kicked into a Confrontation.
Episode 4: Part 3 Confrontation Phase 1
- It’s time to wheedle some more info out of Detective Badd as you prepare for the showdown.
Rebuttal: Det. Badd’s Movements
- Press on the third statement to have a new fourth statement added.
- Present the Balloon Piece on the new fourth statement.
- During the rush of scenes, you’ll receive the Dissipating the smell, Very loud television, and Missing evidence Facts.
- Once in Logic, connect the Lobby No. 2 window Fact you received back near the beginning of the episode with Dissipating the smell to get Open windows.
- Connect Open windows to Very loud television to get Gunshot could be heard.
- Finally, join Gunshot could be heard to Missing evidence to close this round of Confrontation and resume Invesigating.
Episode 4: Part 3 Investigation Phase 2
- While still in Defendant Lobby No. 2, you now know where to find the evidence you seek.
- Examine the TV, and pinpoint the video player machine under it.
- You’ll receive the Surveillance Video Evidence.
- Point to the open window, hit Deduce, and Present the Surveillance Video.
- Choose “When the crime took place” to close this round of Investigation.
Episode 4: Part 3 Confrontation Phase 2
- Back in Courtroom No. 3, it’s time to close the case with a marathon round of confrontations.
Rebuttal: Ms. Yew’s Argument
- Press every statement.
- When prompted, Present the Surveillance Video.
- Choose “The window was open.”
- Present Callisto Yew’s Profile.
Rebuttal: Ms. Yew’s Rebuttal
- Present Ms. Yew’s Perfume on the first statement.
Rebuttal: Why It Couldn’t Be Me
- Press on the fourth statement to receive a new fifth statement.
- Present Yatagarasu’s Key on the new fifth statement.
- When prompted, Present Yatagarasu’s Profile to close the episode.
Episode 5: Turnabout Ablaze walkthrough
- Part 1 - Investigation
- Part 1 - Confrontation
- Part 2 - Investigation Phase 1
- Part 2 - Confrontation Phase 1
- Part 2 - Investigation Phase 2
- Part 2 - Re-creation
- Part 2 - Confrontation Phase 2
- Part 3 - Confrontation Phase 1
- Part 3 - Investigation
- Part 3 - Confrontation Phase 2
- Part 3 - Confrontation Phase 3
It’s time to bring things to a conclusion in the climactic case of Ace Attorney Investigations, as Miles Edgeworth and his impromptu team jump into solving an international incident that could affect the fate of a nation!
Episode 5: Part 1 Investigation
- After the scenes, you’ll begin in the Theatrum Neutralis.
- Move around the room, examining things.
- The left-side table contains the Embassy Guide.
- Speak to the Steel Samurai to receive Steel Samurai’s Autograph.
- A round of scenes will transport you to the Open-Air Stage, then the Babahlese Embassy - Secretariat’s Office, where you’ll begin the investigation proper.
- Examine the large logo on the wall to receive the Butterfly of Babahl Fact.
- Examine the body on the floor to receive Notes on Coachen’s Body into Evidence.
- Examine the knife near the body to receive the Motif on knife handle Fact and Knife Evidence.
- Examine the small object sticking out of the body’s jacket pocket.
- As with the previous episode, rotate the key and click on the gold latch at the bottom of the handle to receive the Yatagarasu’s Key Evidence.
- Examine the safe in the upper left corner of the screen to receive the Locked safe Fact.
- Examine the gold statue in the center of the room to receive Babahl’s Primidux Statue.
- Examine the burned display in the upper right of the screen. It’s not signaled for some reason, but this will silently update the Knife evidence to Babahlese Knife.
- Speak to Franziska to receive the Franziska’s return Fact.
- Run through Franziska’s topics, one of which gives you the Stealing of secret Fact.
- Speak to Palaeno and run through his available topics. You’ll receive Key used at Embassy.
- Enter Logic mode to start putting together Facts.
- Connect Franziska’s Return to Stealing of Secret to unlock a new conversation topic with Franziska.
- Speak to Franziska about “Smuggling” to receive Cohdopian Paper Document.
- Connect Motif on knife handle to Butterfly of Babahl.
- Connect Locked safe with Key used at Embassy.
- You’ll zoom in on the safe. Examine the strangely-shaped hole on the left side of the door, the back wall of the safe, and the piece of paper sticking out of the bottom.
- When prompted, choose “It has two compartments.”
- Point to the strangely-shaped hole, hit Deduce, and Present Yatagarasu’s Key.
- Rotate the key and examine the blade.
- Examine the newly revealed objects and the paper on the lower shelf.
- Point to the papers, hit Deduce, and Present the Cohdopian Paper Document to complete the Investgation.
Episode 5: Part 1 Confrontation
- The subsequent scenes will push you straight into a Confrontation.
Rebuttal: Why Arrest Kay?
- Press on the third statement to add a new fourth statement.
- Present Yatagarasu’s Key on the fourth statement.
Rebuttal: Definitive Evidence
- Present Babahlese Knife on the second statement.
- Point at and examine the center of the knife, where the handle meets the blade.
- You’ll receive the Babahlese Knife Handle Evidence.
- Examine the round symbol on the knife’s tang (the thin part that sticks out below the blade).
- Present the Embassy Guide to close the Confrontation and take you into a checkpoint.
Episode 5: Part 2 Investigation Phase 1
- You’ll return to Theatrum Neutralis - Lobby to do some conversing.
- Speak to Franziska. You’ll receive the Counterfeit Bills Evidence.
- Speak to Palaeno. You’ll receive Babahlese Ink.
- You’ll move on to the Allebahstian Embassy - Ambassador’s Office.
- After the scenes, speak to Badd about his topics.
- Begin examining items around the room when you regain control.
- Examine the body. Upon zooming in, pick out the sword, the orange paper in the body’s right hand, and the victim’s head to receive the Samurai Sword and DeMaqsue II’s Note Evidence pieces, and some insight into the victim’s identity.
- Check out the rack of three knives at the back of the room to zoom in.
- Examine the knives to receive a silent update to the Allebahstian Knife Evidence.
- Examine the spear, then point to the spear’s tip, hit Deduce, and Present the Steel Samurai’s Autograph to receive the Samurai Spear into Evidence.
- Examine the side table in the right-center of the room against the back wall to receive the Photo with Steel Samurai.
- Examine the flowers to the far right to receive Passionflowers.
- Speak to Larry about his topics. Going through them will reward you with the Smoke from chimney Fact.
- Examine the statue in the center of the room (not through the zoomed-in view from the knife rack) to receive Allebahst’s Primidux Statue.
- Hit Deduce on the Statue and Present the Photo with Steel Samurai to update Allebahst’s Primidux Statue.
- Speak to the Pink Princess about her topics. You’ll receive Stand-In Request and Letter from a Stalker into Evidence, and the Used the fireplace Fact.
- You’ll receive Lady’s Undershirt during the next scene.
- Speak to the Pink Princess and Present her with Lady’s Undershirt to receive the Undershirt from next door Fact.
- Select “Samurai Dogs” to receive the Samurai Dogs Evidence.
- Hop into Logic to connect Used the fireplace to Smoke from Chimney to receive the Shared Chimney Fact.
- Use Logic to connect Shared Chimney with Undershirt from next door to receive the Connected fireplaces Fact to complete the investigation.
Episode 5: Part 2 Confrontation
- You’ll jump straight into a Confrontation as soon as you clear the room of clues.
Rebuttal: Up on the Rooftop
- Press on the fifth statement.
- Choose “Raise an objection.”
- Present Ex-Security Lady’s Profile when prompted.
- Present the Stand-In Request.
Rebuttal: Larry’s Assertion
- Present the Letter from a Stalker on the fifth statement.
- Highlight the word at the top of the letter (a badly-written “Mindy”) and Present it.
- Present the Steel Samurai’s Autograph.
Rebuttal: Why Larry?
- Press on the second statement to revise the second statement and add a new third statement.
- Present the Samurai Spear on the new third statement. You’ll receive an update to that piece of Evidence.
Rebuttal: Why Larry? Pt. 2
- Press on the third statement.
- Choose “Raise an objection.”
- Present Allebahst’s Primidux Statue.
- Rotate the model to the base of the statue, and highlight the black smudge to close the Confrontation.
Episode 5: Part 2 Investigation Phase 2
- Confused even further, you’ll transition to the Open-Air Stage, where you’ll discard some irrelevant clues.
- Speak to Gumshoe and investigate his topics to receive the Silhouette Lantern Evidence.
- Speak to Palaeno and run through his available topics. Present Allehbast’s Primidux Statue for some more background.
- After the conversation, you’ll receive the Pick and Ms. Yew’s Perfume Evidence Items.
- Exit the map to the south into the Theatrum Neutralis - Lobby, passing through to enter the Rose Garden on the other side.
- Examine the fountain in front of the stage to receive the Fountain Spouts Evidence.
- Examine the two statues, one on the far left and the other on the far right.
- Speak to Lang and run through his available topics.
- When prompted, point to and present the left-side statue (a crouching figure holding a weapon).
- Point to and present the right-side statue (a kneeling figure with one arm raised).
- Point to and present the right-side statue’s left hand (on the raised arm) to complete this brief investigation.
- During the subsequent scenes, you’ll receive the Photo of Yatagarasu Evidence before moving on.
Episode 5: Part 2 Re-creation Phase 1
- Upon regaining control, exit the area, head back through the Lobby and Open-Air Stage, and return to the Babahlese Embassy - Secretariat’s Office.
- You’ll be unleashed upon the office once more to do some investigating.
- Speak to Palaeno. You’ll receive an update to the Photo of Yatagarasu and the new Fires in Babahl Evidence.
- Run through Palaeno’s topics. You’ll receive the Renovations Fact and Amb. Palaeno’s Testimony Evidence.
- Examine the desk to the left, which you can access now, unlike during the previous investigation.
- Pinpoint the slightly open drawer, and examine the light brown triangular object, then hit Deduce, and Present DeMasque II’s Note.
- Speak to Palaeno again, then choose “Job for DeMasque II” from his topics.
- You’ll enter a Re-creation of the office during the fire.
- Items that were changed by the fire are outlined in yellow, to make them easier to spot.
- Examine the grandfather clock on the right side of the screen. You’ll receive Wire.
- Examine the flames, and when prompted, Present the Silhouette Lantern.
- Present the Babahlese Ink.
- Present the Counterfeit Bills to update their description.
- Speak to Gumshoe about his topics. You’ll receive Shi-na’s location as a Fact.
- After clearing the above clues, you’ll automatically speak to Palaeno and receive the Bilateral symmetry Fact.
- Combine Connected fireplaces with Bilateral symmetry in Logic mode to receive Revolving fireplace used?
- Examine the fireplace, point to the logs, hit Deduce, and present Amb. Palaeno’s Testimony to receive the Missing ashes Fact.
- Enter Logic and connect Missing ashes to Revolving fireplace used?, unlocking the Revolving Fireplace Wall Evidence and Escaped through revolving fireplace Fact.
- Connect Shi-na’s location to Escaped through revolving fireplace to complete this portion of the investigation.
Episode 5: Part 2 Confrontation Phase 2
- You’ll return to the Theatrum Neutralis - Lobby to confront your new suspect.
- Before beginning the confrontation proper, you’ll receive an update to DeMasque II’s Note.
- Present Shi-na’s Profile.
- Present the Photo of Yatagarasu.
Rebuttal: Shi-na’s Movements
- Present the Revolving Fireplace Wall on the fourth statement.
- Present the Revolving Fireplace Wall again, when prompted.
Rebuttal: Shi-na’s Rebuttal
- Present the Counterfeit Bills on the fifth statement.
- Present the Wire when prompted.
- Point to the room with the green “S” dot in it, and Present it.
- Choose “Coat.”
- Present the Babahlese Ink.
- Choose “Burn the coat.”
- Present Ms. Yew’s Perfume.
- Choose “Neither person.”
- When prompted, select and Present the Babahlese Knife Handle.
- Over the course of the next few cutscenes, you’ll receive the Hair Sticks, Trump Card, and Video Tape Evidence as the Confrontation closes.
Episode 5: Part 3 Confrontation Phase 1
- You’ll zoom into a piece of evidence. When prompted, focus on the car’s yellow flag and Present it.
- You’ll be moved to Allebahstian Embassy - Ambassador’s Office for a round of testimony.
Rebuttal: Border-Crossing Weapons
- Present Babahl’s Primidux Statue on the third statement.
- Present the Photo of Yatagarasu.
- Present Allebahst’s Primidux Statue.
Rebuttal: Movement in Allebahst
- Press on the fourth statement to gain a new fifth statement.
- Press on the new fifth statement to get a new sixth statement.
- Present the Passionflowers on the new sixth statement.
- Examine the flowers.
- Choose “Show evidence,” and present the Hair Sticks.
- Point to the crossbow on the wall (above the rack of three knives) and Present it.
Rebuttal: Border-Crossing, Pt. 2
- Press on the first statement.
- Press on the second statement to get a new third statement.
- Present the Wire on the new third statement.
- Choose “Rotary motion.”
- Point to and present the ceiling fan at the top of the screen.
- Present the Hair Sticks (which have been renamed Crossbow Arrows).
- When prompted, Present Allebahst’s Primidux Statue.
- Rotate the statue and examine its head.
- Examine the object that emerges to receive the Counterfeit Plate evidence.
- Choose any option you wish.
- When prompted, point to the black card in the man’s right hand and Present it.
- Rotate the card and point to the bloodstain on the back and Present it.
- Present the black card in the chest pocket of the passenger’s jacket and Present it.
- Point to the red-and-gold badge in the upper-center of the screen and Present it.
- You’ll receive the Amb. Alba’s Wound Evidence.
Episode 5: Part 3 Investigation
- You’ll move to the Theatrum Neutralis - Lobby to search for an opening.
- As the investigation begins, you’ll receive the Agitated Alba and Coachen’s counterfeiting op. Facts.
- Examine the photo on a stand to zoom in.
- Point to the small golden metal shape in Alba’s bouquet (in the center of the orange flower cluster) and hit Deduce on it, then Present the Allebahstian Knife.
- You’ll receive the Commemorative Photo Evidence and an update to the Allebahstian Knife.
- Hop into Logic and Connect Renovations and Coachen’s counterfeiting op.
- Choose “Quercus Alba” to receive the Motive to kill Coachen Fact.
- Connect Agitated Alba to Motive to kill Coachen.
- Point to and Present the Theatrum Neutralis.
- You’ll see a cutscene and receive the Security Footage Evidence.
- Choose “5:23 PM.”
- Point to the cart and examine it for the Pushcart Evidence to complete the investigation.
Episode 5: Part 3 Confrontation Phase 2
- You’re in the endgame now. It’s time to close out the case with a marathon of testimony.
Rebuttal: Ambassador Alba’s Alibi
- Press on the second statement to get a new third statement.
- Present the DeMasque II’s Note on the new third statement.
Rebuttal: Alba’s Alibi, Part 2
- Present the Commemorative Photo on the first statement.
Rebuttal: Alba’s Alibi, Part 3
- Present the Pushcart on the fourth statement.
- When prompted, Present the Notes on Coachen’s Body.
- Rotate the pushcart to look inside and examine the red stain.
Rebuttal: Movements in Allebahst
- Press every statement.
- When prompted, choose “bilateral symmetry.”
- Point to a spot near the wall on the Babahlese side of the building and Present it.
- Present Fires in Babahl.
- Present Fountain Spouts.
- Present the Pick.
- Present the Allebahstian Knife.
Rebuttal: The Steel Samurai’s Show
- Press on the third statement to get a new fourth statement.
- Present the Samurai Spear on the new fourth statement.
- Choose “You saw it.”
- Present the Pushcart.
- During the scenes, you’ll receive the Hinomaru Dogs, Samurai Dogs, and Body in the pushcart Facts.
- You’ll automatically be put into Logic mode.
- Connect Samurai Dogs and Body in the pushcart to receive Samurai Dogs were removed into Facts.
- Connect Samurai Dogs were removed to Hinomaru Dogs.
- Point to the red spot on the fan shape.
- Present Quercus Alba’s Profile.
- Present Amb. Alba’s Wound.
- Present Yatagarasu’s Key.
And it’s over! You have now cleared Ace Attorney Investigations: Miles Edgeworth! Enjoy the ending cutscenes, and consider moving on to Ace Attorney Investigations 2: Prosecutor’s Gambit, on its first official appearance in English.