
Ace Attorney Investigations 2: Prosecutor's Gambit - Spoiler-Free Walkthrough
Thanks to the Ace Attorney Investigations Collection, Ace Attorney Investigations 2: Prosecutor's Gambit is now officially available in English for the first time! If you're new to the collection, starting with Ace Attorney Investigations: Miles Edgeworth is highly recommended. As we mention in our review, the two games are connected enough that they're best treated as two halves of a single, larger saga.
As with our previous walkthroughs for the Phoenix Wright: Ace Attorney Trilogy and Apollo Justice: Ace Attorney Trilogy collections, you can check out this spoiler-free walkthrough to help you beat every case and nail every choice.
Note: While we consider the walkthrough to be spoiler-free, making the guide comprehensible means that we did need to get specific when necessary.
You can use the links below to jump directly to a specific section of each episode.
- Episode 1: Turnabout Trigger
- Episode 2: The Captive Turnabout
- Episode 3: Turnabout Legacy
- Episode 4: A Turnabout Forsaken
- Episode 5: Turnabout for the Ages
Episode 1: Turnabout Trigger walkthrough

- Part 1 Investigation Phase 1
- Part 1 Mind Chess
- Part 1 Investigation Phase 2
- Part 1 Confrontation
- Part 2 Investigation
- Part 2 Mind Chess
- Part 2 Confrontation
It's time to continue that prosecutin' life in the first episode of Ace Attorney Investigations 2. We begin with a case involving the Republic of Zheng Fa, a nation that featured in much of the previous game's background. Things begin with a doozy of a case - the attempted assassination of Zheng Fa's President!
As with the previous game, the episodes of Prosecutor's Gambit are a little less rigidly structured than a mainline Ace Attorney game. For convenience, we'll organize the guide by activity, mainly splitting things up between Investigation, where you move around the area seeking clues, and Confrontation, a mode similar to the regular Cross-Examination sessions where you pinpoint issues with someone's testimony and file objections or press for details.
In addition, the Investigations games add Facts and Logic. You collect Facts like you would evidence, but can hope into Logic mode to connect Facts together to gain new information or clues. Prosecutor's Gambit adds a new twist on Logic, which we'll detail in the guide when you get to it.
Episode 1: Part 1 Investigation Phase 1
Here are all the actions you'll need to take to clear the investigation phase.
You can consult our guide to Ace Attorney Investigations: Miles Edgeworth for a more detailed description of these basics if you need more help than the tutorial provides, but here's a quick rundown of key terms as we use them here:
- Evidence - Clues and items listed in Edgeworth's Organizer.
- Facts - Used in Logic mode to get new Facts and Evidence.
- Deduce - When examining a photo or scene, you can point out some element of it and relate it to some evidence you carry by hitting "Deduce."
- You'll first go through the introductory cutscenes and dialog, then begin at Gourd Lake - Spectator Area.
- During the initial briefing, you'll receive the Newspaper Clipping Evidence and the President was shot at Fact.
- Speak to the President's bodyguards to receive the Event security Fact.
- Pop into Logic mode and click on both President was shot at and Event security, then hit the "Connect" button to form a logical link between the two, leading to the Assassination attempt Fact.
- Begin examining things around the area, starting with the red tattered material draped on the railing to the right of the bodyguards.
- When prompted, point to the small hole in the flag (near its red symbol) and Present it to receive the Flag with bullet hole Fact.
- Examine the submerged Steel Samurai balloon to receive the Popped balloon Fact. You'll also receive the Steel Samurai Balloon Evidence.
- Edgeworth will signal that it's time to hop into Logic mode and make some more connections, so do so.
- Connect Popped balloon with Flag with bullet hole to complete this investigation.
- After the investigation, you'll meet a new character, and be introduced to Prosecutor's Gambit's new mechanic: Mind Chess.
Episode 1: Part 1 Mind Chess
Welcome to Miles Edgeworth's Mind Chess, a new mechanic that adds a bit of time pressure to your conversational sparring. During Mind Chess, you'll see a timer at the top of the screen ticking down, and when it expires, your opponent will grow impatient and cut off the conversation. Your objective - the information you want to wheedle out of them - is displayed at the bottom of the screen.
Your objective is to select the correct response based not just the content of the conversation but the mood of the opponent at the moment in the timeline. Making the wrong choices incurs a time penalty as well as a health hit. Making the right choices breaks an opponent's mental chess pieces, with your eventual goal to defeat their Queen.
In general, you'll want to wait an opponent out when their temper's flaring by choosing to "bide your time," then press the offensive when they seem vulnerable to refill the timer and move on.
If you feel pressured by the ticking clock, note that the timer will pause when characters are speaking. You can also enter the options menu to halt the timer until you're ready to make a choice.
Mind Chess vs. Tabby Lloyd
- Choose your only option for now, "What is it that you do?"
- The subject's agitated. Choose "Bide your time."
- Choose "What was that about ‘scoops'?"
- Choose "Were you at the scene of the crime?"
- Bide your time.
- Choose "You heard gunfire, did you?"
- Choose "Where's the record of your reporting."
- Choose "You must have a record of your reporting."
- Time to deploy your clue - a more forceful tactic - by choosing "You must have a record of your reporting!"
- Bide your time.
- Choose "Play me that tape!"
- You'll receive Ms. Lloyd's Tape evidence.
- Pinpoint the open ground near the bottom left side of the audience stand and Present it.
- You'll receive the Bullet Trajectory evidence.
Episode 1: Part 1 Investigation Phase 2
- You'll resume your investigation at the Gourd Lake - Spectator Area.
- Move around and begin examining things. Check out the trash can nearby.
- You'll zoom in on a purse. Rotate it and examine the clasp that says "Pipe."
- You'll receive the Security Plan evidence, as well as the Six-shot revolver Fact.
- You'll examine the revolver in detail. Examine the revolver's chamber, and the front of the large tube-like attachment on top of the barrel to receive the Laser sight Fact and the Revolver Evidence.
- Speak to the cameraman near the stage.
- You'll zoom in on a photo. Point to the red dot on the President's forehead, hit the "Deduce" button, and Present the Newspaper Clipping to receive the Red birthmark Fact and Kay's Photograph evidence.
- In Logic, connect Laser sight to Red "birthmark" to update the Revolver evidence.
- During the scenes you'll receive updates to Kay's Photographs, giving you more photos to examine.
- Choose "Before the shooting."
- Point to the strange laser beam emanating from the person in the red hoodie in the lower left and Present it.
- Choose "After the shooting."
- Locate the red hoodie-wearer, who is visible in the gap between a running figure in a brown top and the person with a black tote bag in the foreground. Present them.
- Move to and examine the Samurai Dogs food stand on the right side of the screen.
- There is a small red cloth peeking out from under the stand. Examine it to receive the Red Raincoat Evidence.
- Examine the raincoat in detail, highlighting the inside-out sleeve and the small object to the lower right (near the raincoat's left sleeve) to receive the Red button and Raincoat sleeve Facts.
- Dip into Logic mode and connect the Red button and Raincoat sleeve Facts to examine the raincoat in detail.
- Examine the side of the coat to open it and reveal a bloodstain that can be examined, updating the Red Raincoat evidence and closing out the investigation stage.
Episode 1: Part 1 Confrontation
- Following the Investigation, you'll be introduced to Confrontations, which function quite similarly to cross-examination in regular Ace Attorney games. You can have Gumshoe give you a tutorial if you need one.
Rebuttal: Doe's Deposition
- Present the Red Raincoat on the second statement.
Rebuttal: Doe's Deposition, Pt. 2
- Press on the third statement, to receive a new fourth statement.
- Present the Security Plan on the new fourth statement.
- When prompted, present Ms. Lloyd's Tape, then present Tabby Lloyd's Profile.
Rebuttal: Ms. Lloyd's Testimony
- Present Kay's Photographs on the third statement.
- Point to and Present the President's raised arm.
- Choose "John Doe" to close this Confrontation Phase and bring you to a checkpoint.
Episode 1: Part 2 Investigation Phase 1
- After a wild sequence of events, you'll find yourself in the Zheng Fa Presidential Plane, ready to investigate the latest twists in the case.
- Begin by examining the body.
- Check the visible gunshot wound to receive the Bullet through the body Fact and the Crime Scene Notes evidence.
- Check on the briefcase to receive the Bulletproof Attache Case evidence.
- Examining the gun in the body's right hand nets you the Rook's gun fact.
- Connect Rook's gun to Six-shot revolver in Logic mode to gain some insight about the weapons you've encountered so far, updating the Revolver evidence.
- Check on the desk to the right of the screen, zooming in and examining the black vest to obtain the Bulletproof vest Fact.
- Examining the blue document folder will cause you to zoom in. Pinpoint either the knight or rook chess pieces (the horse or the castle, in case you're not familiar with chess) and hit the "Deduce" button, then present the Security Plan to receive the Knight's position Fact, and update the Security Plan evidence.
- Connect the Bulletproof vest to Bullet through the body in Logic mode to obtain the Bulletproof Vest evidence.
- Check on the bank of monitors in the upper right of the screen, and point at the strange stuffed toy in the center-left monitor to receive the Security Monitors evidence.
- You'll trigger a series of scenes that awards you with the Calling Card evidence and closes this investigation phase.
Episode 1: Part 2 Mind Chess
- Upon closing the investigation, you'll engage in a Mind Chess duel with none other than Zheng Fa's President himself.
Mind Chess vs. Di-Jun Wang
- Choose "So who will take over the case?"
- Choose "Bide your time."
- Choose "Bide your time" again.
- Choose "Explain to me why I'm off the case."
- Choose "Are they related to our current location?"
- Choose "Are things getting too hot for you?"
- Choose "You've overplayed your hand."
- Choose "Bide your time."
- Choose "Bide your time" again.
- Choose "Does that rule really apply here?"
- Choose "Bide your time" yet again.
- Choose "She fired at you from outside the plane?"
- After the exchange you'll be kicked straight into a Confrontation.
Episode 1: Part 2 Confrontation
- Having bested the President himself in rhetorical gamesmanship, it's time to take the head of state's testimony.
Rebuttal: President Wang's Testimony
- Present the Steel Samurai Balloon on the third statement.
- Choose "Yes, it does."
- When prompted, Present the Bullet Trajectory evidence.
- When prompted, Present Bronco Knight's Profile to receive an update to the Bullet Trajectory evidence.
- Present Kay's Photographs.
- Point to and highlight the yellow-and-gold-striped flag and Present it.
- Choose "Is not the assassin," and receive the Knight shot the balloon Fact.
- Connect Knight's position to Knight shot the balloon in Logic mode, and you'll receive the Change of plans Fact.
- Connect Change of plans to Assassination attempt in Logic.
- Present the Bulletproof Attache Case when prompted.
- Subsequent scenes will also update the Bulletproof Vest evidence.
Rebuttal: Knight's Gambit
- Present the Revolver on the fifth statement.
- Present Bronco Knight's Profile.
- Choose "Not in my possession."
- Present the Security Monitors.
- You'll receive the Bloody Bullet evidence.
Rebuttal: Knight's Counter
- Press on the first statement.
- Choose "The gun."
- Present Bronco Knight's Profile, which will update Revolver to Mr. Knight's Revolver.
- Present Mr. Knight's Revolver on the second statement.
Rebuttal: Knight's Counter, Pt. 2
- Press on the third statement.
- Present Mr. Knight's Revolver on the fourth statement.
- Choose "Fingerprints."
- Rotate the gun and click on the cylinder to swing it out, then pinpoint the bullets in the cylinder to clear the case.
- Present the Calling Card as the episode ends.
Episode 2: The Captive Turnabout walkthrough
- Part 1 Investigation
- Part 1 Mind Chess
- Part 1 Confrontation
- Part 2 Mind Chess
- Part 2 Confrontation Phase 1
- Part 2 Investigation
- Part 2 Confrontation Phase 2
- Part 3 Investigation
- Part 3 Confrontation Phase 1
- Part 3 Re-creation
- Part 3 Confrontation Phase 2
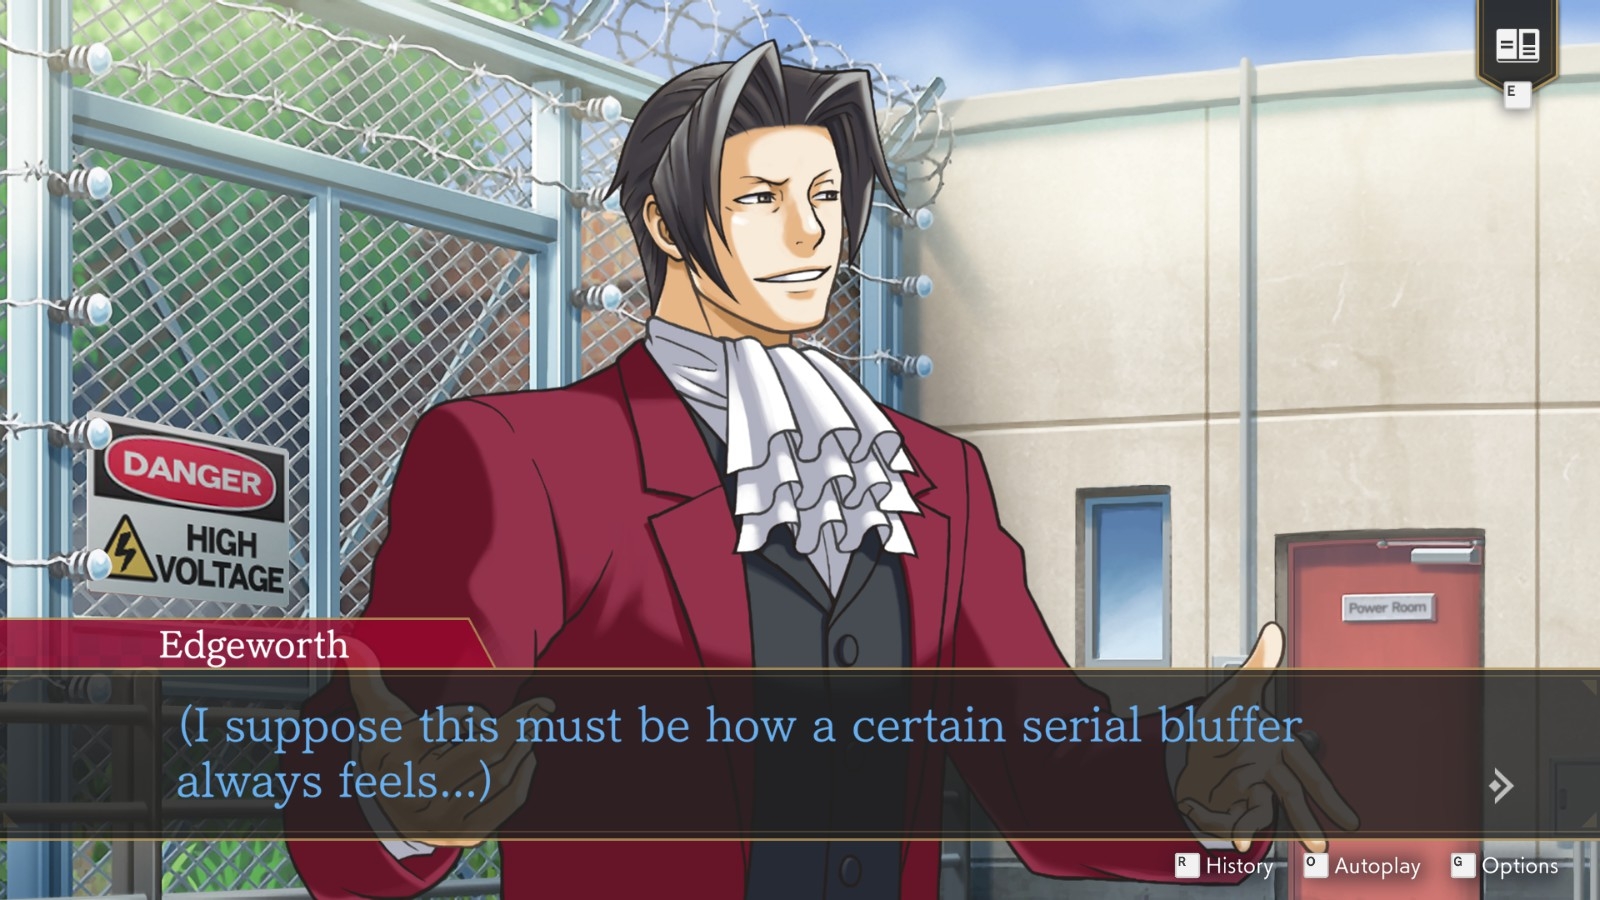
It's prison time for everyone's favorite prosecutor, as a bizarre murder rocks an incarceration facility, featuring a familiar face from the previous episode!
Episode 2: Part 1 Investigation
- You'll begin the episode in a place near and dear to the hearts and minds of Ace Attorney fans - the Detention Center - Visitor's Room, awaiting a perpetrator that became a victim.
- As you begin the investigation, you'll receive the Building Layout evidence.
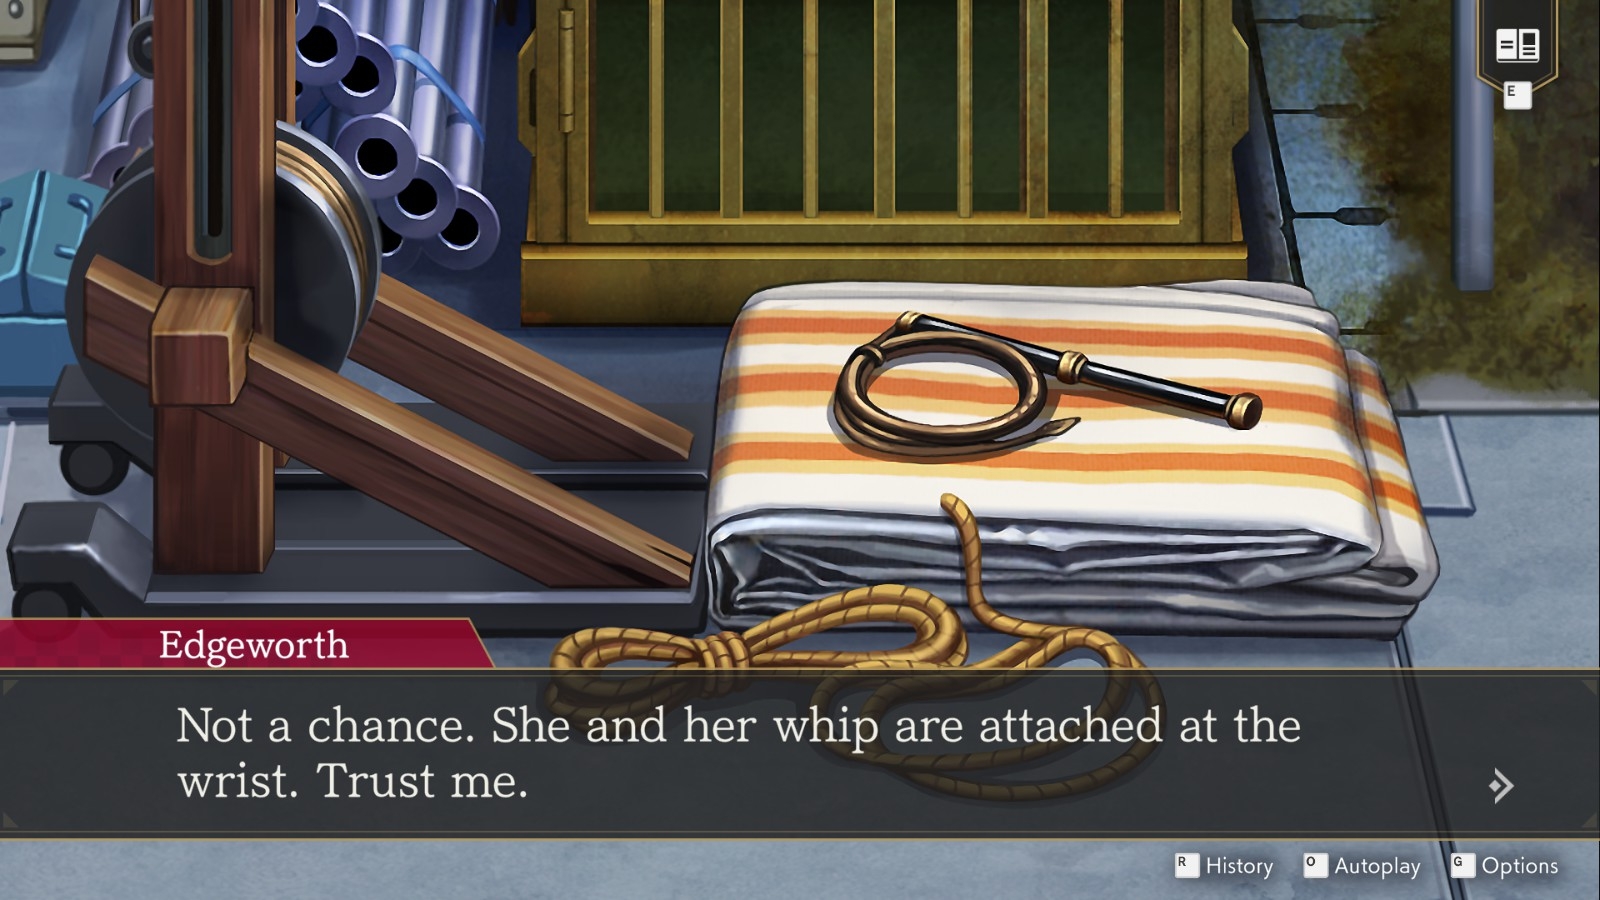
- Examine the crane-like assembly in the center of the room to zoom in.
- Scroll down and check out the orange-striped sheets folded at the foot of the crane to receive the Pile of tarps Fact.
- Examine the body to receive the Mr. Knight's Body evidence.
- Examine the black-and-white checked box just above the body to receive the Pocket Chess Set evidence.
- Examine the pink stained glove near the victim's head to zoom in.
- Rotate the glove and highlight the text on the back, and the bloodstain on the fingers to receive the Rubber Glove evidence.
- Examine the rope and tarp on the victim's legs to get the Rope evidence and the Bloody tarp Fact.
- Examine the victim's hand.
- Hop into Logic mode and connect Pile of tarps to Bloody tarp to get the Bloody Tarp evidence.
- Choose "The murder weapon."
- Meet a new character, Eddie Fender, and talk to him about his available topics.
- While speaking about "This room," choose any option you like when prompted. You'll receive the Door Sensors evidence.
- Return to the body, examine it again, and point to the pink glove, then hit "Deduce" and Present the Door Sensors to close this Investigation phase.
Episode 2: Part 1 Mind Chess
- You'll receive an update to the Door Sensors evidence, then get into some Mind Chess against a hardened inmate.
Mind Chess vs. Rocco Carcerato
- Choose "Tell me about your day so far."
- Choose "Bide your time."f
- Bide your time again.
- Choose "I thought you took it easy?"
- Choose "What were you doing?"
- Bide your time yet again.
- Choose "How do you know my profession?"
- Choose "What was it like around here?"
- Choose "Don't play dumb!"
- Choose "You were exercising!"
- Choose "‘Already', you say?"
- You'll have your opponent in check and ready to give some proper testimony.
Episode 2: Part 1 Confrontation
Rebuttal: The Incident
- Present Mr. Knight's Body on the third statement.
- Choose "There is a problem," and a set of cutscenes will shut down the Confrontation.
Episode 2: Part 2 Mind Chess
- Though a Mind Chess bout will take up the majority of this section, you'll begin in the Detention Center, ready for some questioning and conversation.
- Talk to Simeon and run through his available topics.
- Present the Pocket Chess Set to get an update to its description and unlock a new topic.
- After being deputized, you'll move to the Prison - Corridor to look for a witness.
- Speak to the prisoner in the third cell from the door.
- You'll be directed to the Workshop door in the upper right.
- Speak to the prisoner, and prepare for Mind Chess.
Mind Chess vs. Frank Sahwit
- Choose "What's your connection to this incident?"
- Choose "A good person who's in prison?"
- Bide your time.
- Choose "‘The person who found the body,' you say?"
- Choose "Tell me about the day of the incident."
- Choose "What were you doing?"
- Choose "Were they screaming?"
- Choose "Tell me about the day of the incident."
- Choose "How were things in the prison?"
- Choose "You said you heard a scream!"
- Bide your time.
- Choose "A scream would certainly frighten them."
- Choose "When did you hear the scream?"
- Bide your time again.
- Choose "You weren't actually at the show, were you?"
- Choose "Who did you hear screaming?"
- Choose "You weren't at any show!"
- Choose "Wait, it wasn't the victim who screamed?"
- Choose "Because you're the one who found the body!"
Episode 2: Part 2 Confrontation Phase 1
- Now that he's ready to talk plain, it's time to examine Frank's testimony.
- You'll receive the Prison Roll Call evidence as Frank gives his initial statement.
Rebuttal: Finding the Corpse
- Present the Door Sensors on the second statement.
Rebuttal: Finding the Corpse, Pt. 2
- Press on the third statement.
- Choose "There is a problem," when prompted to receive the Black Dog evidence and a new fifth statement.
- Press on the new fifth statement to receive a new sixth and new seventh statement.
- Present Mr. Knight's Body on the new seventh statement.
- When prompted, point to "Workroom A" on the map and Present it.
- Present the Rubber Glove when prompted.
- You'll receive Mr. Sahwit's Bracelet as evidence.
- You'll also receive updates to the Rubber Glove and Building Layout evidence pieces as the Confrontation closes.
- Move to the newly unlocked Maximum Security section through the door in the lower right.
Episode 2: Part 2 Investigation
- Now in the Prison - Maximum Security section, you'll continue looking for more clues.
- Speak to the prisoner, Kanis, about his topics.
- You'll receive the Dog Chess Piece evidence.
- After the conversation, you'll receive the Prison Search evidence.
- The subsequent cutscenes will add an update to the Building Layout.
- You'll move to the Detention Center - Holding Cell to investigate in further detail.
- Examine the table in the holding cell to zoom in.
- Check out the sheet of paper, then hit Deduce on it and Present the Dog Chess Piece to receive the Chess Diagram evidence.
- Examine the bed to zoom in.
- Examine the streaks on the floor and the newspaper to get the Wiped floor and Torn newspaper facts.
- Hop into Logic mode and connect Wiped floor to Torn newspaper to get the Wiped Floor Evidence.
- Examine the mirror in the upper left of the cell to close the investigation.
- When prompted, point to and Present the Holding Cells area to receive the Security Camera Footage.
- Present the Wiped Floor when prompted to receive an update to the description.
- You'll return to the Detention Center - Corridor to chat up the guards.
- Talk to the guards in the room.
- The guard in the locker will add the Missing Guard Uniform to your organizer.
- You'll also receive Mr. Knight's Cell Key after the cutscenes, just as a new Confrontation brews.
Episode 2: Part 2 Confrontation Phase 2
- It's time to extract some info from Winner about some key bits missing from the picture.
Rebuttal: Reason for Arrest
- Press on the second statement to revise it.
- Present the Pocket Chess Set on the revised second statement.
- Prior to the next topic, you'll first be prompted to examine the chess set in detail.
- Examine the set's lock to open it.
- Examine the inside of the top cover to receive updates to the Pocket Chess Set and add the Security Gates evidence.
Rebuttal: The Whereabouts of the Murder Weapon
- Press on the fourth statement.
- Choose "There is a problem."
- Present the Prison Search when prompted.
- Present the Security Gates.
- Present the Black Dog when prompted to close the Confrontation.
Episode 2: Part 3 Investigation Phase 1
- You'll return to the Detention Center - Visitor's Room to speak with Saint and uncover new clues.
- Talk to Simeon about his available topics.
- You'll move to a new location, the Prison - Yard area, to gather new clues.
- You'll receive an update to the Building Layout evidence.
- Check out objects around the yard, including the sharp wire fence to the left.
- Speak to Regina about her topics, then speak to Warden Laguarde about her topics.
- Find and speak to Sahwit at the other side of the yard and run through his topics, as well.
- Present the Rubber Glove to Sahwit to get an update to the evidence.
- Examine the well in the upper-right area, with the piled-up striped tarps.
- Over the course of the next few scenes you'll move around to various locations from the Prison - Corridor.
- When prompted, pick "Missile."
- You'll move to Maximum Security, and be prompted to examine everything in the cell.
- You'll move to a different cell back in the Corridor.
- Examine everything, including the punching bag.
- After the scenes, you'll end up in the Detention Center - Holding Cell area.
- Mr. Knight's Body will receive an update.
- You'll also receive the Tunnel Prints evidence, and an update to the Wiped Floor will close out your investigation phase.
Episode 2: Part 3 Confrontation Phase 1
- You'll return to Prison - Maximum Security to speak with Kanis, but wind up in a Confrontation.
Rebuttal: How Knight Wound Up in the Prison Proper
- Press on the second statement.
- Choose "Press further."
- Present Mr. Knight's Cell Key when prompted.
- Present the Wiped Floor.
- Present the Tunnel Prints.
- You'll receive the Autopsy Report Evidence.
- Choose "The dog jumping on somebody."
- Point to and Present the Maximum Security area.
- Present the Black Dog.
- You'll receive the Chisel evidence.
Rebuttal: Kanis' Defense
- Present the Chess Diagram on the second statement.
- You'll receive an update to the Chess Diagram.
- You'll also receive Mr. Kanis' Bells into Evidence.
- Present the Pocket Chess Set to receive an update.
Minigame: Video Analysis
- At this point you'll be introduced to a small minigame allowing you to scrub back and forth through security footage.
- In essence, you can play and pause clips of video, then zoom into different quarters of the screen and examine curious elements.
- Pause the video at about 6:42:20, or when the small black shape jumps at the man.
- Zoom in on the upper-right quarter of the screen, pinpoint the shape, and Examine it.
- Choose "A bear," to update the Tunnel Prints evidence.
- Pause again at around 6:42:24, or when a shape appears in the mirror visible in the top-left.
- Zoom in to the top-left quarter and examine the mirror.
- Present the Missing Guard Uniform when prompted.
- Present Rocco Carcerato's Profile.
- Present the Rubber Glove.
- When prompted, point to and Present the video's time stamp. The Security Camera Footage will be updated.
Rebuttal: Around the Time of Discovery
- Press on the third statement to get a new fourth statement.
- Present Mr. Knight's Cell Keyon the new fourth statement.
- Present the Wiped Floor when prompted.
- You'll receive an update to Mr. Knight's Cell Key.
- Present Mr. Knight's Body.
Episode 2: Part 3 Re-creation
- You'll return to the Prison - Yard area, only to find it changed beyond recognition.
- It's here you'll be introduced - or reintroduced, if you played the previous game - to Re-creation, which recreates a scene and overlays new clues from a different point in time.
- At this point, you can investigate as normal, finding clues and updating the re-creation to reflect new data.
- Once the re-creation is set, move to the well and examine it, as well as the the large 30-pound weight to the right, the pulleys, rope, and tarps to get the 30-pound weight and Items around the well Facts.
- Walk left and examine the elephant to receive the Azea the elephant Fact.
- The re-creation will be updated after the subsequent scenes.
- Examine the stage and the elephant to get the Mr. Saint's big moment Fact.
- When the recreation is updated, examine the area covered by static (near the well) to gain the ability to switch between two different versions of the re-creation by speaking with your assistant (in this case Kay) and selecting the "Switch re-creations" conversation topic.
- Don't switch yet, though. Move past the stage to the left and examine the cart full of fruit to get the Disappearing apples fact.
- Speak to Gumshoe to receive the Metal detector fact.
- Hop into Logic mode and connect Mr. Saint's big moment to Items around the well to get the Pulling force Fact and Mr. Saint's Trick evidence.
- In Logic, connect 30-pound weight to Pulling force.
- Choose "How heavy it is," when prompted to get the Insufficient weight Fact.
- Connect Metal detector to Insufficient weight.
- You'll play a brief minigame where you can pilot Gumshoe around using a metal detector.
- Basically, when you're near something that's metal, the needle will move more and the beeping will increase in frequency.
- Move towards the grassy pond in the lower left of the screen and hit the Examine button when the detector is set off.
- You'll update the re-creation again.
- Examine the well to zoom in.
- Point at the rope and hit Deduce, then Present Mr. Saint's Trick.
- Present the Rope.
- Present the Mr. Knight's Body.
- Present the Bloody Tarp.
- You'll receive the Body used as weight Fact.
- Mr. Saint's Trick will be updated, as well.
- Return to logic and connect Azea the elephant and Disappearing apples.
- You'll receive the Basket of apples fact.
- In logic, connect Basket of apples to Body used as weight.
- When prompted, present the Security Camera Footage.
- You'll receive the Breakers evidence, right on time for a Confrontation.
Episode 2: Part 3 Confrontation Phase 2
- You'll need to speak once more to Gavèlle and Winner and debunk more of their theories.
Rebuttal: Judge Gavèlle's Theory
- You'll receive an Autopsy Report update.
- Present Mr. Saint's Trick on the fourth statement.
Rebuttal: Why Saint is the Suspect
- Press on the third statement.
- When prompted, Present the Security Camera Footage.
- When prompted, Present the Breakers.
- Present Fifi Laguarde's Profile.
- Present Mr. Knight's Body.
Rebuttal: I Didn't Do It
- Press on the fifth statement.
- Point to and present the Yard area.
- Choose "An accomplice."
- Present Mr. Sahwit's Bracelet.
- Choose "There's definitely more."
Rebuttal: My Truth
- Press on the fourth statement to receive a new fifth and sixth statement.
- Present the Pocket Chess Set on the new fifth statement.
Rebuttal: My Truth, Pt. 2
- Press on the fourth statement to receive a new fifth statement.
- Present the Chess Diagram on the new fifth statement.
- Choose "In order to get Kanis transferred."
- Present Mr. Kanis' Bells.
- Choose "Object."
- Point to and Present the Yard.
- Scroll left, point to and Present the Alligator.
- Present the Pocket Chess Set to close the episode.
Episode 3: Turnabout Legacy Walkthrough

- Part 1 Investigation
- Part 1 Confrontation
- Part 2 Investigation
- Part 2 Confrontation
- Part 3 Mind Chess
- Part 3 Confrontation
- Part 3 Re-Creation
- Part 4 Investigation
- Part 4 Confrontation
- Part 5 Investigation
- Part 5 Confrontation Phase 1
- Part 5 Mind Chess
- Part 5 Confrontation Phase 2
It's time to see double when it comes to both your caseload and time frame, with one side covering defense a generation in the past and another side covering prosecution in the present!
Episode 3: Part 1 Investigation
- This case takes place over two time periods, with one following Miles in the present, and another following his father in the past.
- You'll begin the episode in the past, visiting the Detention Center - Visitor's Room, in the shoes of none other than Gregory Edgeworth, Miles' dear old dad and a veteran defense attorney.
- Talk to the defendant, Samson Tangaroa, and run through his available topics.
- You'll move to the Contest Venue - Fountain Room, then transition to Tangaroa's Room to begin your own investigation.
- Examine objects around the room, then zoom in on the large ship .
- Examine the body outline, and you'll receive the Sound of something breaking Fact and the Seal evidence.
- Note here that as a defense attorney, Gregory uses the Court Record to collect pieces of evidence, rather than the Organizer. There's no functional difference, though.
- Scroll right and examine the debris under the ship to get the Broken stand Fact.
- You'll view a photo and receive the Blunt force trauma Fact and the Crime Scene Notes evidence.
- Zoom in once more on the ship and hit Deduce on the missing corner of the bottom of the treasure box (roughly where the head of the body outline is located), presenting the Crime Scene Notes to get them updated.
- Get into Logic Mode to connect Broken stand to Sound of something breaking to get the Why did it break? Fact (more of a question, really).
- Examine the oven and the teapot nearby to receive Mr. Tangaroa's Teapot.
- Talk to the man in red, Carmelo Gusto, and run through his available topics.
- For your trouble, you'll receive the Contest Rules evidence.
- Your attention will be drawn to the framed picture on the wall, near the table with a set of candles. Zoom in and examine it.
- Pinpoint the lower left corner where one of the leaf-shaped flourishes should be and Present it to receive the Damaged creations fact.
- Examine smudge on the left center of the frame to receive the Frame Finger Marks evidence.
- Hop into Logic mode and connect Why did it break? To Damaged creations.
- Examine the newly-revealed panel behind the candlestick.
- Speak to the police officer on the left side of the room, near the small water channel to complete the investigation.
Episode 3: Part 1 Confrontation
- Over subsequent scenes you'll receive updates to Crime Scene Notes, add the Mansion Key, and move into a very brief confrontation with the much-younger Detective Badd.
Rebuttal: Why I Think Tangaroa Did It
- Present the Crime Scene Notes on the third statement.
Episode 3: Part 2 Investigation
- You'll gain control in the Contest Venue - Scone's Room, ready to seek clues from other participants in the incident.
- Examine the castle to open it up, and check out the insides to receive the Runny cream fact.
- The inside will also contain blue bolts of rolled-up fabric and rock-like sculptures, which yield the Rock crystal stands fact.
- Examining the tops of the castle's turrets will net the Hexagonal indentations fact.
- Connect Rock crystal stands and Hexagonal indentations in Logic to gain insight into their nature and purpose.
- The scene will change slightly. Examine the rock salt lamps to receive the Bloody lamp fact.
- Examine an elf on the shelf, seated in rear corner of the room (the one missing a banner overhead) to receive the Luminous Cloth evidence.
- Check the control panel in the rear left corner (near the orange light) to receive the High temperature fact.
- In Logic Mode, connect Blunt force trauma to Bloody lamp to get the Salt Lamp evidence.
- Examine the castle again, then point at one of the lamps, hit Deduce, and Present the Contest Rules to receive the Scone's rulebreaking fact.
- Connect Runny cream with High temperature in Logic mode to receive the Fake confections fact.
- Connect Fake confections with Scone's rulebreaking to add Fake Confections as evidence to the Court Record.
- Speak to Scone and run through her topics to receive the Confectionery research and Lack of knowledge facts.
- Connect Confectionery research and Lack of knowledge in Logic to close the investigation.
Episode 3: Part 2 Confrontation
- Your clue-hunting in Scone's room has led you into an exchange with legendary prosecutor Manfred von Karma himself!
Rebuttal: The Murder Weapon
- Present the Luminous Cloth on the fifth statement.
- When prompted, present the Frame Finger Marks.
- Present the Fake Confections to kick off a number of scenes and close the Confrontation.
Episode 3: Part 3 Mind Chess
- You'll return to the present day, back in Miles' shoes in the Zodiac Hall - Winter Wing, ready to kick off the case they're tackling involving some of the very folks that Gregory looked into a generation ago.
- Before you begin, you'll receive the IS-7 Incident Case File and Gallery Pamphlet evidence.
- Check the control panel in the rear left of the room, the ice statues in the center, and the ice blocks.
- sSome trivia: You may recognize a few cameos from previous Ace Attorney games in the area!
- During the process you'll receive the Winter Wing Photo.
- After the cutscenes, you'll get into a round of Mind Chess with a familiar face.
Mind Chess vs. Larry Butz
- Choose "Why are you here?"
- Bide your time.
- Bide your time again.
- Bide your time once more.
- Bide your time yet again.
- Choose "So you're here for the Gemini sculpture?"
- Choose "What did you do once you got here?"
- Choose "You didn't get a pamphlet?"
- Choose "You didn't pay upon entry?"
- Choose "Ms. Bound wasn't at the reception desk?"
- Choose "You know a lot about the Winter Wing…"
- Choose "Did you enter the Winter Wing?"
- Choose "You mean you didn't go in?"
- Choose "The victim prevented you from entering?"
- Choose "What did you see in the Winter Wing?"
- Choose "So what became of your sketch?"
- Choose "So you saw something ‘totally terrifying,' did you?"
- When prompted, Present the Gallery Pamphlet.
- You'll receive the Pisces Statue Sketch after the Mind Chess session closes.
Episode 3: Part 3 Confrontation
- After the discussion with Larry, you'll be in the Zodiac Hall - Autumn Wing for a bit of light looking around before a confrontation with a figure from the previous episode.
- You'll receive the Used Blowtorch evidence.
- You'll receive the Luminous Cloth into this time period's evidence locker.
- After the scene you'll also receive Poison Gas Ingredients.
Rebuttal: Winner's Winning Deduction
- Present the Poison Gas Ingredients on the second statement.
- Present the Pisces Statue Sketch when prompted.
- Point to and present the pink puddle at the foot of the statue to close the Confrontation.
Be careful not to accidentally highlight the foot of the stanchion.
Episode 3: Part 3 Re-Creation
- When prompted, Present Carmelo Gusto's Profile.
- You'll be prompted to investigate a re-creation of the Zodiac Hall - Autumn Wing.
- Examine the Pisces case on the left.
- Present the Used Blowtorch.
- Present Judy Bound's Profile to close this quick re-creation session.
Episode 3: Part 4 Investigation
- You'll return to the past with Gregory and Young Eddie to pick up where a now rather soggy thread left off - In the Contest Venue - Fountain Room.
- Over the course of the conversation, you'll receive Chocolates, Mr. Frost's Room, and Instant Camera as pieces of evidence.
- You'll also receive Ms. Scone's Statement.
- When prompted, Present the Seal and Mr. Tangaroa's Teapot.
- Choose "A famed sculptor!"
- Present the Instant Camera to kick off a series of scenes.
- You'll return the next day to the Detention Center - Visitors Room for a brief talk.
- Present the Chocolates.
- Run through Tangaroa's topics.
- You'll move back to the Contest Venue - Fountain to continue searching for clues.
- Speak to the officer kneeling at the rim of the fountain.
- Present Artie Frost's Profile when prompted to gain the Victim's Blood clue.
- Speak to Judy in the lower-right corner to receive the Semifinal Entries and Ultimate Cookbook clues.
- Talk to Judy about her topics, and when you finish, you'll complete the investigation, then confront von Karma.
Episode 3: Part 4 Confrontation
Rebuttal: Gusto and Frost's Connection
- Present the Semifinal Entries on the second statement.
Rebuttal: Gusto and Frost's Real Connection
- Press on the third statement to revise and add a new fourth statement.
- Present Ms. Scone's Statement on the new fourth statement.
- Choose "Make the ice the day before the final."
- You'll receive the Family Photo evidence.
- You'll receive the No autopsy report, Blood in the fountain, and Missing victim's blood Facts.
- In Logic mode, connect Missing victim's blood to Blood in the fountain to obtain the Body moved aside? Fact.
- Connect No autopsy report to Body moved aside.
- When prompted, present Victim's Blood to close the confrontation and whisk you back to the present.
Episode 3: Part 5 Investigation
- Back in the present, you'll finish Eddie's story in the Zodiac Hall - Fountain Room.
- Prior to the start of the investigation you'll receive the IS-7 Incident Case File, Ultimate Cookbook, Frame Finger Marks, Salt Lamp and Family Photo evidence.
- When prompted, present Artie Frost's Profile.
- You'll also receive the Minty fragrance fact.
- Examine the tea serving tray on the left side of the room to zoom in on it.
- Check out the moon-shaped pot to receive the Teapot evidence and the The tea smells different… fact.
- You can speak to Judy at this point, but she won't have much to say.
- There's a brown puddle on the floor slightly to the north of the tea cart. Examine it to obtain the Ceramic Fragment.
- Speak to Larry on the right side of the screen and present the Ceramic Fragment to him.
- Run through Larry's topics to receive the Switched teapots fact and Larry's Sketches evidence.
- Enter Logic mode and connect The tea smells different… to Switched teapots to receive the Teapot's leftover aroma.
- Zoom in once more on the tea cart.
- Point to the cart's tablecloth, hit Deduce, and Present Larry's Sketches.
- Enter logic mode and connect Minty fragrance to Teapot's leftover aroma.
- Speak to Judy about her topics to receive Chocolates.
- Check out the fountain, and you'll receive the Gemini Case Analysis Results.
- Speak to Ms. Scon and run through her topics to receive the In the ultimate cookbook fact.
- You can unlock an additional topic by presenting her with the Luminous Cloth.
- Speak to Eddie and run through his topics to receive the Bound's actions fact.
- Hop into Logic and connect Bound's actions to In the ultimate cookbook.
- Move over to where Eddie is standing and examine the cart he's facing to add the Lift Cart to evidence and close this round of investigation.
Episode 3: Part 5 Confrontation Phase 1
After the latest investigation, it's time to get some testimony from one of the most pivotal figures of the last 18 years, and bring an end to a cross-generational cold case.
Rebuttal: Zodiac Hall
- Press on the third statement to receive a new fifth statement.
- Present the Gemini Case Analysis Results on the new fifth statement.
Rebuttal: What I Did That Day
- Press on the fourth statement.
- Choose "This was the moment."
- Point to and Present the tea serving tray cart.
- Present the Lift Cart when prompted.
- You'll receive the Statutes of Limitations Book evidence.
- Present the Winter Wing Photo.
- Point to and present the hooded figure in the case to the left.
- Present the Luminous Cloth.
- Present Larry's Sketches.
- Choose "On Ms. Bound's person."
- Choose "To find the true killer."
- Choose "Make the accusation."
- Present Carmelo Gusto's Profile to close this line of questioning, kick off a number of scenes, and resume testimony.
Rebuttal: The Committee's View
- Press on the fourth statement to receive new fifth and sixth statements.
- Present the Gemini Case Analysis Results on the new fifth statement.
- During the subsequent scenes, you'll receive the Murderer's motive, Cooperation ended?, Wanted the cookbook?, and Remaining exposures facts.
- Enter Logic mode to make a few connections, starting with Cooperation ended? to Murderer's motive to receive Timing of the murder.
- Now connect Wanted the cookbook? and Remaining exposures to receive the Afternoon tea fact.
- Finally, connect Afternoon tea to Timing of the murder to close this confrontation and kick you into a round of Mind Chess.
Episode 3: Part 5 Mind Chess
Mind Chess vs. Carmelo Gusto
- Choose "Why did you collaborate with Mr. Frost?"
- Bide your time.
- Choose "Wake up!"
- Choose "Did you want just more than the title?"
- Bide your time.
- Bide your time again.
- Choose "So you were interested in the book, too?"
- Choose "Did you need it to help you make your sweets?"
- Choose "You know more than you're letting on."
- Choose "Did you know what the book was really worth?"
- Chose ""Except, you knew that's not what's really in there!"
- Choose "You needed medicine, didn't you?"
- Choose "Tell me more about your son."
- Bide your time.
- Choose "So he wasn't too sick to join you?"
- Choose "Was the book necessary for him to get better?"
- Choose "But you cared about Mr. Tangaroa's work!"
- Choose "What was the name of your son's condition?"
- Choose "But it wasn't life-threatening was it?"
- Choose "Did he have a taste disorder?"
- Choose "You were sick yourself, weren't you?
- Choose "But weren't you working with Mr. Frost?!"
Episode 3: Part 5 Confrontation Phase 2
Rebuttal: My Entry for the Final
- Press on the fourth statement.
- Choose "Ask about the semifinal" to add a new fifth statement.
- Present the Family Photo on the new statement.
- Choose "To taste your creations."
- Present the Salt Lamp.
- Choose "To obscure the time of death."
Rebuttal: Why You Can't Arrest Me
- Press on the second statement.
- Choose "His training in Zheng Fa" to have it revised.
- Present the Statutes of Limitations on the revised second statement.
- Choose "Raise an objection."
- Present the IS-7 Incident Case File.
- When prompted, choose the "Suspect Data" to close out this marathon episode.
- Present the Chocolates during the epilogue.
Episode 4: A Turnabout Forsaken Walkthrough
- Part 1 Confrontation Phase 1
- Part 1 Investigation
- Part 1 Confrontation Phase 2
- Part 2 Investigation Phase 1
- Part 2 Mind Chess
- Part 2 Investigation Phase 2
- Part 3 Confrontation Phase 1
- Part 3 Mind Chess
- Part 3 Confrontation Phase 2
Welcome to one of the most intense episodes in the series yet, as Edgeworth's career is put in jeopardy by an inquiry with the Committee for Prosecutorial Excellence!
Episode 4: Part 1 Confrontation Phase 1
- Waiting at the High Prosecutor's Offices - Room 1202, Edgeworth and Gumshoe await a meeting with the court.
- Speak to the new guest and run through her topics. You may need to prompt them more than once.
- You'll receive the Yatagarasu Pin, Jammin' Ninja Mask, Letter, Ticket Stub, and Magenta Flower evidence.
- After a few more scenes, you'll move to the Bigg Building - Viewing Platform for an interview of sorts.
- Prior to the testimony you'll receive the Bigg Building Pamphlet.
Rebuttal: My Entry for the Final
- Press on the third statement to have it revised.
- Press on the revised third statement to have it revised again.
- Present the Bigg Building Pamphlet on this re-revised third statement.
- You'll receive Kay's Recollections and close the confrontation.
Episode 4: Part 1 Investigation
- After the scenes you'll be in the Committee for Prosecutorial Excellence - Chamber, investigating a gruesome scene in the heart of the justice system.
- You'll receive an update to the Bigg Building Pamphlet.
- Speak to the uniformed officer to receive the Room security fact.
- Examine objects around the room, including the goddess statue and the bloodstains at its feet.
- You'll be cleared to examine the body. Do so, examining the stab wounds, the victim's clothes, their head, the fallen candle stand, the blue card in the body's hand, and the notepad beside the victim's leg, to receive the Candelabrum evidence and the Keycard fact.
- Hop into Logic and connect Keycard to Room security to receive the Keycard evidence.
- Examine the flower on the victim's jacket, then hit Deduce on it and Present the Magenta Flower for an update.
- After examining the body, the investigation will close, netting you the Coroner's Findings.
Episode 4: Part 1 Confrontation Phase 2
- You'll be drawn into a Confrontation once you're done investigating.
Rebuttal: Why I Think Kay Did It
- Present the Keycard on the third statement to receive the Keycard Record evidence and the Victim's Letter.
Rebuttal: Kay's Letter
- Present the Coroner's Findings on the fifth statement.
- When prompted, present the Keycard Record to close this brief (and consequential) Confrontation.
Episode 4: Part 2 Investigation Phase 1
- After the scenes you'll be relocated to the Bigg Building - Viewing Platform, investigating case leads (rather than new employment leads).
- Examine objects around the area. The cherry tree will net you Where Kay was standing and the nearby railing will get you the Railing, both as facts.
- Speak to Florence and Dr. Hertz on the right side.
- Try to move and you'll set off some scenes.
- Examine the TV beside where Florence and Hertz were standing to view the building from outside.
- Highlight the floor that's lit and hit Deduce, then Present the Bigg Building Pamphlet for the Is there a 51st floor? Fact.
- Speak to Kay about her topics to add The moon as a fact.
- In Logic mode, connect Railing to The moon to receive the Where Kay fell fact.
- Connect Where Kay was standing to Where Kay fell.
- Examine the tree once more, then focus on the small hatch door in the lower left of the screen to receive the Down the hatch? Fact.
- Connect Down the hatch? to Is there a 51st floor?
- You'll move to a mysterious, ?????? area (it's the Fifty-First Floor - Storeroom) to continue your clue hunt.
- Examine the money pile at the right side of the room to get the Lots of money fact.
- Check out the panel covered in masks in the upper left.
- Hit deduce on the empty space where a mask is missing and present the Jammin' Ninja Mask.
- Check out the table in the lower left and examine items on it for the Price tags fact and the Broken Plushie evidence.
- Examine the empty spot with the "240" tag, hit deduce on it, and present the Candelabrum.
- Enter Logic and connect Price tags to Lots of money.
- Examine the large statue in the center of the room.
- A new NPC should enter the scene.
- Speak to Lotta and run through her topics for the Masks and Ringleader's Appearance evidence, and the Auction entry and exit fact.
Episode 4: Part 2 Mind Chess
- Present Lotta with the Coroner's Findings to set off a Mind Chess match.
Mind Chess vs. Lotta Hart
- Choose "Let's talk about this reasonably."
- Bide your time.
- Choose "She was your apprentice."
- Choose "Tell me what you know."
- Choose "I know your apprentice pretty well."
- Choose "You have a scoop of some kind, don't you?"
- Choose "Is it related to the auction?"
- Choose "So you heard the sound of something, then?"
- Choose "Is it related to an incident of some kind?"
- Choose "You sneaking in is a problem!"
- Choose "So your scoop is about a murder?"
- Choose "But you did hear something, didn't you?"
- Choose "Were you really ‘in the middle' of the scene?"
- Bide your time.
- Choose "Tell me more about the incident."
- Choose "I thought you were ‘honester' than everybody?"
- Choose "You can prove it, can you?"
- Choose "There's still something you're not telling me!"
- Choose "You're definitely still hiding something!"
- You'll receive Ms. Hart's Picture and Ms. Hart's Statement into evidence and the Disappearing victim fact.
Episode 4: Part 2 Investigation Phase 2
- You'll resume investigating exactly where you left off.
- Armed with a new fact, dip into Logic to connect Disappearing victim with Auction entry and exit to change it into the Hidden body fact.
- Thanks to Ema's presence, you can now slather the room in fluorescent fluid.
- Spray the ladder from top to bottom, exposing a hand print.
- Examine the box covered in chains in the lower-left center of the room.
- Spray the inside of the box and examine the spot to receive the Clothes box blood Fact.
- Check out the elevator and spray near the edge of the platform for the Elevator Blood evidence.
- Pop into Logic and connnect Clothes box blood and Hidden body to add the Clothes Box evidence and close this investigation phase.
Episode 4: Part 3 Confrontation Phase 1
- You'll be drawn into a Confrontation once you enter the Center for Prosecutorial Excellence - Chamber.
Rebuttal: Franziska's Current Theory
- Present the Elevator Blood on the fifth statement.
- When prompted, choose "The weapon was removed here."
- You'll receive the Committee Chamber Blood evidence.
Rebuttal: Franziska's Latest Theory
- Press on the fourth statement to receive a new fifth statement.
- Present Ms. Hart's Statement on the new fifth statement.
- You'll receive the Red Raincoat evidence.
Episode 4: Part 3 Mind Chess
- After the events of the previous checkpoint, you'll be visiting the Detention Center - Holding Cell for a bit of catch-up prior to a round of Mind Chess.
- Talk to the visitor about her topics.
- Examine the objects in the room.
Mind Chess vs. Excelsius Winner
- Choose "Why the rush to arrest Kay?"
- Bide your time.
- Bide your time again.
- Choose "‘Coming along nicely'...?"
- Choose "You were the one calling the shots, weren't you?"
- Choose "I don't need that badge anyway!"
- Choose "How much time did you spend investigating?"
- Bide your time yet again.
- Bide your time some more.
- Choose "‘The decision has been made'...?"
- Choose "That you planned to have her arrested!"
- Choose "I still have questions!"
- Choose "What grounds did you have?"
- Bide your time.
- Choose "You're hoping to avoid talking about the case."
- Bide your time.
- Choose "I still have questions!"
- Choose "Who gave the order?"
- Choose "You remembered the evidence pretty well!"
- Choose "You, of course!"
- Choose "You seem to know an awful lot about the case."
- Bide your time.
- Choose "But you keep saying how busy you are…"
- Choose "Did you see exactly where she was found?"
- Choose "Tell me what you know about Kay."
- Choose "Yet you know every other detail about the case!"
- Bide your time.
- Choose "‘Load her down with'...?"
- Choose "Kay is innocent!"
- Choose "Except I know it wasn't her!"
Episode 4: Part 3 Confrontation Phase 2
- It's time to let the council determine your fate in the Center for Prosecutorial Excellence - Chamber.
Rebuttal: The Committee's View of the Case
- Present Ms. Hart's Picture on the fifth statement.
- Point to and present the left hand of the figure shown in the photo.
- Choose "Survived the attack."
Rebuttal: What You're Forgetting
- Present the Red Raincoat on the third statement.
- Present the Coroner's Findings.
Rebuttal: Know Your Place
- Press on the fourth statement.
- Present the Yatagarasu Pin.
- Rotate the plushie and examine its right horn to get an update to Broken Plushie.
- Present the Coroner's Findings when prompted.
- Select the phrase "burn mark" and Present it.
- Choose "The ringleader was the killer."
- Present Committee Chamber Blood.
- Choose "I don't."
Rebuttal: The So-Called Mistake in the Report
- Press on the third statement to revise it.
- Present the Coroner's Findings on the revised third statement.
- Choose "She is a co-conspirator."
- Choose "Maintain attendee numbers."
- Present the Clothes Box when prompted.
- Choose "She had stolen the victim's clothes."
- You'll receive Nurse Niedler's Statement.
- You'll receive an update to the Autopsy Report.
- Choose "The auctioneer's hammer."
- Present Ms. Hart's Statement when prompted.
- During the scenes you'll receive the IS-7 Incident Case file.
Rebuttal: Everything I Know About Ms. Ringer
- Press on the second statement to receive a new third statement.
- Press on the new third statement to receive a new fourth statement.
- Present the Broken Plushie on the new fourth statement.
- Choose "The murderer had a burn mark, too."
- Present the Ringleader's Appearance.
- Present Nurse Niedler's Statement to close the confrontation.
- In the aftermath, choose "Your memories of two different locations."
- Point to and present the cherry tree.
- Present the Victim's Letter.
Episode 5: Turnabout for the Ages Walkthrough

- Part 1 Investigation Phase 1
- Part 1 Confrontation Phase 1
- Part 1 Mind Chess Phase 1
- Part 1 Investigation Phase 2
- Part 1 Mind Chess Phase 2
- Part 1 Investigation Phase 3
- Part 2 Confrontation Phase 1
- Part 2 Re-creation
- Part 2 Confrontation Phase 2
- Part 3 Confrontation (Finale)
While the last episode would've been enough to cap off any Ace Attorney title on its own, there are just too many loose ends left to tie off. It's time to save Miles' career in the final case of Prosecutor's Gambit!
Episode 5: Part 1 Investigation Phase 1
- Prior to beginning the actual investigation at the Bigg Building - Empty Lot, there's a bit of preamble to go through.
- Before arriving, you'll receive the Forged Letter evidence.
- Check on the rather familiar-looking victim to receive Crime Scene Notes and the Was he stomped on? Fact.
- Examine the area around the body for Monster Footprints and Three footprints.
- Check the lock on the gate to the right to receive the Bigg Building evidence, Broken Lock, Side gate chain cut, and Dented fence.
- Check out the fence a second time to see a familiar face!
- Talk to Lotta and Penny and run through their respective topics to receive the Creature Feature Flyer and Combination lock.
- Examine the equipment around the lot, including the crane and the plastic sheets in the lower right, and other items.
- Time to give the body a second look.
- Zoom in on it and highlight the broken horn in the upper right, hit Deducce, and present the Creature Feature Flyer.
- New topics will unlock with Penny. Run through them and receive the Broken horn Fact.
- In Logic Mode, connect Combination lock to Side gate chain cut to receive the Movie Set Locks evidence.
- Connect Broken horn to Dented fence to receive Taurusaurus head into your Facts lineup.
- Connect Side gate chain cut with Combination lock to receive the Movie Set Locks evidence.
- Connect Was he stomped on? to Taurusaurus head.
- Penny will move away from the staircase, allowing you to examine it.
- You'll zoom in on the Taurusaurus model's head. Examine the head itself to receive Taurusaurus Head and Taurusaurus Plushie into evidence.
- Examining the broken table unlocks some new topics and a chance to talk to Agent Lang.
- Speak to Agent Lang and run through his topics.
- You'll meet Shaun. Speak to him about his topics ro receive Behind-the-Scenes Photo.
- You'll also receive the Security Camera Footage to close the investigation.
Episode 5: Part 1 Confrontation Phase 1
- On closing the initial investigation, you'll have words with Agent Lang, who's an old acquaintance from Ace Attorney Investigations 1.
Rebuttal: Why I Suspect Gavèlle
- Present Behind-the-Scenes Photo on the second statement.
- When prompted, Present the Movie Set Locks.
Rebuttal: Why I Still Suspect Gavèlle
- Present Bigg Building on the fourth statement.
- You'll receive Ms. Hart's Statement and close out the confrontation.
Episode 5: Part 1 Mind Chess Phase 1
- You'll move to the District Court - 3rd Floor Lobby, and after the introductory scenes, get set up before engaging in some pitched Mind Chess with the woman who's bedeviled your every move since the second episode.
- Speak to Franziska about her topic, and Present the Crime Scene Notes.
- Speak to Eddie about his topics.
- When prompted, present Eustace Winner's Profile.
Mind Chess vs. Verity Gavèlle
- Choose "What did you talk to the president about?"
- Bide your time.
- Choose "You helped us this morning!"
- Choose "Where's Mr. Winner?"
- Bide your time.
- Choose "You're worried about somebody else, as well?"
- Choose "You're no servant - you're a person!"
- Choose "Are you worried about Mr. Winner?"
- Bide your time.
- Choose "‘That poor child'? Who do you mean?"
- Choose "Are you worried about Taurusaurus?"
- Choose "Is there something wrong with where he died?"
- Choose "A crew member found him."
- Choose "Who are you worried about?"
- Choose "‘That poor child' is missing, aren't they?"
- Choose "It's someone from the movie, isn't it?"
- Choose "Are you a fan?"
- Bide your time.
- Choose "Did you hear that from Shaun himself?"
- Choose "Do you know him?"
- Bide your time.
- Choose "You must have spoken to him!"
- Choose "Do you know where he is?"
- Choose "The two of you are very much connected!"
- Choose "The person who kidnapped him?"
Episode 5: Part 1 Investigation Phase 2
- You'll resume your investigation in the Bigg Building - Plaza area.
- Examine objects around the area.
- Approach the taxi driver and speak to him to receive the Two men Fact.
- Speak to the nearby officer to receive the Vehicle activity fact.
- Check out the blue-colored truck to receive the Blue Truck into evidence.
- Speak to the man wearing orange about his topics.
- Check out the van on the left side of the screen to receive Shaun's Rehearsal Tape.
- The equipment beside the trailer yields the Stolen case fact.
- Speak to Lotta and Tabby about their topics.
- Present Tabby with the Behind-the-Scenes Photo.
- Tabby will provide the Men in black fact.
- In Logic mode, connect Men in black to Two men to receive the No Shaun fact.
- Connect No Shaun to Stolen case to move you to a new, unknown area.
- In the mysterious ?????? area, you'll be free to find a few clues as to your quarry's whereabouts.
- Examine objects on the floor, including the gloves, the green box, and the tools on the wall.
- You'll receive the Mechanic's Gloves.
Episode 5: Part 1 Mind Chess Phase 2
- You'll need to engage in some Mind Chess to calm Eustace down.
Mind Chess vs. Eustace Winner
- Choose "Tell me what's on your mind." (You can choose the second option as a joke and take a bit of damage.)
- Bide your time.
- Bide your time again.
- Bide your time once more.
- Choose "You have to believe in yourself!"
- Choose "I think you mean ‘incompetent'."
- Choose "Why were you taken to your own home?"
- Bide your time.
- Choose "The owner? Excelsius Winner?"
- Choose "Who were you kidnapped by?"
- Choose "Your father was behind your kidnapping!"
- Choose "Of course note!"
- Choose "What did the kidnappers want?"
- Choose "That wasn't your father's motive!"
- Choose "What did they ask you?"
- Choose "What is it you remembered?"
- Choose "You mean your father?"
- Bide your time.
- Bide your time again.
- Choose "You wanted your father's approval?"
- Choose "Because you wanted to be of use to your father."
- Choose "It's ‘clear his name'."
- Choose "What connects Laguarde and your father?"
- Choose "What else do you remember?"
- Bide your time.
- Choose "Where's the evidence from the case?"
- Bide your time.
- Choose "You gave the evidence to your father!"
- Choose "He wanted to mess with the trial!"
- Choose "Will you walk the same path as your father?"
- Choose "Do you mean ‘the milk of human kindness.'"
- Choose "I can be that person for you."
- Choose "Will you continue to work as a prosecutor?"
- Choose "Only you can answer that!"
- Choose "What do you mean to do now?"
- Choose "It's ‘clothes make the man.'"
- Bide your time.
- Choose "You'll be a different kind of prosecutor."
Episode 5: Part 1 Investigation Phase 3
- You'll resume investigating in the Bigg Building - Plaza area.
- You'll receive the IS-7 Incident Case File.
- You'll move to the Bigg Building - 51st Floor.
- Examine the table to the left to zoom in, and receive the Report on Knight and Knight's Possessions.
- Exit the room via the ladder.
- When prompted, choose "Listening in on us."
- Present the Yatagarasu Pin.
- Rotate the pin and examine its back.
- You'll receive an update to the Yatagarasu Pin and the new Bug evidence.
- You'll return to Bigg Building - Plaza.
- You'll receive the Exploding sound fact.
- Speak to Tabby about her topics to receive Ms. Lloyd's Tape.
- Speak to Gumshoe, who is kneeling near the taxi, about his topics.
- Walk to the right, just past Simeon and Regina, to zoom into a different screen.
- Examine the onscreen objects, including the sign, the fence, and box on the ground leaking white liquid to receive the Garbage disposal area fact.
- Enter Logic mode and connect Vehicle activity to Garbage disposal area.
- When prompted, point to the lock on the gate and Present it.
- You'll receive the Garbage facilities fact.
- Walk over to Simeon and Regina and speak to Simeon about his topics to receive the Festival at Sunshine Coliseum fact.
- Connect Festival at Sunshine Coliseum to Exploding sound in Logic mode to get Near the Coliseum.
- Connect Near the Coliseum to Garbage facilities.
- You'll move to District Court - Courtroom No. 3
- When prompted, present the Report on Knight.
- Examine the paper.
- When prompted, choose "The newspaper."
- Rotate the paper and check the back, highlighting the hand-shaped print on the back.
- Present the Mechanic's Gloves.
- Point to and present the finger of the left-hand glove with the letter "A" on the tip to close the investigation and move on.
Episode 5: Part 2 Confrontation Phase 1
- After the sudden twist, you've got even more mysteries piled up to be solved, as you take in some testimony
Rebuttal: About Last Night
- Present Shaun's Rehearsal Tape on the fourth statement.
- When prompted, present the Taurusaurus Head.
Rebuttal: Mother-and-Child Murderers
- Press on the fourth statement to receive a new fifth statement.
- Present the Crime Scene Notes on the new fifth statement.
- When prompted, present the Mechanic's Gloves.
- Choose "Concrete."
- Choose "He was digging something up."
- When prompted, point to and present the bag sitting behind the Taurusaurus costume.
- Point to the black crane poking into the frame from the left and Present it.
- Scroll down and point to the beige sheets on the blue table near the crane and present them.
- You'll receive an update to the Crime Scene Notes.
- Zoom in on the upper right quadrant of the photo, then point to and present the muscular figure on the right side of the frame.
Rebuttal: What Happened While I Was Rehearsing
- Press on the sixth statement.
- Choose "Push him a little more" to gain new seventh and eighth statements.
- Present President Wang's Autopsy Report on the new seventh statement to get an update to it, as well as add the Bouquet to evidence.
- Over the course of the next scenes, you'll receive the Sedative.
- When prompted, present the Report on Knight.
- You'll eventually receive the SS-5 Incident Case File.
Episode 5: Part 2 Re-creation
- It's time to set things right in the largest Re-creation segment yet: A copy of a certain Orphanage.
- Inspect the body laying there to receive Mr. Aldown's Autopsy Report.
- Keep examining the body to receive the Bloody Button evidence.
- Examine the camera nearby to receive Mr. Aldown's Photograph.
- Check out the brick for the Brick used in murder fact and the cellphone for the Mr. Aldown's Final Call evidence.
- Zoom back out, then step left and examine the planter box near the body for the Planters fact.
- In Logic mode, connect Three footprints to Planters.
- Present the Report on Knight when prompted for the What did Winner dig up fact.
- Check out the orphanage door frame and the pillars near it for the Fire clue, and the footprint tracks across the area.
- Speak to Lang.
- The re-creation will get an update that nets you the Was Winner involved? Fact.
- Get into logic to connect Was Winner involved? to What did Winner dig up? To get an update to Monster Footprints.
- Check out the scene of the kidnapping to zoom in.
- Examine the head of the snowman in the foreground and hit Deduce on it, then Present the Bloody Button.
- Choose "The victim's location" when prompted.
- After another update, reexamine the body, paying special attention to the shoes, to receive the Victim's Shoes evidence and the The body was moved fact.
- Back to the kidnapping scene, examine the area near where the snowman was, zeroing in on the gap in the brick border for the Missing brick fact.
- Enter Logic mode and Connect Missing brick and Brick used in murder to receive the Brick from near the snowman fact.
- Connect The body was moved to Brick from by the snowman.
- Examine the scene again.
- When prompted, present Mr. Aldown's Photograph to get it updated.
- Pinpoint the lamp post on the upper left (the unlit one near the orphanage's entrance) and Present it.
- The other re-creations are also updated thanks to all the new data, so speak to Kay and choose "Switch re-creations" to explore the updated scenery.
- Move to where the body was located in the other version and examine the area.
- Examine the bloodstain to receive the Mysterious Blood Stain evidence.
- Pinpoint the bloodstain, then hit Deduce and Present the Fire to close this re-creation exploration.
- You'll receive the Child's Drawing evidence.
- When prompted, present the Taurusaurus Plushie.
Episode 5: Part 2 Confrontation Phase 2
- After the major revelations, it's time to bring a few threads full circle with a lengthy round of testimony!
Rebuttal: The Real Story of the SS-5 Incident
- Present Mysterious Blood Stain on the fourth statement.
- When prompted, present the Child's Drawing.
- Present Bodhidharma Kanis' Profile.
- Choose "One was a body double."
- Present the SS-5 Incident Case File.
- Present Mr. Aldown's Photograph.
- Present Monster Footprints.
- Present the Victim's Shoes.
Rebuttal: My Unexpected Savior
- Press on the fourth statement.
- Choose "There is."
- Choose "‘The date."
- Present the IS-7 Incident Case File.
Rebuttal: The Pup and I
- Press on the first statement to receive the Correspondence Chess Diagram.
- Present Knight's Possessions.
- Choose "The ring," to get an update to Knight's Possessions.
- You'll have a new fifth statement appended to the testimony.
- Present the Correspondence Chess Diagram on the new fifth statement to get an update to it.
- Present Simeon Saint's Profile.
- When prompted, zoom in on the upper left quadrant of the frame, then Present the monster's eye behind the blinds to close the confrontation.
Episode 5: Part 3 Confrontation
- We're in the endgame now. It's time to bring everything to a close and take down the mastermind behind everything!
Rebuttal: I Was Just Out Practicing
- Press on the first statement to add a new second statement.
- Present the Blue Truck on the new Second statement.
- You'll receive the Lion Hot Air Balloon evidence
- Choose "Fingerprint dusting."
- Choose "Miles Edgeworth's."
- Cover the screen in dust and hit the "blow" button a few times to clear up the fingerprint.
- Present the Sedative when prompted.
- Present the Correspondence Chess Diagram.
- Present Knight's possessions.
Rebuttal: You Can't Prove I Incited Anything
- Present Ms. Lloyd's Tape on the fourth statement.
- When prompted, choose "Two nights ago."
- Present President Wang's Autopsy Report.
- Present the Lion Hot Air Balloon.
- Rotate to the bottom of the object, then examine the bullet hole in the bottom of the basket.
Rebuttal: What Really Happened Two Nights Ago
- Press on the fourth statement.
- Choose "There is a problem" to get a new fifth statement.
- Present Ms. Hart's Statement on the new fifth statement.
- Present the Lion Hot Air Balloon.
Rebuttal: The Murder of the So-Called President
- Present the Lion Hot Air Balloon on the fourth statement.
- Point to and present the Sunshine Depot location, north of the Coliseum.
- Present the Lion Hot Air Balloon yet again.
- Present the Bouquet to close out this marathon Confrontation.
Congratulations! You've saved Miles' career and cleared Ace Attorney Investigations: Prosecutor's Gambit!
If you're still looking forward to new Ace Attorney games to play, consider our spoiler-free walkthroughs for the Apollo Justice: Ace Attorney Trilogy or the original Ace Attorney Trilogy as well.