
Dragon Age: The Veilguard Warden Vault - How to open the three locks hiding Rivain's Grey Warden treasure
Most quests in Dragon Age: The Veilguard are fairly straightforward: Follow the marker, fight some enemies or solve some facially obvious puzzles, and occasionally make a decision or have a conversation. This is par for the course for the action games The Veilguard has taken for inspiration, but a bit of a departure from the meandering and exploration of previous Dragon Age titles. That said, the game does have a few notable outliers in questing that put the onus on players to solve. One of these is the Regional Quest "The Warden Vault." In case you're feeling a bit stumped by it, check out our quick guide to completing the quest and unlocking some tasty Grey Warden treasure.
How to Start The Warden Vault Quest in Dragon Age: The Veilguard
The quest is first unlocked while exploring the Rivain Coast region. This region is first unlocked in the second wave of major story quests, when Rook recruits Taash to the Veilguard in their introductory quest, "The Dragon Slayer."
Completing "The Dragon Slayer" unlocks Rivain Coast as an exploration zone, and the quest is located in the ruins of an old fort belonging to the Grey Wardens and currently occupied by the Antaam.
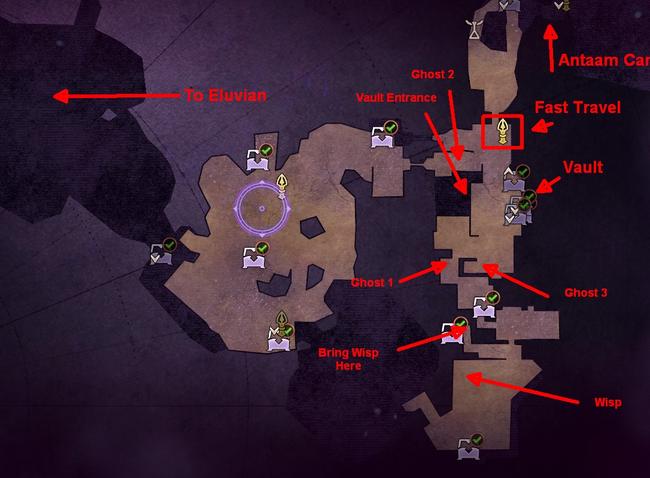
You'll find the Warden Vault down a set of stairs off the main hall of the Warden Fort. To get to this hall, you'll need to travel from the fast travel beacon in the the northeast of the initially available Rivain Coast map (before the area near the Antaam's headquarters is available to access). If this is your first time in the area (since Taash's introductory quest), You'll have to blow up a gaatlock barrel and climb around a bit to open the main gate, dropping a ladder from the top floor. Note that there are enemies in this room, and they'll respawn if you leave the area for a while.
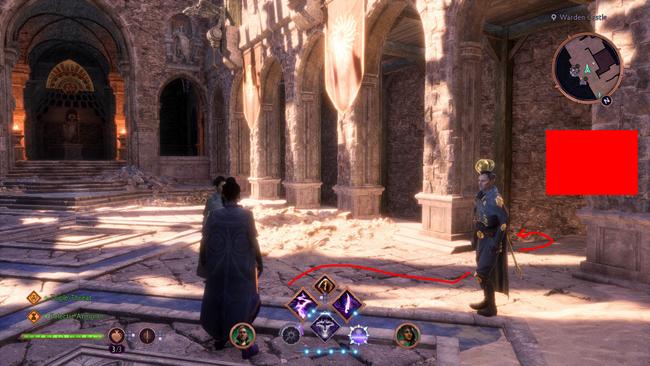
The door to the vault corridor is blocked by Drakestone, which you must melt with Taash's power. You'll see a sealed door and a note nearby that gives you clues as to how to unlock the vault. Finding the note also puts the quest in your journal.
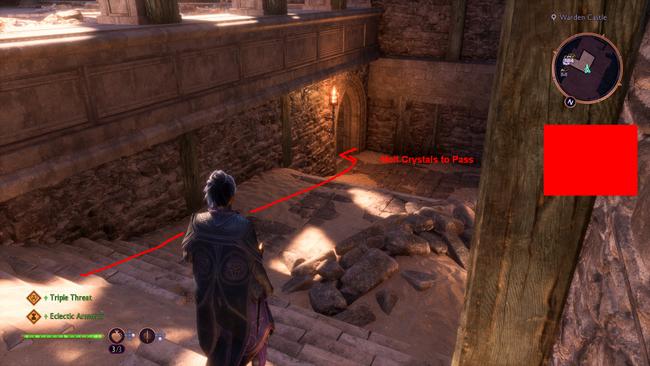
In summary, you'll need to find and pull three levers to unlock three seals on the vault door. These seals are represented by green torches that light up when you've pulled one of the levers hidden around the castle. The levers are somewhat hidden and their locations aren't indicated by a marker.
Warden Vault Lock Locations and How to Open Them
Note that you can flip these levers in any order, I'm just numbering them for convenience.
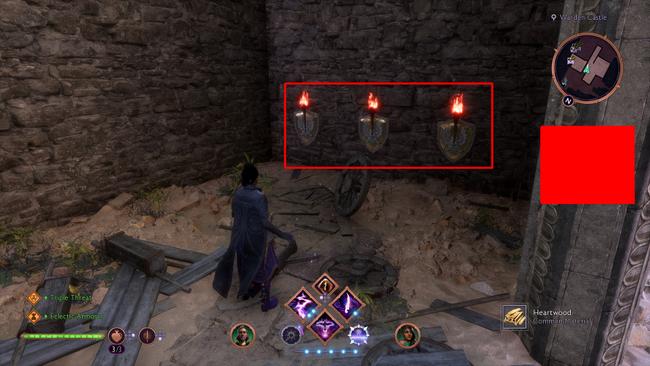
Warden Vault Lever No. 1 - Levers and Torches, the Prologue
- Return to the extenal courtyard near the 2nd floor ladder and head outside to find a hallway filled with destructible wooden debris.
- Wreck the debris to reveal a wall covered with three levers mounted on shields.
- Each lever lights torches, and you'll need to pull the levers in the correct order to light all three torches in a nearby room.
- Pull the levers in this order: Left -> Right -> Center.
- Leave the hallway, enter the hall, then climb up to see three torches mounted on shields over a lever. Pull the lever to raise the gate.
- Enter the now-open room, loot the chest, then pull the lever under the big shield to pen the first lock on the Warden vault.
Warden Vault Lever No. 2 - Wisp Escort Mission
- This section is timed, and uses mechanics that are entirely unexplained if you're doing this mission before you recruit Emmrich and haven't done the Lighthouse secret room quest yet. You'll be fine if you follow these instructions, though.
- Head south through the interior of the Warden fort from the fast travel beacon, into a corridor that bends west past a room that's partially open to the outside (you'll pass a skeleton with glowing butterflies, which is the start point for the 3rd lever)
- Head past that into a large open courtyard with dirt floors, large warden statues, and Antaam to fight.
- Kill the Antaam, and look up and to the west to see a large broken structure with a hole in the wall and some Antaam barricades on the second floor.
- There's a Gaatlock barrel there. Blow it up with Taash's ability to extend a ladder down.
- Climb the ladder and you'll see a glowing green wisp. Move near it and it will follow you.
- Now run (don't dawdle, as the wisp will go away after a while) back through the hallway you entered the courtyard from and head left, towards some Drakestone.
- Melt the drakestone and go through to see a hole in the wall with a lever you can't reach.
- The wisp will automatically reanimate a skeleton to pull the lever when you get close enough. Job's done.
Warden Vault Lever No. 3 - Follow The Ghosts
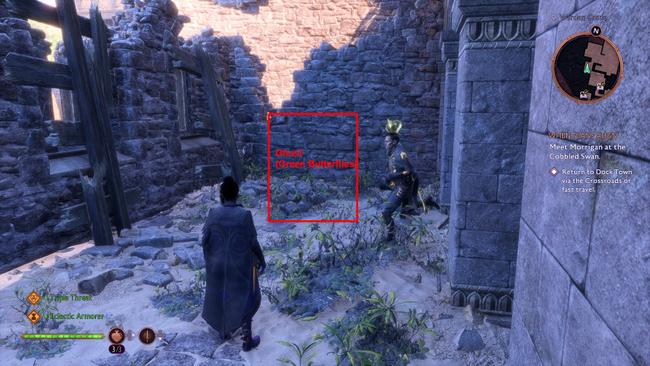
- Head back to where you saw the skeleton with the glowing green butterflies.
- Approaching it will summon a ghost that drifts through a nearby wall.
- Move in the general direction the ghost was moving in when it passed through the wall, heading roughly north.
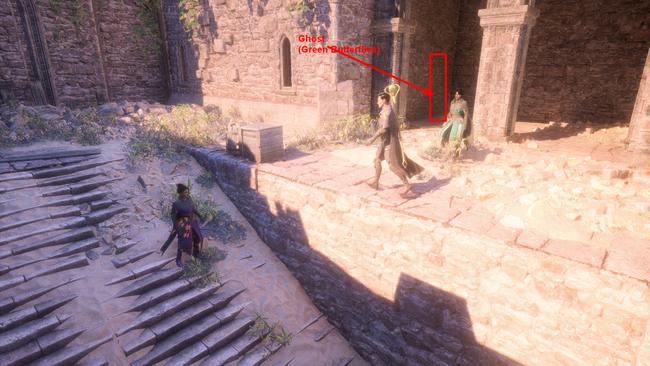
- You'll need to go back outside and turn through a courtyard and up some stairs, where you'll see another skeleton with glowing green butterflies on the western edge of the ruin, in the shade.
- Approach this skeleton to summon the ghost, which will go further north, back through the main hall and large gate, where a third skeleton with green butterflies lies against a corner.
- Approach that spot, then follow the ghost back through the main hall. This last ghost stops in a shadowed corner at the back of the main hall. Note that the Antaam might have respawned, so you may need to fight a bit.
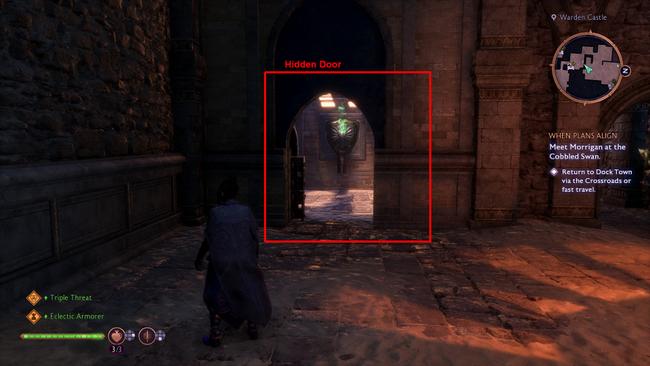
- Approach the final ghost who opens a door that reveals a secret room with the final lever. Pull it.
Opening the Warden Vault
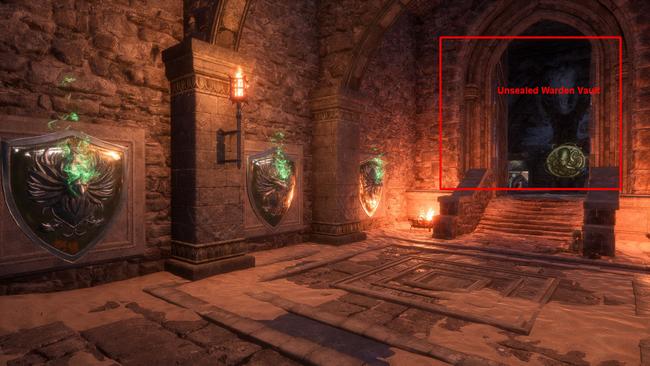
- Head back to the Vault Room. You'll know the doors are unlocked when all three torches are burning green.
- Inside you'll find some large treasure chests with loot, gear upgrades, mementos, and a unique ring, the Shard of the Void.
And that's it for the Warden Vault quest! You'll also gain some XP, and Faction Strength for the Grey Wardens and Lords of Fortune. Check out more of our guides at the Dragon Age: The Veilguide hub!